Chapter 4 Operating Instructions
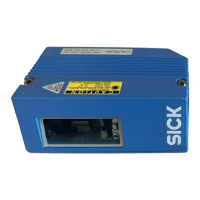
CLV 45x Bar Code Scanner
4-14
©
SICK AG · Division Auto Ident · Germany · All rights reserved 8 009 139/K949/06-06-2002
Installation
2. Install the distance sensor (photoelectric reflex switch) for the object height detection
so that the optical path for the reading range 1 remains uncovered (also refer to
Table 5-8, Page 5-9
). It is advisable to install the distance sensor against the direction
of travel of the conveyor unit approx. 100 mm before the reading-pulse sensor.
3. Connect the distance sensor via the AMV/S 40 connection module to the "Sensor 2"
switching input of the CLV (refer to
Chapter 5.5.8 Wiring the "Sensor 2" switching input,
Page 5-8
).
4. After you have manually determined the focal positions for the two required reading
ranges use the R
EADING
CONFIGURATION
tab card of the CLV-Setup user interface.
To do so click on the D
ISTANCE
CONFIGURATION
/A
SSIGNMENT
TABLE
command button and
edit the dialog box correspondingly.
5. Select the standard decoder as described in
Chapter 4.3.2 Adjusting the CLV, Page 4-8
and call up the percentage evaluation temporarily.
6. Check the reading quality for the two distance configurations in static operation.
(no transport movement of the objects).
7. Finally check the function of the distance detection realistically in reading mode.
To this purpose observe the read result in the terminal emulator as described in
Chapter 4.4.2 Installing an external reading-pulse sensor, Page 4-12
.
Default setting of CLV 450: F1 = 900 mm, F2 = 500 mm, F3 = 200 mm
Note The integrated timer or the oscillating mirror inversion points can be used to change over
the CLV for slow search runs between a maximum of 8 distance ranges.
Command strings can be used to change the CLV synchronously to the process over
between 8 distance ranges.
4.5 Disassembling the device
1. Switch off the supply voltage of the AMV/S 40 connection module.
2. Pull the cable plug of the CLV off after loosening the fixing screws from the AMV/S 40
connection module.
3. Unscrew the CLV from the mounting device.
In order to dispose of the unit after final removal from service without damaging the
environment proceed as described in
Chapter 7.3 Disposal, Page 7-2
.

 Loading...