Operating Instructions Chapter 6
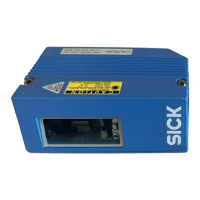
CLV 45x Bar Code Scanner
Operation
8 009 139/K949/06-06-2002
©
SICK AG · Division Auto Ident · Germany · All rights reserved
6-1
6
Operation
6.1 Overview of the startup steps
•
Start up the CLV with the factory default setting (Quick-Start).
With this configuration, the CLV can be operated without being connected to a PC
•
Connect the PC (refer to
Chapter 5.5.5 Connecting the CAN interface, Page 5-6
) and
install the CLV-Setup PC software (refer to
Chapter 10.4 Installing and operating the
"CLV-Setup" PC software, Page 10-20
)
•
Configure (parameterize) the CLV for the desired application.
6.2 Default setting
Table 6-1
and
Table 6-2, Page 6-2
contain an overview of the factory default setting for the
CLV. The default parameters are such that the CLV can be put into operation either straight
away or following a few minor adjustments. With the default setting no PC is required for star-
ting up.
The default settings are stored permanently both in the CLV (ROM) and in the CLV-Setup
database. They can be downloaded at any time into the RAM of the CLV or displayed in the
tab cards of the CLV-Setup.
Displaying and printing out the complete default setting in CLV-Setup
1. In order to save the current settings in the parameter record, select the S
AVE
AS
menu
item under F
ILE
in the menu bar and enter a file name in the dialog box.
CLV-Setup saves the current settings in a configuration file with the extension "*.scl".
2. Click on in the toolbar.
CLV-Setup loads the default setting from its internal database and displays them in the
tab cards.
3. Click on in the toolbar.
The P
RINT
FILE
dialog box is opened.
4. If desired, a comment can be entered in the input field for the header of the printout.
Confirm the dialog box with "OK".
The P
RINT
dialog box for configuring the printer is then displayed.
5. Edit the dialog box correspondingly and confirm.
CLV-Setup prints out the complete default setting in the form of a table. The header contains
the company and user names that were entered during the CLV-Setup installation routine.

 Loading...