The system offers the following options:
● Check box cleared
This is the default setting.
When you create/update a screen, all PCS 7 block icons are arranged automatically,
starting in the top left corner.
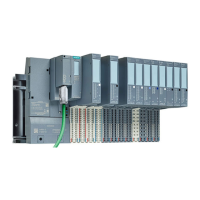
Screens in which a rack structure (for example, ET 200 central rack) is displayed are
exceptions to this. In this case, the block icons for objects are arranged in the order of their
slots.
After you update/create the diagnostics screens, move the block icons to meet your
requirements. Block icons that have been moved remain in their position after the screen
is updated. New block icons are added in the top left corner of the screen.
Note that adding new block icons may cause icons to overlap.
Block icons to be deleted are removed from the screen. Their position in the screen remains
unoccupied.
● Check box selected
The block icons for the selected diagnostic area are repositioned automatically.
All block icons are repositioned.
Note
This function is available if you configured the Maintenance Station in the MS Standard version.
Requirement
The Maintenance Station has been created.
Procedure
1. Open the plant view in the SIMATIC Manager.
2. Select the object in the tree view:
– If you are using a multiproject, select the object "[name of the project] MP".
– If you are using a single project, select the object "[name of the project]".
3. Select the menu command Options > Plant Hierarchy > Advanced Diagnostics Settings....
The "Advanced Diagnostics Settings" dialog box opens.
4. Select the "Other settings" tab.
5. Select the desired diagnostic area.
6. Click "OK".
These settings are saved retentively.
Result
When the "Create/update diagnostic screens" function is executed, the block icons for the
selected diagnostic area are repositioned automatically.
Configuring the maintenance stations
5.11 Advanced diagnostics settings
Maintenance Station
Function Manual, 03/2016, A5E36187641-AA 65
 Loading...