Programming and Operating Manual (Milling)
6FC5398-4DP10-0BA1, 01/2014
219
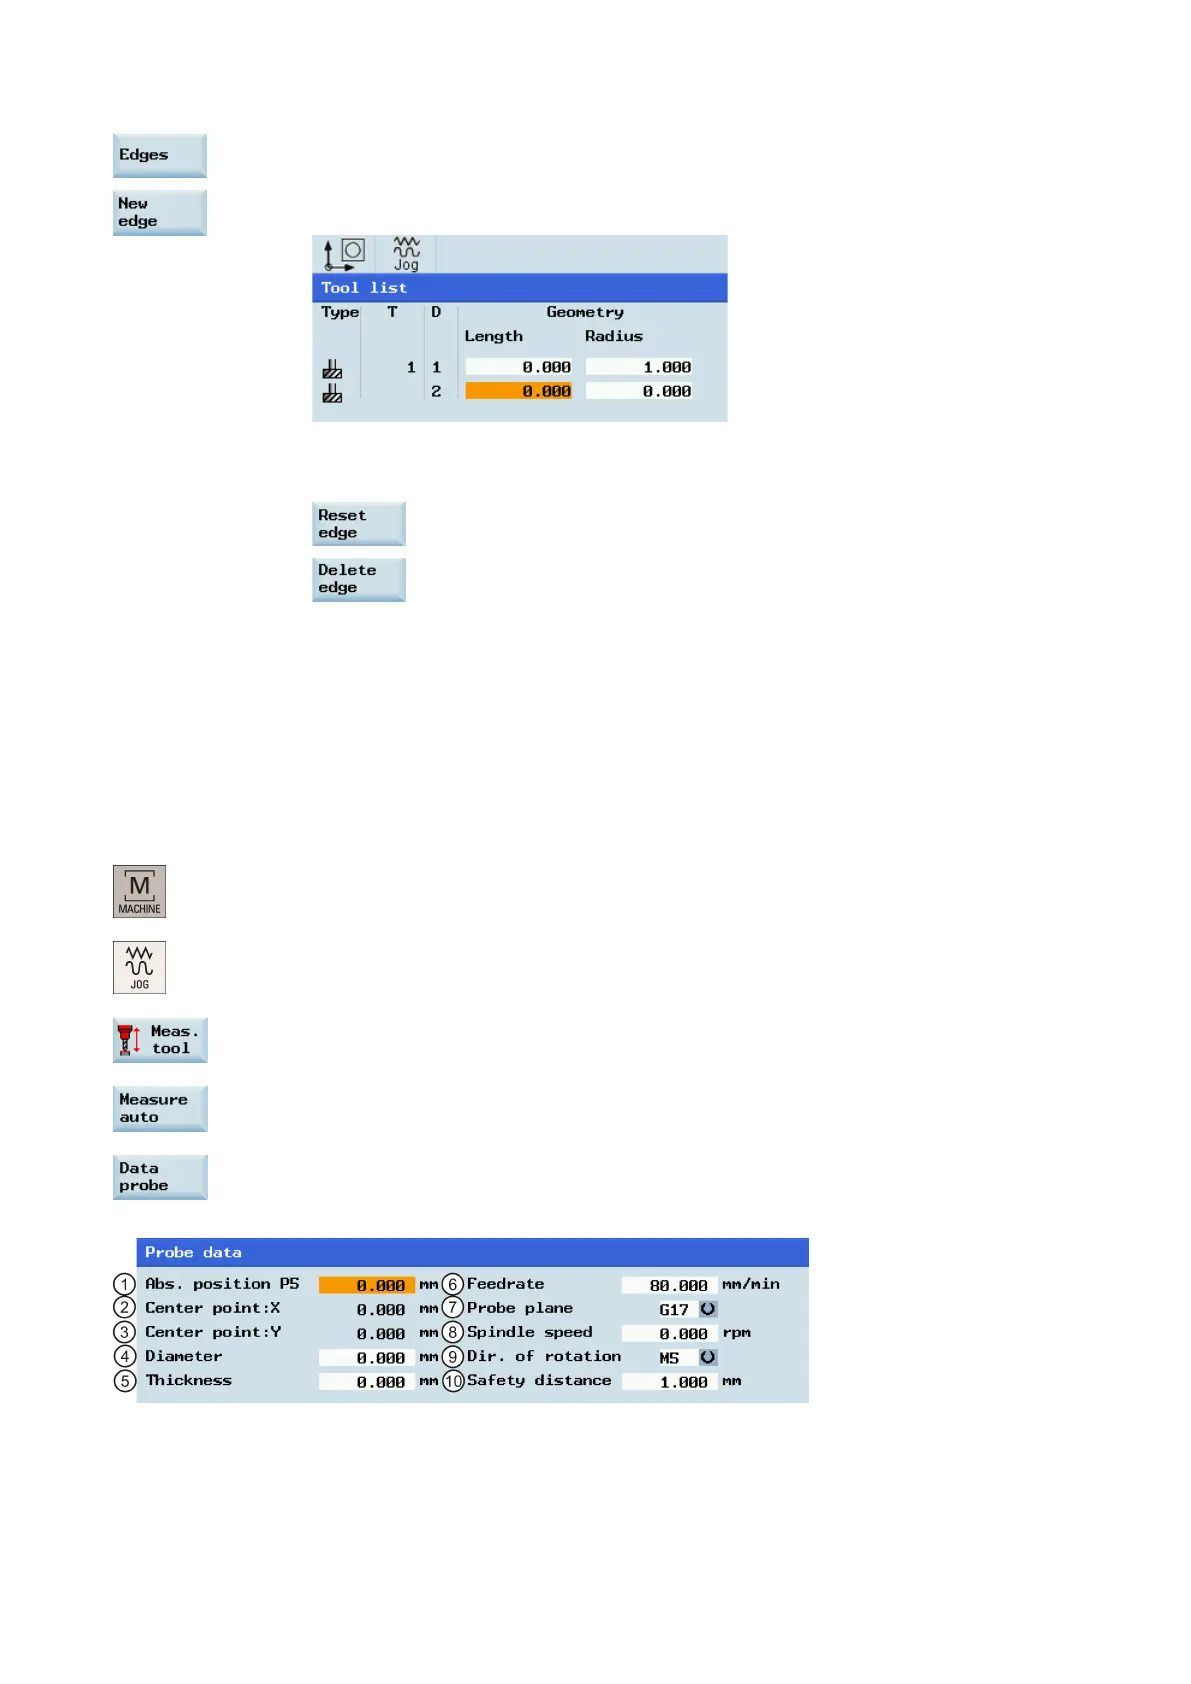
Open the lower-level menu for cutting edge settings.
Press this softkey to create a new cutting edge for the selected tool. The control system
automatically adds the new cutting edge to the tool list.
You can enter different lengths and radii for each cutting edge (see Section "Creating a new tool
(Page 19)" for more information).
Other options for setting up the cutting edges:
Reset all offset values of the selected cutting edge to zero.
Delete the selected cutting edge.
Calibrating the tool probe
Overview
To be able to measure your tools automatically, you must first determine the position of the tool probe based on the machine
zero position.
Operating sequences
Setting the probe data
1. Select the desired operating area.
2. Switch to "JOG" mode.
3. Open the lower-level menu for tool measurement.
4. Open the auto tool measurement window.
5. Press this vertical softkey to open the probe data setting window, which shows the coordinates of
the probe. Enter the values in the input fields as required (see table below for the parameter
descriptions). Refer to the machine coordinate system for all position values.
 Loading...