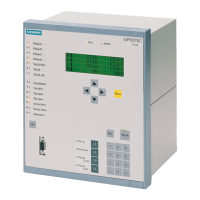
In order to disassemble the device, first remove it from the substation installation. To do so, perform the steps
stated in Sections Panel Flush Mounting, Panel Surface Mounting or Cubicle Mounting in reverse order.
NOTE
The following must absolutely be observed:
Disconnect the communication connections at the device bottom (ports A and B). If this is not observed,
the communication lines and/or the device might be destroyed.
NOTE
To use the device, all terminal blocks must be plugged in.
CAUTION
Mind electrostatic discharges
Failure to observe these precautions can result in personal injury or material damage.
²
Any electrostatic discharges while working at the electronics block are to be avoided. We recommend
ESD protective equipment (grounding strap, conductive grounded shoes, ESD-suitable clothing, etc.).
Alternatively, an electrostatic charge is to be discharged by touching grounded metal parts.
NOTE
In order to minimize the expenditure for reconnecting the device, remove the completely wired terminal
blocks from the device. Use a screwdriver (DIN 4 x 0.8) to carefully bend the left and right spring clips
outwards. Then carefully pull out the terminal block. When reinstalling the device, carefully insert the
terminal block into the spring clips. Both spring clips must engage clearly audible. (Sections Panel Flush
Mounting, Panel Surface Mounting or Cubicle Mounting).
In order to install or exchange communication modules or to replace the fuse, proceed as follows:
Remove the two covers at the top and bottom. Thus, 1 housing screw each at the top and bottom becomes
accessible. First, only unscrew the bottom housing screw so far that its tip no longer looks out of the thread of
the mounting bracket (the housing screws are captive, they remain in the front cover even when unscrewed).
Unscrew all screws that fasten any existing communication modules in the module cover on the bottom side
of the device. Also unscrew the 4 countersunk screws that fasten the module cover on the bottom side of the
device. Carefully pull the entire module cover out of the device.
Only now completely unscrew the two housing screws at the top and bottom in the cover and carefully
remove the complete electronics block from the housing (Figure 3-3).
NOTE
If you have not removed the terminal blocks from the rear panel, much more force is required for removing
and reinstalling the electronics block, which might lead to the damaging of the device. Therefore, we abso-
lutely recommend to remove the terminal blocks before removing the electronics block.
Mounting and Commissioning
3.1 Mounting and Connections
316 SIPROTEC 4, 7SJ80, Manual
E50417-G1140-C343-A8, Edition 12.2017

 Loading...