EasyManua.ls Logo

Siemens SITRANS FUG1010 IP65 NEMA 4X User Manual

Siemens SITRANS FUG1010 IP65 NEMA 4X
268 pages
To Next Page IconTo Next Page
Page #1 background imageLoading...
Page #1 background image
Ultrasonic flowmeters
SITRANS FUG1010 IP65 NEMA 4X
Instruction Manual - September 2008
SITRANS F

Table of Contents

Questions and Answers:

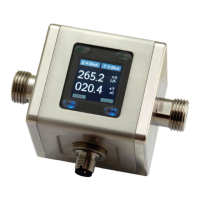
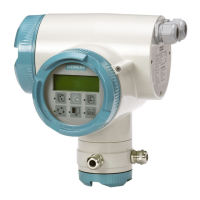
Siemens SITRANS FUG1010 IP65 NEMA 4X Specifications

General IconGeneral
BrandSiemens
ModelSITRANS FUG1010 IP65 NEMA 4X
CategoryMeasuring Instruments
LanguageEnglish

Summary

Section 1

1. INTRODUCTION

Overview of the FUG1010GCN gas flowmeter and its features.

1.1 IMPORTANT SAFETY CONSIDERATIONS

Critical safety precautions for installing and operating the FUG1010GCN gas flowmeter.

1.2 FLOWMETER INSTALLATION STEPS

Typical steps to complete the flowmeter installation procedure.

1.3 THEORY OF OPERATION

Explanation of the transit-time ultrasonic flow measurement technology.

1.3.2 FLOW PROFILE COMPENSATION

How the flowmeter compensates for laminar or turbulent flow profiles using Reynolds number.

1.3.3 STANDARD VOLUME COMPENSATION

Compensation for gas compressibility to report volumetric flow in standard units.

1.3.4 MASS FLOW COMPUTATION AND SPECIFIC GRAVITY

Methods for computing gas density, specific gravity, and mass flow.

Section 2

2. FUG1010GCN FLOWMETER INSTALLATION INSTRUCTIONS

Steps for preparing the FUG1010GCN gas flow display computer for installation.

2.1 FUG1010GCN FLOWMETER TYPES

Overview of FUG1010GCN series flowmeter types (Single, Dual, Four Path).

2.2 POWER SUPPLY WIRING

Instructions for wiring the power supply to the FUG1010GCN flowmeter.

2.3 GRAPHIC DISPLAY SETTINGS

Information on the flowmeter's main display and software version identification.

FUG1010GCN Interconnection Diagram

Diagram illustrating the interconnection of the FUG1010GCN flowmeter components.

Section 3

3. GETTING STARTED

Initial steps for setting up and operating the FUG1010GCN flowmeter.

3.1 THE KEYPAD ENABLE SWITCH

How to use the keypad enable/disable switch for menu access.

3.2 THE FUG1010GCN KEYPAD

Description of the FUG1010GCN integral keypad and its functions.

3.3 INTRODUCTION TO THE FUG1010GCN MENU SCREENS

Explanation of typical FUG1010GCN menu screens and call-outs.

3.4 HOW TO USE THE INSTALLATION MENU

Instructions on accessing, leaving, and entering data in the Installation Menu.

3.4.2 HOW TO ENTER DATA

Guidance on entering data, including selecting items from option lists.

3.4.3 THE METER TYPE MENU

Selecting the meter type required for application and its impact on menu choices.

Creating a New Site Setup

Instructions on creating a new site setup and initiating site programming.

Section 4

4. THE FUG1010GCN INSTALLATION MENU

Overview of the FUG1010GCN installation menu and its parameters.

Manual Conventions

Explanation of conventions used for keypad keys and menu cell references.

General Installation Menu Notes

Important notes regarding data retention, site setup, and parameter editing.

4.1 THE CHANNEL/PATH SETUP MENU

Menu for managing site setups, including creation, recall, deletion, and security.

4.1.1 HOW TO RECALL A SITE SETUP

Procedure to reinstall the system at a former site by recalling a saved site setup.

4.1.2 HOW TO ENABLE AND DISABLE A MEASUREMENT CHANNEL

Steps to enable or disable a measurement channel for operation.

4.1.3 HOW TO CREATE/NAME A SITE SETUP

Steps to create and name a new site setup, including system defaults.

4.1.4 HOW TO ENABLE/DISABLE SITE SECURITY

Instructions for activating and deactivating site security, including password management.

4.1.5 HOW TO DELETE A SITE SETUP

Procedure for deleting an unused site setup to free up memory.

4.1.6 HOW TO SAVE/RENAME A SITE SETUP

How to save or rename a site setup for future recall or operation.

4.2 THE PIPE DATA MENU

Defining the application's pipe parameters by selecting from stored tables or manual entry.

4.2.1 HOW TO SELECT A PIPE CLASS

Arranging pipe tables by classes of type and material for parameter selection.

4.2.2 HOW TO SELECT A PIPE SIZE

Installing selected pipe parameters for transducer selection and installation.

4.2.3 HOW TO ENTER THE PIPE OD (in. or mm.)

Editing the pipe outer diameter for accurate transducer installation.

4.2.4 HOW TO SELECT A PIPE MATERIAL

Selecting pipe material, which affects flow calibration and transducer recommendations.

4.2.5 HOW TO ENTER THE WALL THICKNESS

Setting the pipe's wall thickness for accurate transducer size and spacing recommendations.

4.2.6 PIPE ID (in. or mm)

Direct entry of pipe inside diameter for meter accuracy.

4.2.7 CC129 THICKNESS

Numeric entry for CC129 thickness to compute gas sound velocity.

4.2.8 ThermExp Coef

Setting the thermal expansion coefficient for pipe volume compensation.

4.2.9 Mod of Elast PSI

Setting the modulus of elasticity for pipe volume compensation.

4.3 THE GAS PARAMETERS MENU

Editing gas parameters like specific heat ratio, viscosity, and compressibility for accurate computations.

4.3.1 BASE TEMP and BASE PRES. PSIA

Setting base temperature and pressure for volumetric flow rate compensation.

4.3.2 SPEC. HEAT RATIO

Ratio of gas specific heat at constant pressure to constant volume for specific gravity computation.

4.3.3 VISCOSITY (cP)

Inputting gas viscosity in centipoise for Reynolds number computation and flow profile compensation.

4.3.4 FIXED MW g/mole

Entering fixed molecular weight to override automatic specific gravity computation.

4.3.5 ESTIMATED Vs

Numerical entry for nominal sound velocity of natural gas.

4.3.6 FIXED TEMP and FIXED PRES. PSIA

Setting fixed temperature and pressure when external inputs are unavailable.

4.3.7 Z Base

Entry for compressibility factor at base conditions for AGA8 compensation.

4.3.8 Z Actual

Fixed entry of compressibility factor for stable pressure, temperature, and composition.

4.3.9 AGA8 COMP

Facility for performing internal volume compensation using an AGA8 lookup table.

AGA8 Table Generation and Installation Instructions

Step-by-step guide for generating and installing an AGA8 lookup table.

4.4 THE PICK/INSTALL XDCR MENU

Automatically identifies suitable transducers, mounting mode, and spacing based on pipe/application data.

4.4.1 HOW TO SELECT A TRANSDUCER MODEL

Defining transducer type to adjust transmit/receive functions for application.

4.4.2 HOW TO SELECT A TRANSDUCER SIZE

Selecting transducer size, overriding recommendations if needed.

4.4.3 HOW TO SELECT A XDCR MOUNT MODE

Recommending Direct or Reflect mounting modes based on pipe and liquid data.

4.4.4 REVIEWING THE SPACING METHOD

How the flowmeter determines the best way to install transducers.

4.4.5 HOW TO USE THE SPACING OFFSET

Adjusting spacing offset to influence transmit signal strength and reported Number Index.

4.4.6 THE NUMBER INDEX MENU CELL

Establishes transducer spacing based on pipe diameter and sonic velocity.

4.4.7 THE Ltn MENU CELL

Displays distance between transducer faces along the pipe axis.

4.4.8 HOW TO USE [INSTALL COMPLETED?]

Informing the flowmeter of transducer mounting completion for operation readiness.

Force Transmit Procedure

Diagnostic routine to force a transmitting condition for amplitude level search.

4.4.9 ZERO FLOW ADJUST MENU

Methods to ensure proper zero flow compensation for accurate readings.

AutoZero

Automatic zeroing routine invoked at end of Initial Makeup in Reflect Mode.

Actual Zero

Averaging indicated zero flow readings to store an average value in memory.

Using ReversaMatic

Routine to establish zero flow level when flow cannot be stopped or Reflect Mount is not possible.

ZeroMatic

Dynamically compensates for changing conditions that cause zero drift.

4.5 THE OPERATION ADJUST MENU

Fine-tuning meter output characteristics after transducer installation.

4.5.1 DAMPING CONTROL

Selecting data output filter types (SmartSlew or Time Average) for damping.

4.5.2 DEADDBAND CONTROL

Instructing the meter to report zero flow if rate falls below a specified level.

4.5.3 MEMORY/FAULT SET

Selecting meter response to interruptions like excessive turbulence or fault conditions.

4.6 THE FLOW/TOTAL UNITS MENU

Selecting mass/volumetric flow units and time base, and adjusting output resolution.

4.6.1 FLOW VOLUME UNITS

Selecting rate units for volumetric or mass flow reporting.

4.6.2 STD VOL CORR

Enabling or disabling the reporting of standard volume flow and total volume.

4.6.3 FLOW TIME UNITS

Selecting a flow display time base.

4.6.4 FLOW DISPLAY RANGE

Choosing between Autorange or High range for screen resolution.

4.6.5 FLOW DISPLAY SCALE

Editing the displayed scaling prefix for capacity and resolution.

4.6.6 TOTAL VOLUME UNITS

Selecting units for the flow total output, converting volumetric to mass flow.

4.6.7 TOTALIZER SCALE

Editing the displayed scaling prefix for flow total data.

4.6.8 TOTAL RESOLUTION

Understanding multiplier prefixes for flow total units and selecting resolution levels.

4.6.9 TOTALIZER MODE

Selecting totalizer modes (POSFLOW, NEGFLOW, NETFLOW) for flow accumulation.

4.6.10 BATCH/SAMPLE TOTAL

Register for Batching or Sampling applications, used for relay control.

4.7 THE DATA SPAN/SET/CAL MENU

Setting analog output limits, alarm setpoints, and applying external calibration adjustments.

4.7.1 SPAN DATA

Setting 0% and 100% output limits for volumetric flow, absolute flow, and sonic velocity.

PGEN

Controls digital output pulse function and assigns pulses per unit volume.

Max Flow

Stores the maximum range for the flow rate output (Vfo).

Min Flow

Stores the minimum range for the flow rate output (Vfo).

Max Vs m/s

Stores the maximum range for the sonic velocity output.

Min Vs m/s

Stores the minimum range for the sonic velocity output.

Max SG

Stores the maximum range value for the specific gravity output.

Min SG

Stores the minimum range value for the specific gravity output.

Max Base S.G.

Stores the maximum range for Specific Gravity at base temperature.

Min Base S.G.

Stores the minimum range for Specific Gravity at base temperature.

Max Viscosity cS

Stores the maximum range for analog span of viscosity.

Min Viscosity cS

Stores the minimum range for analog span of viscosity.

Max Temperature

Stores the maximum temperature range for analog span.

Min Temperature

Stores the minimum temperature range for analog span.

4.7.2 SET ALARM LEVELS

Selecting system alarm functions for local display and system relays.

High Flow

Setting the HI Alarm relay trip-point and position on the Stripchart Display.

Low Flow

Setting the LO Alarm relay trip-point and position on the Stripchart Display.

Interface Vs (m/sec) and Interface SG

Triggering an alarm for changes in gas composition via Vs or SG.

Turbulence %

Setting turbulence percentage as an alarm relay set-point.

Makeup Latch

Alerting the user to an In-Process Makeup by holding the Makeup Alarm active.

4.7.3 CALIBRATE FLOWRATE AND CALIBRATION TABLES

Conditioning calibration performance using Intrinsic, Kc, and Calibration Tables.

Kc Calibration

Linear meter response calibration using a single correction factor (slope correction).

Kc Factor

Obtaining and entering the Kc factor for slope adjustment of rate output.

Calibration Tables 1 through 3

Linearizing or optimizing flow response by tabulating calibration results.

4.8 THE STRIPCHART SETUP MENU

Selecting data category, scaling, and update interval for the on-screen stripchart.

4.8.1 SELECT DATA

Selecting a data function for the on-screen stripchart display.

4.8.2 DATA DISPLAY

Selecting plot format for stripchart: data rate units or percent of span.

4.8.3 TIME BASE

Defining the stripchart x-axis display interval.

4.8.4 STRIPCHART CLEAR

Erasing current stripchart data.

4.9 THE DATALOGGER SETUP MENU

Selecting data items, events, logging interval, and destination for datalogger reports.

4.9.1 DATALOGGER MODE

Options to disable, transmit, or store datalogger data.

4.9.2 DATALOGGER DATA

Selecting data items to record for datalogger reports, including Site ID and Time.

4.9.3 LOG TIME INTERVAL

Setting the snapshot interval for Datalogger data recording.

4.9.4 DATALOGGER EVENTS

Event-based data logging that generates reports upon alarm triggers.

4.9.5 DISPLAY DATALOGGER

Enabling and formatting the on-screen datalogger display with line wrap options.

4.10 THE I/O DATA CONTROL MENU

Assigning functions for analog outputs, optional inputs, and setting up alarm relays.

4.10.1 ANALOG OUTPUT SETUP

Assigning data functions to current, voltage, and pulse-rate analog outputs.

Assigning Io Output Functions

Configuring the self-powered, isolated 4-20mA DC analog output signals.

Assigning Vo Output Functions

Configuring the 0-10V DC analog output signals.

Assigning Pgen Output Functions

Configuring the pulse rate analog output signals (0-5000 Hz).

4.10.2 RELAY SETUP

Assigning functions to channel relays (Alarm Relay, Pulse Relay).

Assigning Relay 1 and 2 Functions

Procedure for assigning functions to specific relays based on alarm conditions.

4.10.3 ANALOG INPUT SETUP

Assigning active analog inputs to measurement channels and spanning them to desired scaling.

Setting up the Analog Current Input

Enabling and spanning DC current input ports for system variables like pressure and temperature.

4.11 THE DIAGNOSTICS DATA MENU

Diagnostics Data Menu for system analysis and recovery.

4.11.1 MAIN DIAGNOSTICS SCREEN

Main Diagnostics Data screen showing Flow, Application, Gas, and Site Setup information.

4.11.2 FLOW DATA MENU

Live display of primary output data including flow rate, units, and alarms.

Vs m/s

Display and adjustment of current gas sonic velocity in m/s.

AnCal

Entering artificial flow rates to drive analog outputs and check calibration.

4.11.3 THE APPLICATION INFO MENU

Live display of basic timing data used during meter operation.

4.11.4 THE GAS DATA MENU

Display of Reynolds number, operating pressure, temperature, and gas properties.

4.11.5 THE SITE SETUP DATA MENU

Data pertaining to transducer characteristics and operation for technical interpretation.

Introduction to [HF] Menu Item

Entry of a flow registration correction parameter for signal beam compensation.

Using the [HF] Menu Item

Methods for adjusting the [HF] parameter, including manual and automatic adjustments.

“Manual” Adjustment Procedure

Procedure for manually entering the HF correction parameter.

“Automatic” Adjustment

Procedure for automatically measuring and installing the HF correction value.

4.11.6 THE TEST FACILITIES MENU

Commands for system analysis and recovery, including Makeup and Graph routines.

4.11.7 DETECTION MODES

Explanation of how the Test Facilities Graph Screen is used for troubleshooting.

The Test Facilities Graph Screen

Display of digitized receive signal waveform for troubleshooting and parameter adjustment.

Entering the Diagnostic Graph Screen

Steps to access the Diagnostic Graph Screen for viewing.

Command Modes

Overriding default settings for difficult operating conditions.

Digital Damping Control: (Hot Key 1 and 2)

User modification of digital averaging for signal processing.

Transit Time Adjustment: (Hot Key 3)

Adjusting the Tn marker position to optimize receive signal.

Zero Crossover Adjustment: (Hot Key 4)

Adjusting the crossover point of the receive signal.

Envelope Threshold Adjustment: (Hot Key 5 & 6)

Adjusting envelope threshold limits to exclude portions causing Tn detection problems.

Signal Masking Function: (Hot Key 7)

Eliminating noise from signal processing by masking leading edge noise.

4.11.8 TROUBLESHOOTING TIPS

Guidance on identifying and resolving system problems and interpreting diagnostic messages.

Flow Computer Messages

List of common flow computer messages, explanations, and recommended actions.

Using the “F4” Reset Sequence

Procedure for restoring operation using the F4-reset sequence for system issues.

4.12 THE METER FACILITIES MENU AND GRAPHIC DISPLAY SCREEN

Accessing global control functions for unit selection, table customization, and memory management.

4.12.1 PREFERRED UNITS

Selecting default units (English or metric) for all menu items and data outputs.

4.12.2 THE TABLE SETUPS MENU

Pre-conditioning pipe and transducer tables for default settings.

Create/Edit Pipe

Editing existing pipe tables or adding new pipes to the table.

4.12.3 THE DATALOGGER CONTROL MENU

Global control functions for datalogger, including enabling usage and selecting destinations.

Output Datalogger

Sending datalogger contents to an external device via RS-232 serial port.

Circular Memory

Overwriting oldest records when datalogger memory becomes full.

Clear Datalogger

Erasing all stored datalogger data to free up memory.

4.12.4 THE MEMORY CONTROL MENU

Displaying available data memory bytes and controlling memory management.

4.12.5 THE ANALOG OUTPUT TRIM MENU

Fine-tuning meter's analog voltage and current outputs using a multimeter.

Current Output Trim (Io1 & Io2)

Calibrating the current output signals to nominal values.

Voltage Output Trim (Vo1 & Vo2)

Calibrating the voltage output signals to nominal values.

Pgen Output Trim (Pgen 1 & Pgen 2)

Calibrating the pulse rate output signals.

4.12.6 THE RTD CALIBRATE MENU (optional)

Calibrating RTD temperature sensors to an external standard.

RTD Calibration By Data Entry

Adjusting intrinsic RTD reading by entering external reference thermometer values.

4.12.7 THE CLOCK SET MENU

Setting the meter's internal clock and calendar for real-time data stamps.

Date

Setting the month, day, and year for the meter's clock.

Time

Setting the hours and minutes for the meter's internal clock.

4.12.8 RS-232 SETUP

Setting operating parameters for the serial I/O port for data transmission.

Baud Rate

Setting the asynchronous serial transmission data transfer rate.

Parity

Checking accuracy of asynchronous serial data transfer using parity settings.

Data Bits

Specifying the number of data bits for formatting serial transmissions.

Line Feed

Instructing the flow computer to add or omit a line feed character after a carriage return.

Network ID

Storing an identification number for host computer polling in a network environment.

RTS Key Time

Selecting how long the flow computer holds its request-to-send line high.

4.12.9 BACKLIGHT

Specifying how long to maintain backlighting for the LCD display.

4.12.10 SYSTEM INFO

Providing general information about the flowmeter.

4.13 THE FUG1010GCN GRAPHIC DISPLAY SCREENS

Visual access to system variables and conditions through the graphic display.

Section 5

5. HARDWARE INSTALLATION GUIDE

Comprehensive guide for installing the flowmeter hardware.

5.1 PREPARING TO MOUNT THE TRANSDUCERS

Preliminary work required before mounting transducers.

5.1.1 HOW TO IDENTIFY 1011G TRANSDUCERS AND MOUNTING HARDWARE

Identifying 1011G series transducers and associated mounting hardware.

5.1.2 SELECTING A LOCATION FOR CLAMP- ON TRANSDUCERS

Guidelines for selecting optimal mounting locations on the pipe.

5.1.3 CLAMP-ON TRANSDUCER MOUNTING MODES

Explanation of Direct and Reflect mounting modes for clamp-on transducers.

5.1.4 PREPARING THE PIPE

Steps for preparing the pipe surface for transducer mounting.

5.2 REFLECT MODE - MOUNTING FRAMES AND SPACER BAR

Using mounting frames and spacer bar for easy and rigid transducer mounting in Reflect Mode.

5.3 DIRECT MODE - MOUNTING FRAMES, SPACER BAR AND SPACING GUIDES

Recommended method for mounting Direct Mode transducers using frames, spacer bar, and guides.

FINDING THE HALFWAY DISTANCE

Procedure for determining the correct spacing using a mylar guide.

ALIGNING THE TRANSDUCERS FOR DIRECT MODE OPERATION

Steps for aligning transducers for direct mode operation.

5.4 USING 1012T MOUNTING TRACKS

Using 1012T Mounting Tracks for rigid mounting of universal or high precision transducers.

Installing a 1012T Mounting Track in Reflect Mode

Procedures for installing the 1012T Mounting Track in Reflect Mode.

Installing a 1012T Mounting Track in Direct Mode

Procedures for installing the 1012T Mounting Track in Direct Mode.

NOTE: Some transducers require a right-angle adapter.

Note regarding the installation of right-angle adapters.

RECOMMENDED SONIC COUPLING COMPOUNDS

Table listing recommended sonic coupling compounds and their characteristics.

Section 6

6. FUG1010GCN APPLICATION NOTES

Guidelines for obtaining the best service from the FUG1010GCN flowmeter.

6.1 TO OBTAIN TECHNICAL ASSISTANCE

How to get technical assistance and analyze system issues using diagnostics data.

6.2 OVERVIEW OF SYSTEM PERFORMANCE

Factors influencing system performance, such as signal-to-noise ratio and amplitude.

6.2.1 ACCURACY

Information on system accuracy, low flow rates, and common data-entry mistakes affecting performance.

6.2.2 REPEATABILITY

Features emphasizing repeatability due to digital design.

6.2.3 DATA STABILITY

Factors influencing data stability: Data Scatter and Drift.

Data Scatter

Definition and causes of rapid variation in flow readings.

Data Drift

Definition of long-term cyclical flow deviation due to temperature or sonic velocity variations.

6.3 FLOW CONDITIONS

Control over stability and agility of flow rate output under various real-world conditions.

6.3.1 LOW FLOW RATES

Flow resolution and measurement range capabilities, especially at low flow rates.

6.3.2 FLOW DATA SCATTER AND DAMPING

How to smooth output response using damping and slewing controls.

6.3.3 NOTES ON FLUID CONDITIONS

Factors affecting transit-time flow measurement, like sonic transmit signals and dispersed matter.

6.3.4 ERRONEOUS FLUID PARAMETER SPECIFICATION

Importance of accurate fluid viscosity specification for rate output compensation.

6.3.5 TURBULENCE

How gases with low sonic impedance or water vapor affect the receive signal and cause turbulence.

6.3.6 TWO-PHASE FLUIDS

Potential issues with two-phase fluids causing sonic beam scattering.

6.4 OVERVIEW OF FUG1010GCN MEMORY RESOURCES

Explanation of memory resources including ROM and RAM, and storage functions.

6.5 REFERENCE TABLES

Tables providing reference data for site setup.

TERMINOLOGY CHART

Explanations for uncommon terms used in the manual.

6.6 THE NEMA DUAL PATH MENU CHART

Menu chart for FUG1010GCN Permanent Dual Path.

THE METER MENU

Overview of the meter menu options.

THE CLAMP-ON GAS MENU

Detailed menu structure for clamp-on gas flowmeters.

THE METER FACILITIES MENU

Accessing global control functions for unit selection, table customization, and memory management.

APPENDIX A

Couplant Installation Instructions

Detailed instructions for installing couplant materials.

CC129A Dry Film Couplant/Damping Material Installation Instructions

Specific installation instructions for CC129A Dry Film Couplant/Damping Material.

1. SELECTING A LOCATION FOR TRANSDUCER MOUNTING

Guidelines for choosing the optimal location for transducer mounting on the pipe.

2. PREPARING THE PIPE SURFACE

Steps for preparing the pipe surface to ensure proper adhesion of damping material.

3. CC129A DRY FILM COUPLANT/DAMPING MATERIAL

Information on the CC129A dry film material, its sheets, and layers.

3.1 CUTTING AND INSTALLING CC129A COUPLANT SHEETS

Instructions for cutting and applying CC129A sheets to the pipe.

3.1.3 APPLYING CC129A COUPLANT SHEET TO PIPE

Procedures for applying the CC129A couplant sheet to the pipe surface.

3.1.4 MOUNTING TRANSDUCERS

Installing mounting assemblies and transducers onto the CC129A material.

3.1.5 CAUTIONS ON THE USE OF CC129A DRY FILM COUPLANT

Important warnings regarding cleaning and surface preparation when using CC129A.

3.1.6 MULTI-BEAM INSTALLATIONS

Installation guidelines for multi-beam configurations.

3.2 GRACE ICE AND WATER SHIELD DAMPING MATERIAL

Information on using Grace Ice and Water Shield as an alternate damping material.

APPENDIX B

SITE SETUP CONSIDERATIONS FOR SITRANS F 1010/1020N BLIND SYSTEMS

Hardware and software requirements for programming blind system models.

THE RS-232 INTERFACE CABLE

Details on the physical connection and cable configuration for RS-232 communication.

HOW TO USE THE Windows HyperTerminal PROGRAM

Step-by-step guide for setting up HyperTerminal for PC communication.

Accessing the Installation Menu

How to access the Installation Menu via HyperTerminal after parameter setup.

Data Display Mode

Toggling between Installation Menu and Data Display modes using PC keyboard or keypad.

Navigating Through the Installation Menu

PC keyboard equivalents for navigating the 1010 installation menu.

Terminal Mode Menu Commands

Commands used to control the flowmeter in Terminal Mode via PC.

Transfer of Information from a SITRANS F 1010/1020 Flowmeter to the PC

Procedures for transferring data from the flowmeter to a PC using HyperTerminal.

RESET PROCEDURE FOR BLIND SYSTEMS

Instructions for performing a system reset via the RS-232 interface for blind systems.

APPENDIX C

ENGINEERING DRAWINGS

List of engineering drawings for flow computer and transducer components.

Flow Computer Drawings

List of drawings related to flow computer hardware and installation.

Transducer and Accessory Drawings

List of drawings for transducers, mounting frames, and spacer bars.

Related product manuals