397
Creating and Editing Keyframes
Chapter 13 Keyframe Effects
Duration Mode Setting
There are two keyframe duration modes: variable duration
mode, and constant duration mode in which the effect
duration is fixed (see page 381).
• To select variable duration mode, turn the [CONST
DUR] button off.
• To select constant duration mode, press the [CONST
DUR] button, turning it on.
Transition Mode Settings for User
Programmable DME
To create an effect for user programmable DME, it is
necessary to set the transition mode.
User programmable DME in transition
mode
For the transition mode set when creating a keyframe
effect for a user programmable DME pattern, the
following can be used.
Single: single transition mode
Flip tumble (Flip Tumble): flip tumble transition mode
Dual: dual transition mode
Picture-in-picture (PinP): one-channel and two-channel
picture-in-picture transition mode
Compress: a type of picture-in-picture, in which the new
image is the background, and the currently visible
image shrinks, and then expands to its original size.
(See example in the next item.)
Frame in-out (Frame I/O): frame in-out transition mode.
When the first transition completes, if you move the
position of the image, you can move it both
horizontally and vertically.
Frame in-out H (Frame I/O H): a type of frame in-out
mode, which is specified when creating a transition
effect in the horizontal direction.
The image movement is reflected at both the transition
start point and end point. (See page 398.)
The operation is carried out according to DME wipe
patterns 1202, 1203, or 1204.
Frame in-out V (Frame I/O V): a type of frame in-out
mode, which is specified when creating a transition
effect in the vertical direction.
The image movement is reflected at both the transition
start point and end point. (See page 398.)
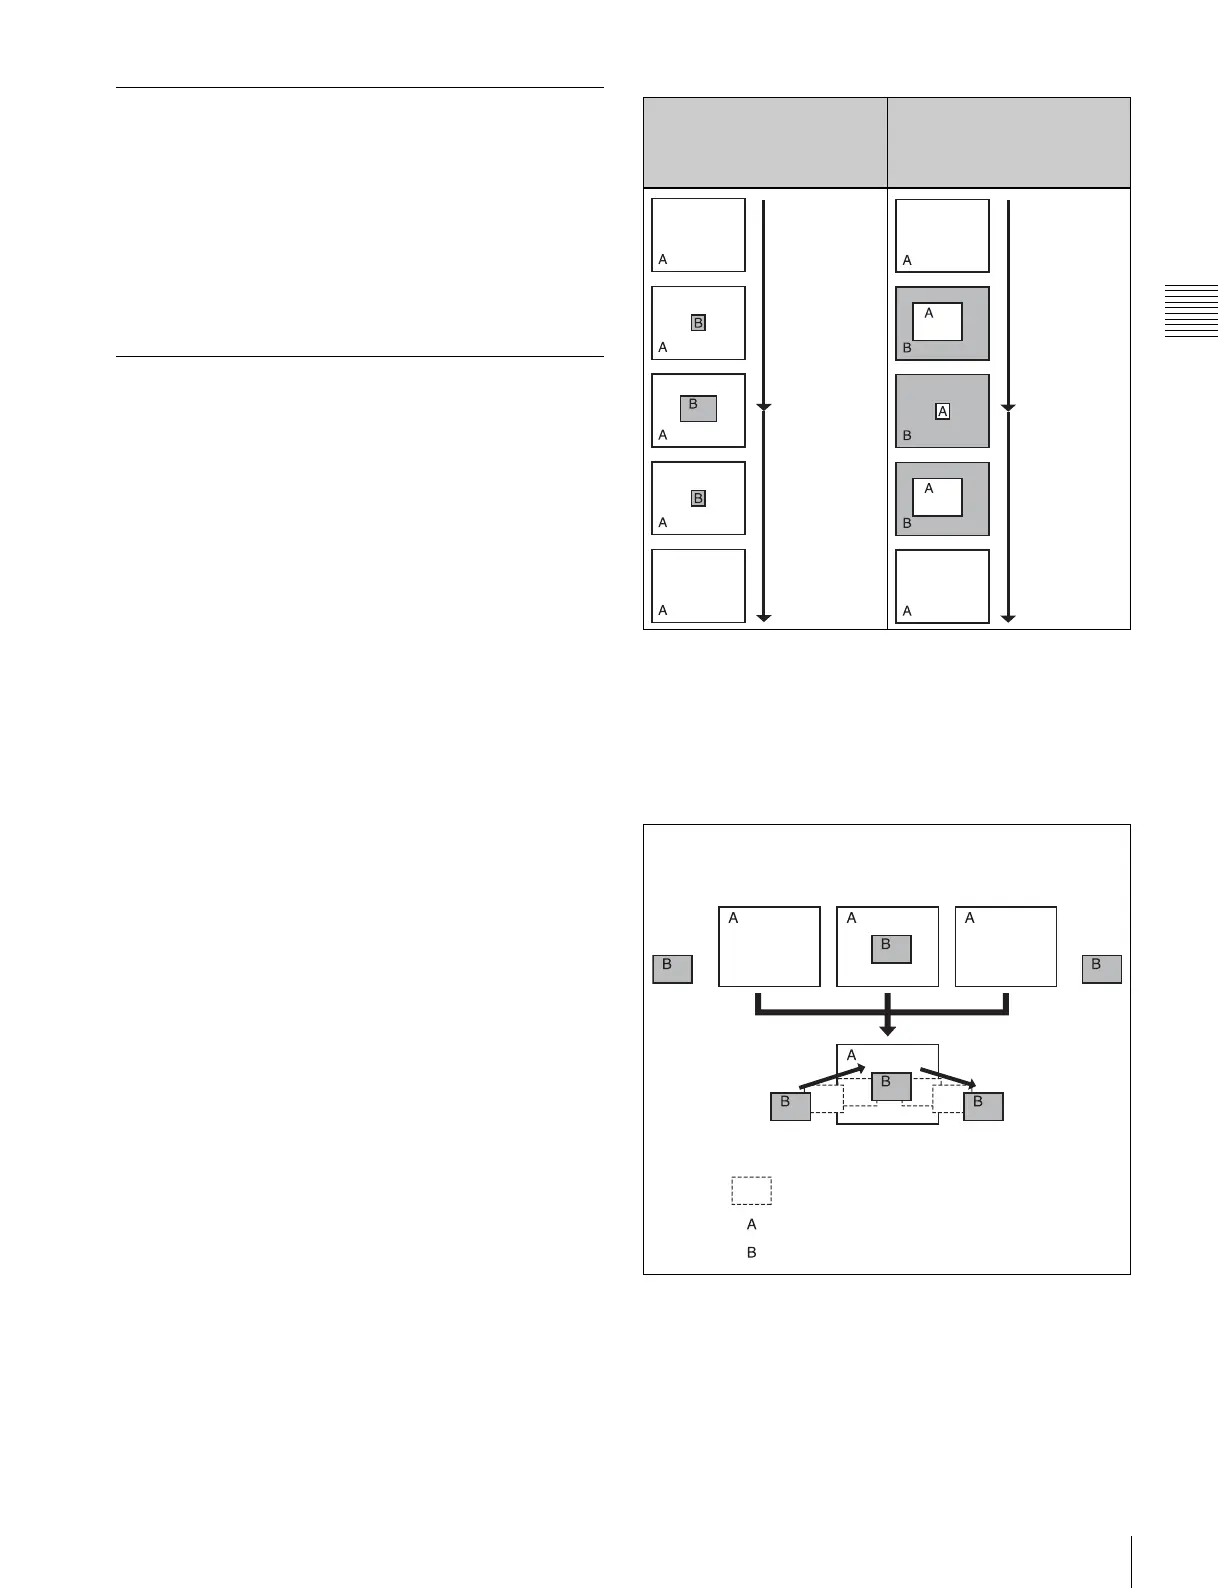
Transition mode “Compress”
The change in the image when the transition mode is set to
“Compress” is as follows, in comparison to the case of
“Picture-in-picture.”
Transition mode “frame in-out”
In this mode, when the first transition has completed, you
can move the image with the positioner in both horizontal
and vertical directions, but the image position at the
transition start point and end point does not change.
The description is of an example of creating an effect such
as the following.
At the first transition completion point, if you move the
image with the positioner, the transition appears as in the
following figure.
Example of the image
change in the transition
mode “Picture-in-picture”
(one-channel mode)
Example of the image
change in the transition
mode “Compress”
Second stroke
First stroke
First stroke
Second stroke
Transition start Transition end
First transition
completion
point
Effect execution
Image created by interpolation
Background B
Background A