146
Basic Procedure for DME Wipe Settings
Chapter 6 DME Wipes
a) Shared with knob 3 for parameter group 1
b) The horizontal center position of the video pasted on Side H. At –100.00
the center is at the left edge of the screen, and at +100.00 the center is at
the right edge of the screen.
c) The vertical center position of the video pasted on Side H. At –100.00 the
center is at the bottom edge of the screen, and at +100.00 the center is at
the top edge of the screen.
Setting DME Wipe Modifiers
You can apply various modifiers to the DME wipe pattern:
setting the DME wipe direction, pattern position, and so
on.
For an overview of the DME wipe modifiers, see “DME
Wipe Pattern Variation and Modifiers” (page 142).
Specifying the DME wipe direction
(Direction)
You can specify the DME wipe direction (normal/reverse).
To specify the DME wipe direction in a menu
1
In the M/E-1 >DME Wipe menu, select HF4 ‘Edge/
Direction.’
The Edge/Direction menu appears.
2
In the <Direction> group, specify the DME wipe
direction.
Normal: regular direction
Normal/Reverse: alternate between regular and
reverse for each transition
Reverse: reverse direction to normal
To specify the DME wipe direction with a button
in the transition control block
In the transition control block of each of the M/E-1 to M/
E-3 and PGM/PST banks, press the following direction
selection buttons.
NORM: Normal
NORM/REV: Normal/Reverse
REV: Reverse
Modifying the DME wipe pattern edge
1
In the M/E-1 >DME Wipe menu, select HF4 ‘Edge/
Direction.’
The Edge/Direction menu appears.
2
Depending on whether the selected pattern is in one-
channel mode or two-channel mode, proceed as
follows.
For a pattern in one-channel mode: press [1st Ch],
turning it on.
For a pattern in two-channel mode: from the <Ch
Select> group, select the corresponding channel.
You can select more than one channel at the same
time.
3
In the <Edge> group, select the edge type.
Border: border
Soft Border: soft border
4
Set the parameters according to the selection in step 3.
When border is selected
When soft border is selected
Display indications when multiple channels are
selected at the same time
The indications on the knobs show the settings of the
lowest-numbered channel. When you turn the knobs to
adjust the settings, this changes the settings on the
other channels by the same amount.
Setting the DME wipe position (Positioner)
1
In the M/E-1 >DME Wipe menu, select HF5 ‘Modify.’
The Modify menu appears.
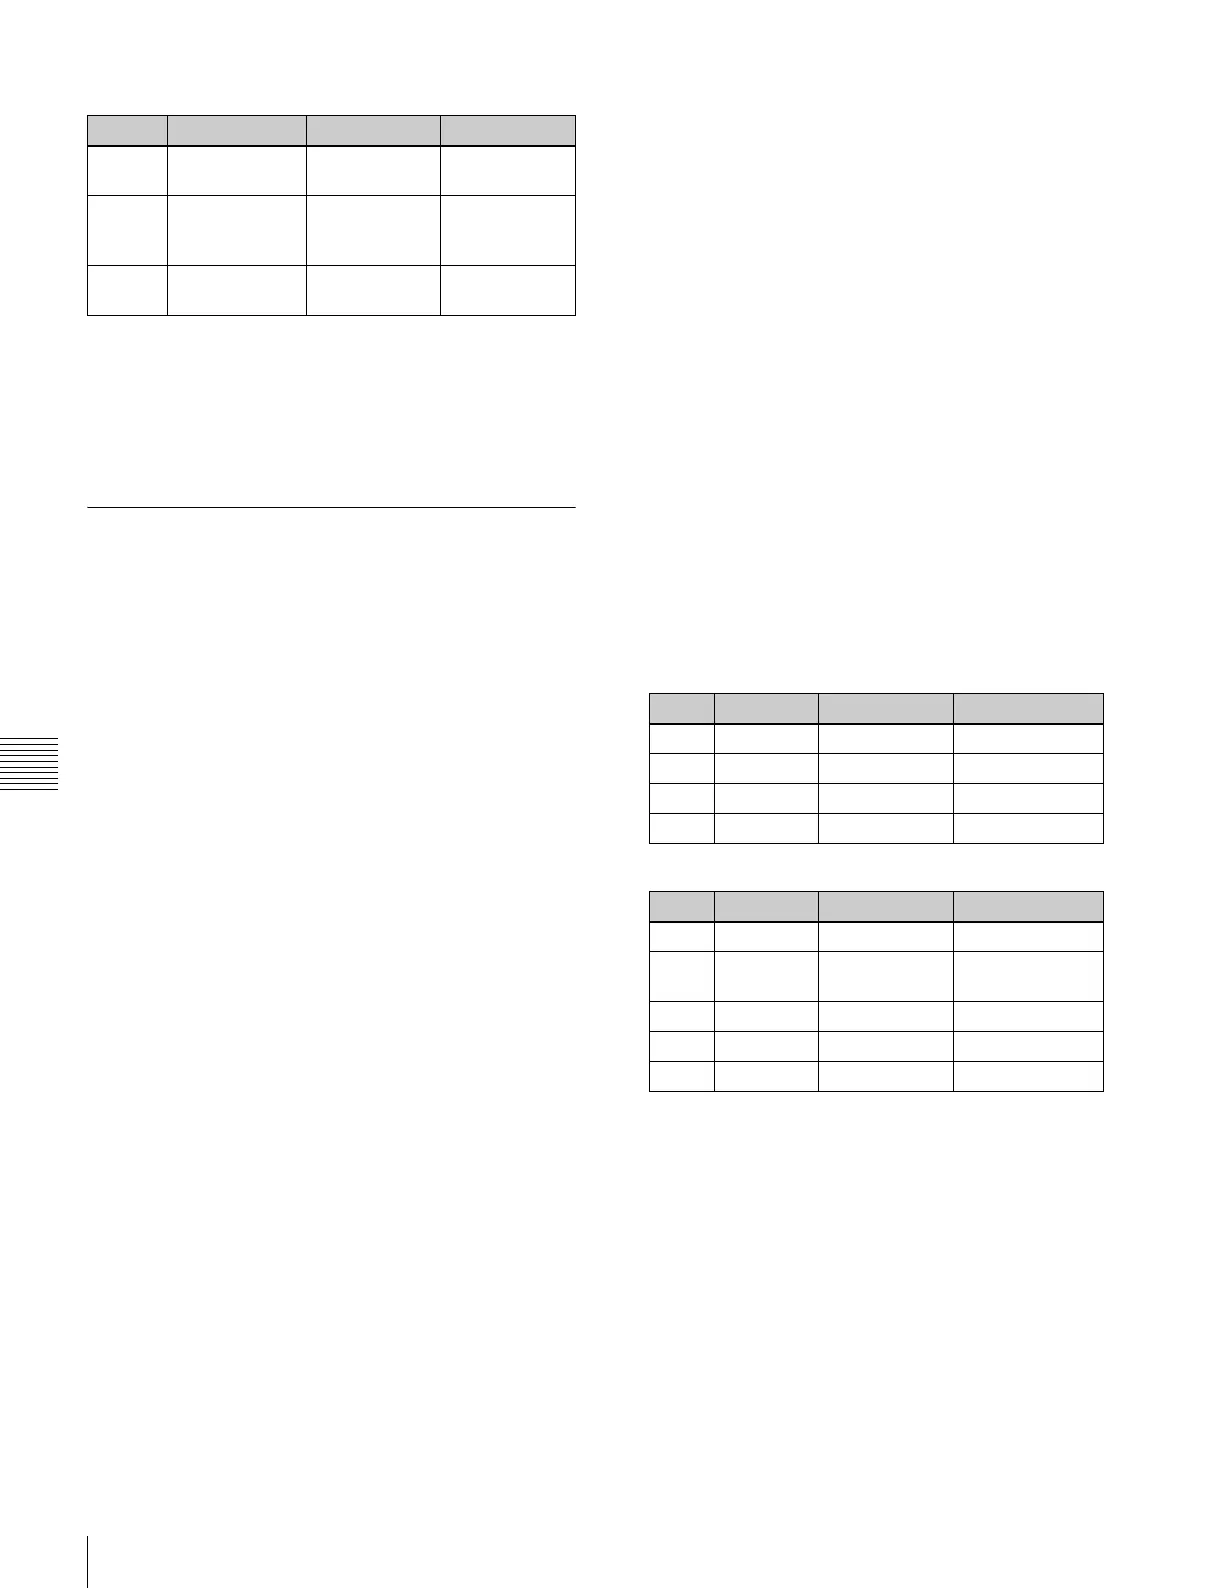
3 Height Height of brick 0.01 to 100.00
a)
4 Side H Center
X
Side H
horizontal
center position
–100.00 to
+100.00
b)
5 Side H Center
Y
Side H vertical
center position
–100.00 to
+100.00
c)
Parameter group [2/2]
Knob Parameter Adjustment Setting values
Knob Parameter Adjustment Setting values
1 Width Border width 0.00 to 100.00
3 Luminance Luminance 0.00 to 100.00
4 Saturation Saturation 0.00 to 100.00
5 Hue Hue 359.99 to 0.00
Knob Parameter Adjustment Setting values
1 Width Border width 0.00 to 100.00
2 Inner Soft Border inner
softness
0.00 to 100.00
3 Luminance Luminance 0.00 to 100.00
4 Saturation Saturation 0.00 to 100.00
5 Hue Hue 359.99 to 0.00