415
Snapshot Operations From the Numeric Keypad Control Block
Chapter 14 Snapshots
In the numeric keypad control block, it is not possible
to apply the cross-point hold.
For details, see “Applying snapshot attributes” (page
416).
7
Press the [ENTER] button.
This saves the snapshot, and the [STORE] button goes
off. The [RCALL] and [STORE STATS] buttons light.
To cancel a snapshot save operation
Hold down the [STORE STATS] button and press the
[UNDO] button.
Recalling a snapshot from the numeric
keypad control block
1
In the numeric keypad control block, press the
[SNAPSHOT] button, turning it on.
This allocates the numeric keypad control block to
snapshot operations, and the [RCALL] button lights.
2
Press the region selection button corresponding to the
region you want to recall, turning it on. Multiple
selections are also possible.
[M/E 1], [P/P]: These select the M/E-1 and PGM/PST
regions.
[USER 1] to [USER 8]: These select the User regions.
[DME 1] to [DME 8]: These select the DME
channels.
[RTR]: This selects the Router region.
[ALL]: This selects all regions.
[MASTR]: This selects a master snapshot.
The regions that can be selected simultaneously are
those assigned to the region selection buttons in the
numeric keypad control block .
It is not possible to select [MASTR] and other regions
simultaneously. If selected simultaneously, the master
snapshot takes precedence.
The first pressed button lights green as the reference
region, and subsequently pressed buttons light amber.
Pressing one of the amber-lit buttons, while holding
down [SNAPSHOT], turns the button green to indicate
its corresponding region as the new reference region.
For details of the precedence order for becoming the
reference region, see “Reference region” (page 379).
The display shows the name of the reference region
and the number of the register previously recalled for
that region.
3
Enter the desired register number from the numeric
keypad.
The entered register number appears in the display.
4
To apply temporary attributes (see page 414), press the
following buttons, turning them on.
a) Enabled by a setup setting.
For the setup setting, see “Setting the operation mode
of the key bus [XPT HOLD] button” (page 539).
• The cross-point hold and key disable settings are
maintained until you next press the [XPT HOLD]
button.
• Applying temporary attributes does not affect the
contents of the register.
• It is not possible to apply temporary attributes to a
master snapshot.
5
Press the [ENTER] button.
This recalls the specified snapshot, and the reference
region name and recalled register number appear in the
display.
If you applied the effect dissolve or auto transition
temporary attributes in step 4, the corresponding
buttons go off.
When a master snapshot is recalled, the region
selection buttons light according to the saved region
information.
To cancel a snapshot recall operation
To cancel the recall, press the [UNDO] button.
It is not possible to cancel recalling a master snapshot.
Creating and saving a master snapshot
with the numeric keypad control block
To create and save a master snapshot with the numeric
keypad control block, refer to the operations in “Creating
and Saving a Master Timeline Using the Buttons in the
Notes
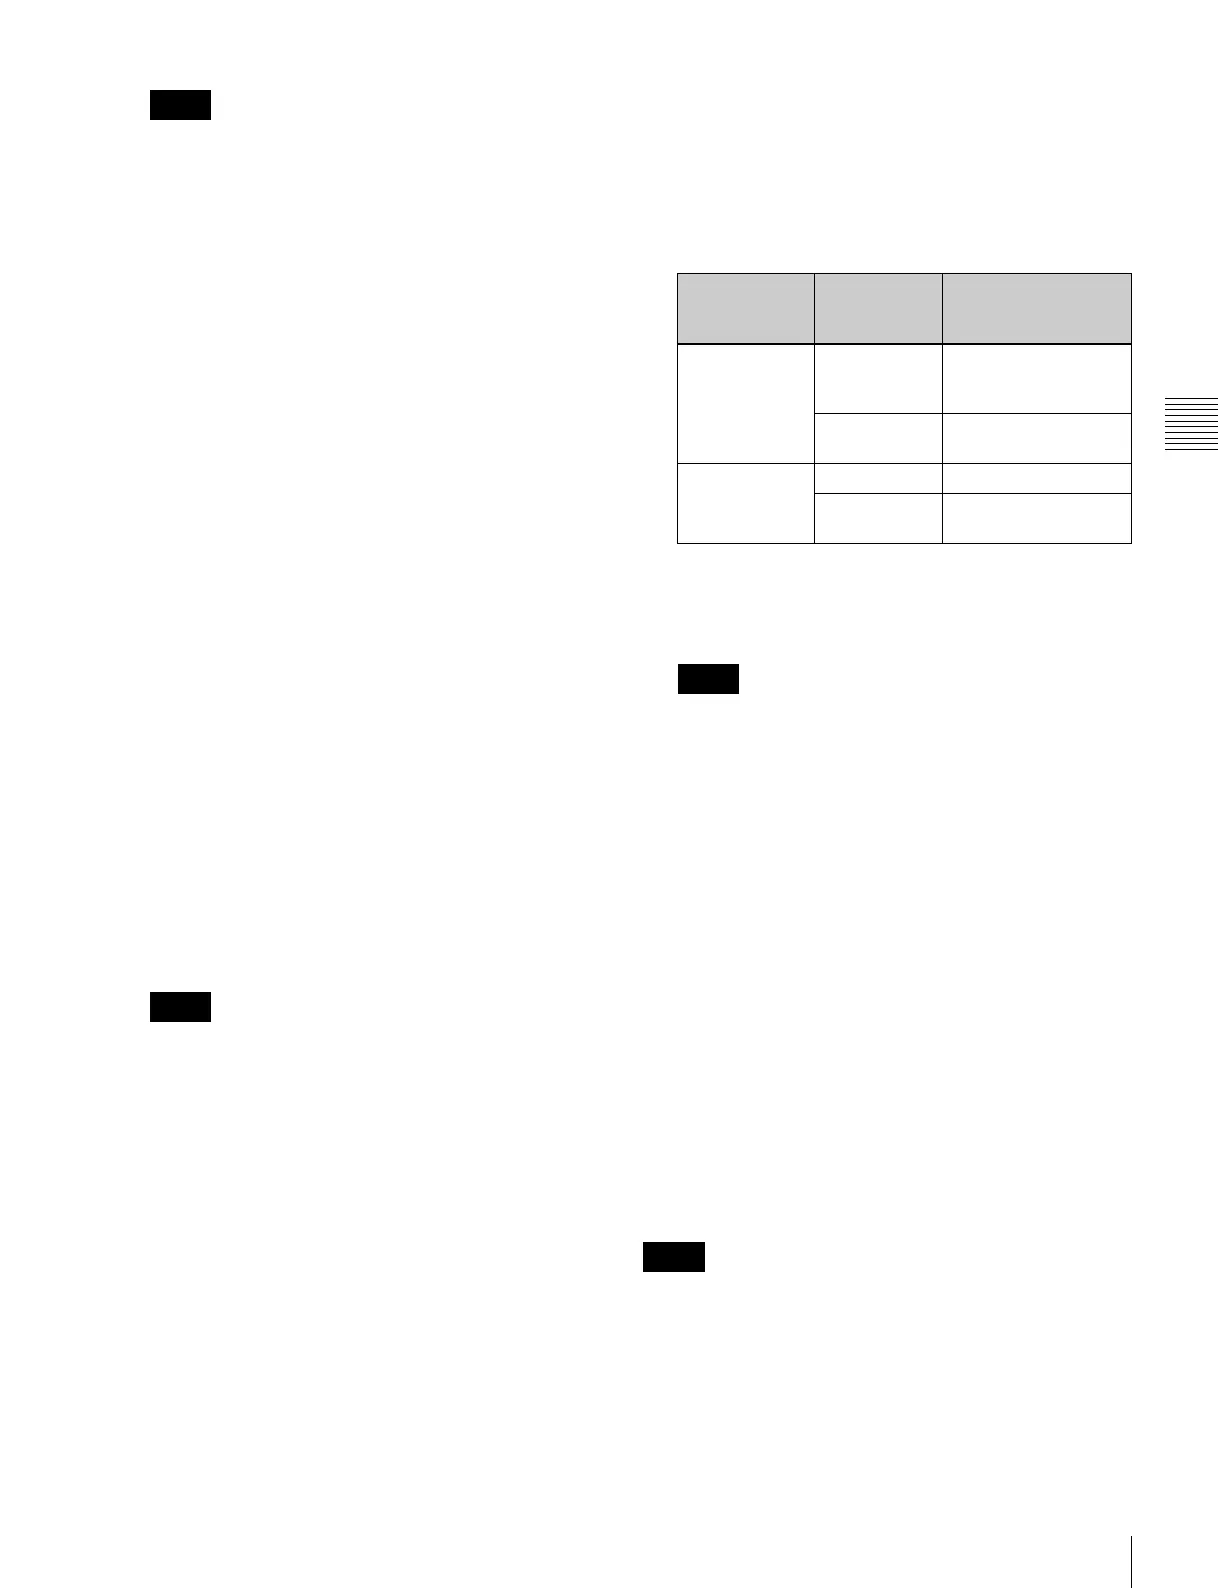
Notes
Control block Temporary
attribute to
apply
Button
Cross-point
control block
A/B bus cross-
point hold
[XPT HOLD] button in
the background A/B
bus
Key cross-
point hold
[XPT HOLD] button
a)
Numeric
keypad control
block
Effect dissolve [+/–/EFF DISS] button
Auto transition [CLR/AUTO TRANS]
button
Notes
Notes
 Loading...


