The IEC 61672-1:2013 standard advises users to perform in-situ checks of
measuring instruments. Checking should be carried out immediately before and
after the measurement.
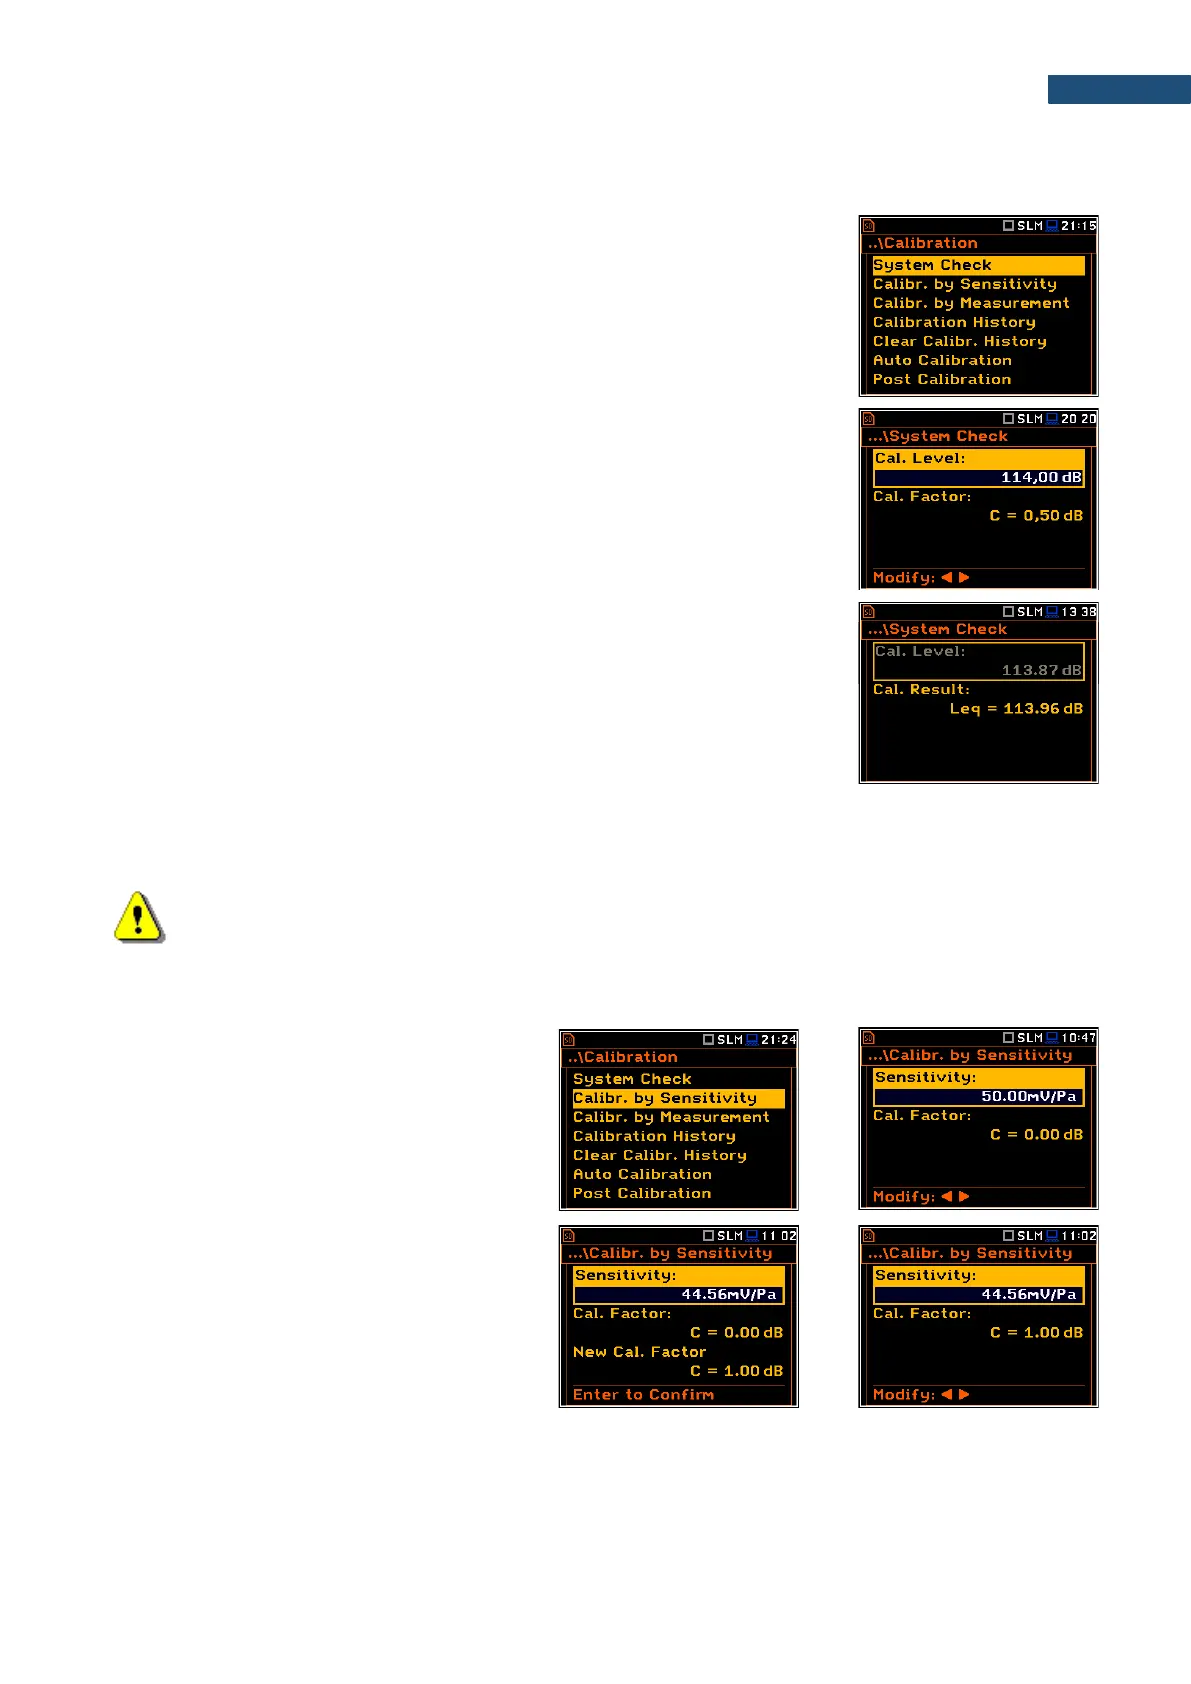
1. Open the System Check position.
2. Set the reference calibration level (Cal. Level).
3. Attach the sound calibrator to the instrument’s microphone or accelerometer
to the vibration calibrator.
4. Switch on the calibrator and wait approximately 30 seconds before starting
the system check measurement.
5. Start the calibration measurement with the <Start> key.
The measurement starts without delay. If maximal difference between three 1-
second consecutive results (Leq(C) or RMS) is less than 0.05dB, the
measurement will be stopped. Otherwise, the user should stop it manually.
During the system check measurement, the <ESC> and <Pause> keys do not
operate but it is possible to stop the measurement using the <Stop> key.
System check is considered as successful if its result (Cal. Result) does not
differ from the calibration level by more than 0.5 dB.
If the system check measurement shows bigger difference than 0.5 dB, you
should perform Calibration by Measurement.
6. Press <ENTER> to exit System Check.
Note: It is advised to perform the system check of the instrument each time before the measurements
begin. If system check gives negative result, then it is necessary to perform calibration.
3.3.2 Calibration by Sensitivity (Acoustic signal)
Calibration on the base of the microphone’s
published sensitivity information can be
performed the following way:
1. Open the Calibr. by Sensitivity position in
the Calibration list.
2. Set the Sensitivity of the microphone
taken from its calibration certificate using
the ◄ / ► key and then press <ENTER>.
The calibration factor (Cal. Factor) is
calculated every time after pressing the ◄
/ ► key, in relation to the nominal value of
50.00 mV/Pa.