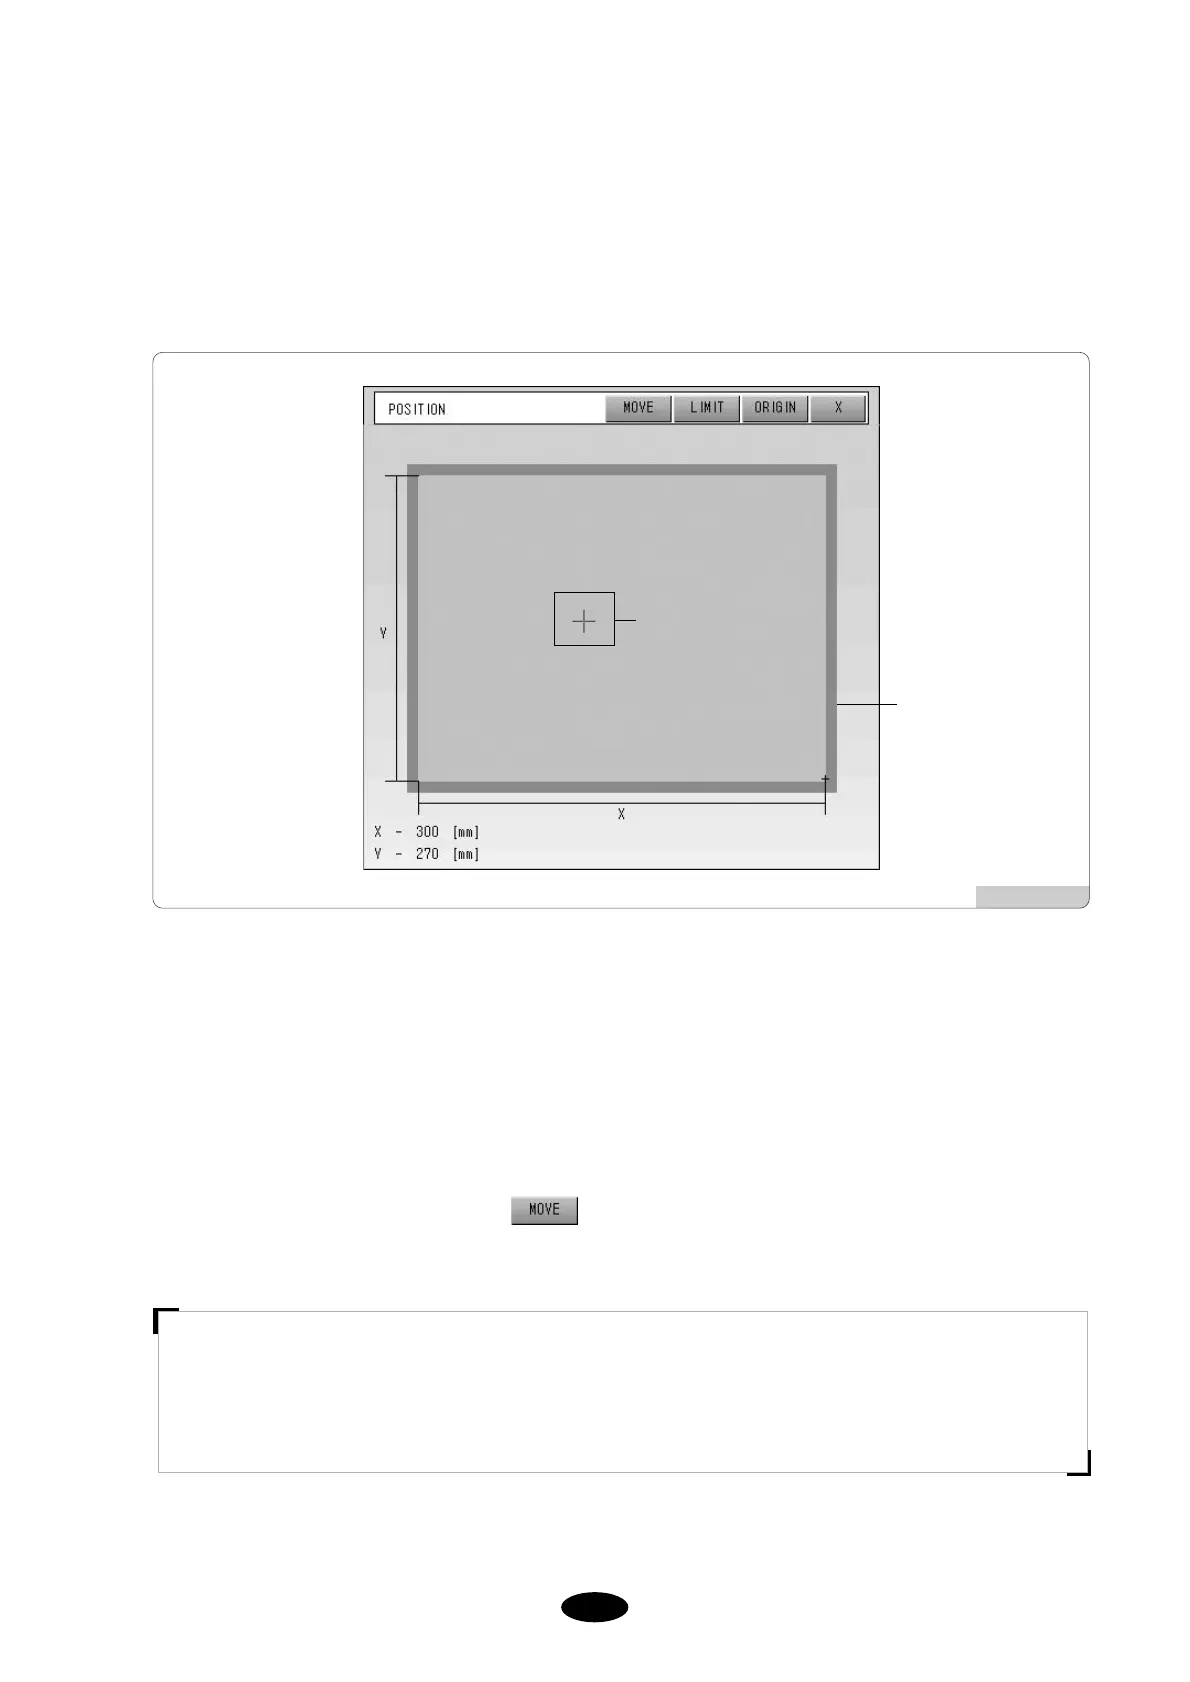
5.10.1 Position
It sets the desired position of the embroidery on the frame.
①
Press Work Position in the screen [Fig.5.10.0-1] and you will see a screen like [Fig.5.10.1-1].
②
Dotted lines within the frame ([Fig.5.10.1-1]) shows the maximum length of the design on X and Y axis. ‘+’
within the dotted square refers to the embroidery start position as well as the frame position where the current
needle bar will be embroidering.
③
Press a desired position within the frame and the design will move to the desired frame position. Red marks, if
any, on the design (the dotted square) means possibility of X, Y limit errors. Make sure that the dotted square
comes safely inside the frame.
Select the desired position and press . And the frame will move to make sure that embroidery design
can be created at the desired position.
[Fig.5.10.1-1]
[CAUTION]
Pushing the frame manually while the main power is off will change the frame origin. If the frame origin is
changed, the machine will not be able to accurately align the work position using the Work Position function
(refer to ‘5.13.4 Frame Origin’ about the details).
Design outline
Frame outline