5.9.4 Needle Setting(Color Setting)
You can pre-set so that the needle bar is automatically changed (color is changed) when the machine meets a color
change code during embroidery. You can also change the design color displayed on the screen.
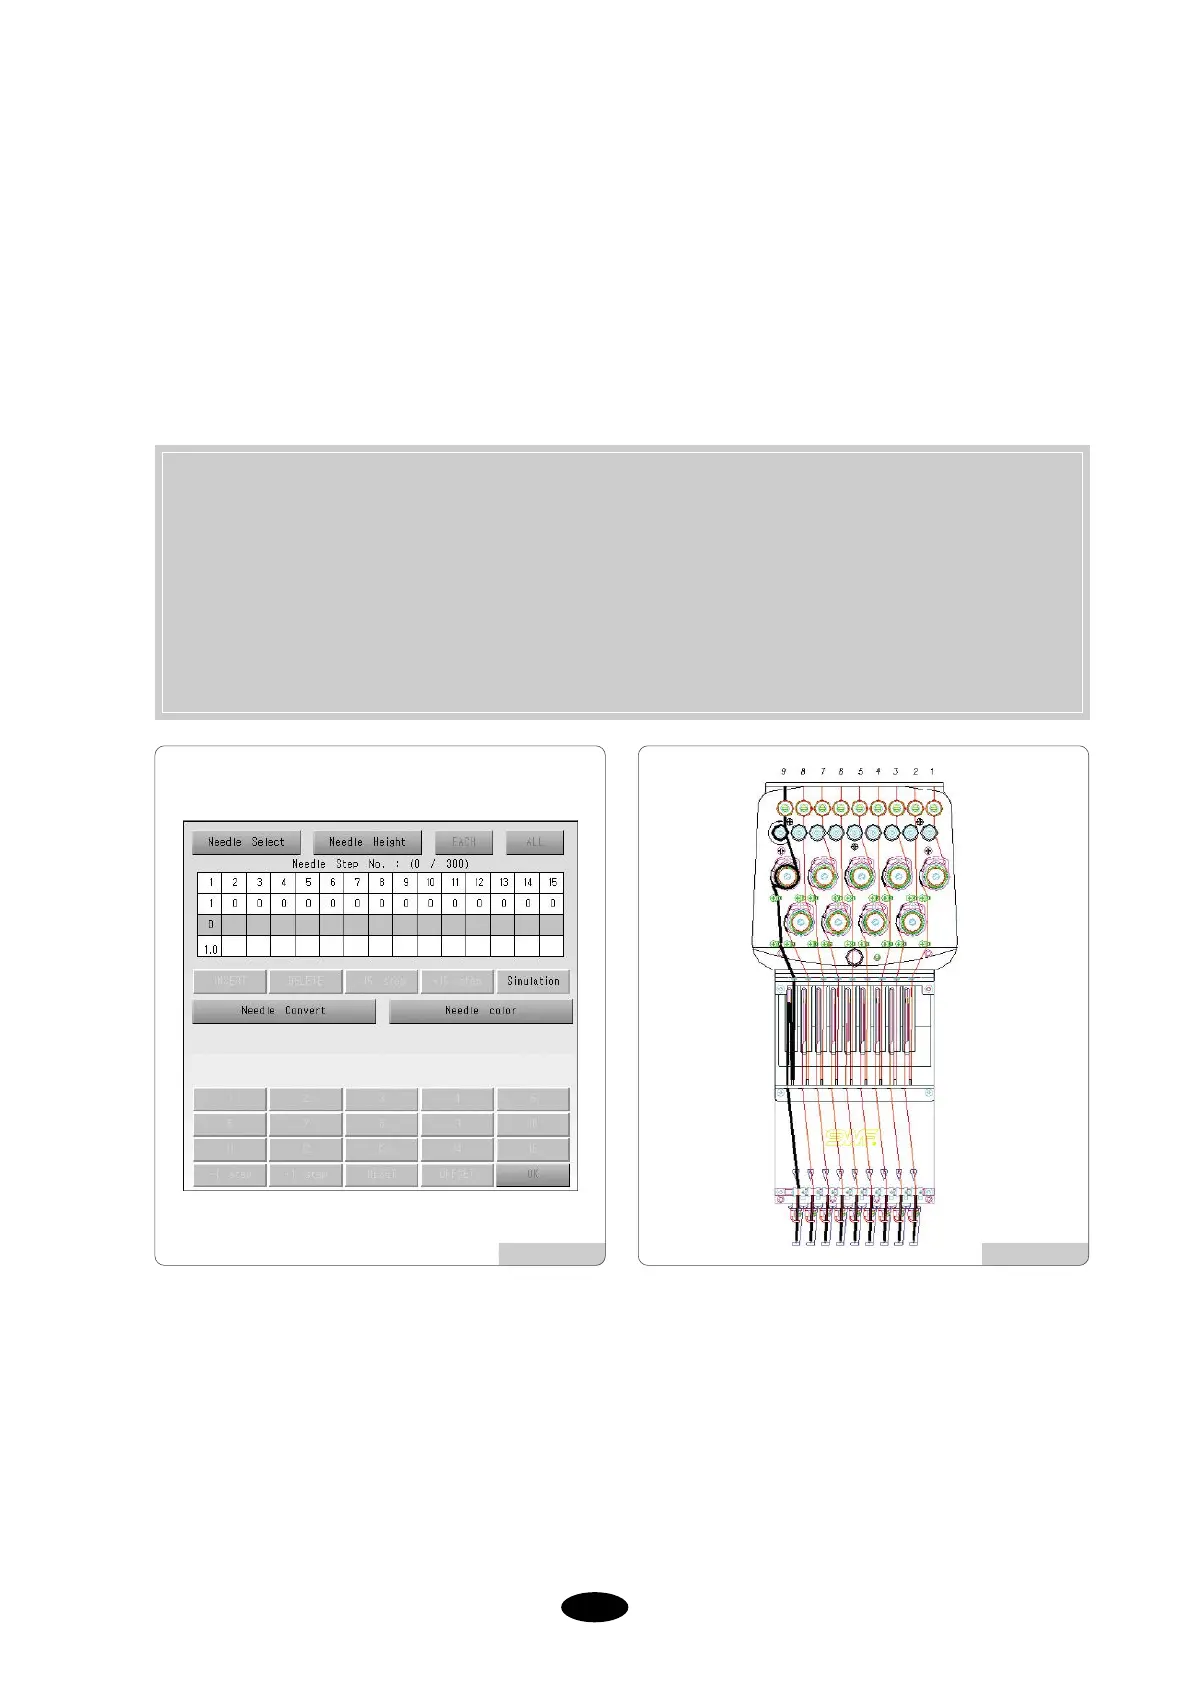
<Fig. 5.9.4-1> shows the needle bar setting menu that appears when the needle bar setting button is pressed on the
setting screen of <Fig. 5.9.0-1>. The needle bar setting is divided into needle bar select, needle bar change, and change
of presser foot height.
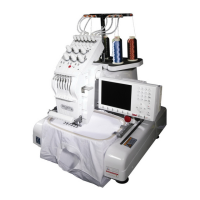
To understand the above functions, let us look at the heads of a SWF multi-head embroidery machine in
shown in [Fig.5.9.4-2].
As illustrated in [Fig.5.9.4-2], a multi-head embroidery machine has each needle bar with unique numbering. Each of
those unique numbers is matched 1:1 to the reference needle bar in the menu Needle Bar Number Change shown in
[Fig.5.9.4-1]. If the changing needle bar matches the reference needle bar, the needle bar selected will also match and
the needle bar of the selected numbering will work. You can change the numbering by using the NEEDLE
CONVERT function. Refer to the following example.
NEEDLE SELECT : It sets the order of needle bar change when the machine comes across a color change
code during embroidery. You can use maximum 300 color change codes.
NEEDLE CONVERT : You can change the 1:1 match between tables in the reference needle bar and the
actual needle bar.
NEEDLE COLOR : It changes the color of the needle bar displayed on the screen.
CHANGING HEIGHT : This function changes the presser foot height.
[Fig.5.9.4-1] [Fig.5.9.4-2]