76 097-55501-01 Issue 6 – June 2003
1
TimeHub 5500 System Guide
3.4 Configuring the Shelf as Master or
Remote
A TimeHub shelf can be configured for either master or remote operation
without any change of equipment. In other words, the shelf and associated
plug-ins are compatible with either mode of operation. There is only a single
setup step required to establish whether the shelf will be a master or remote.
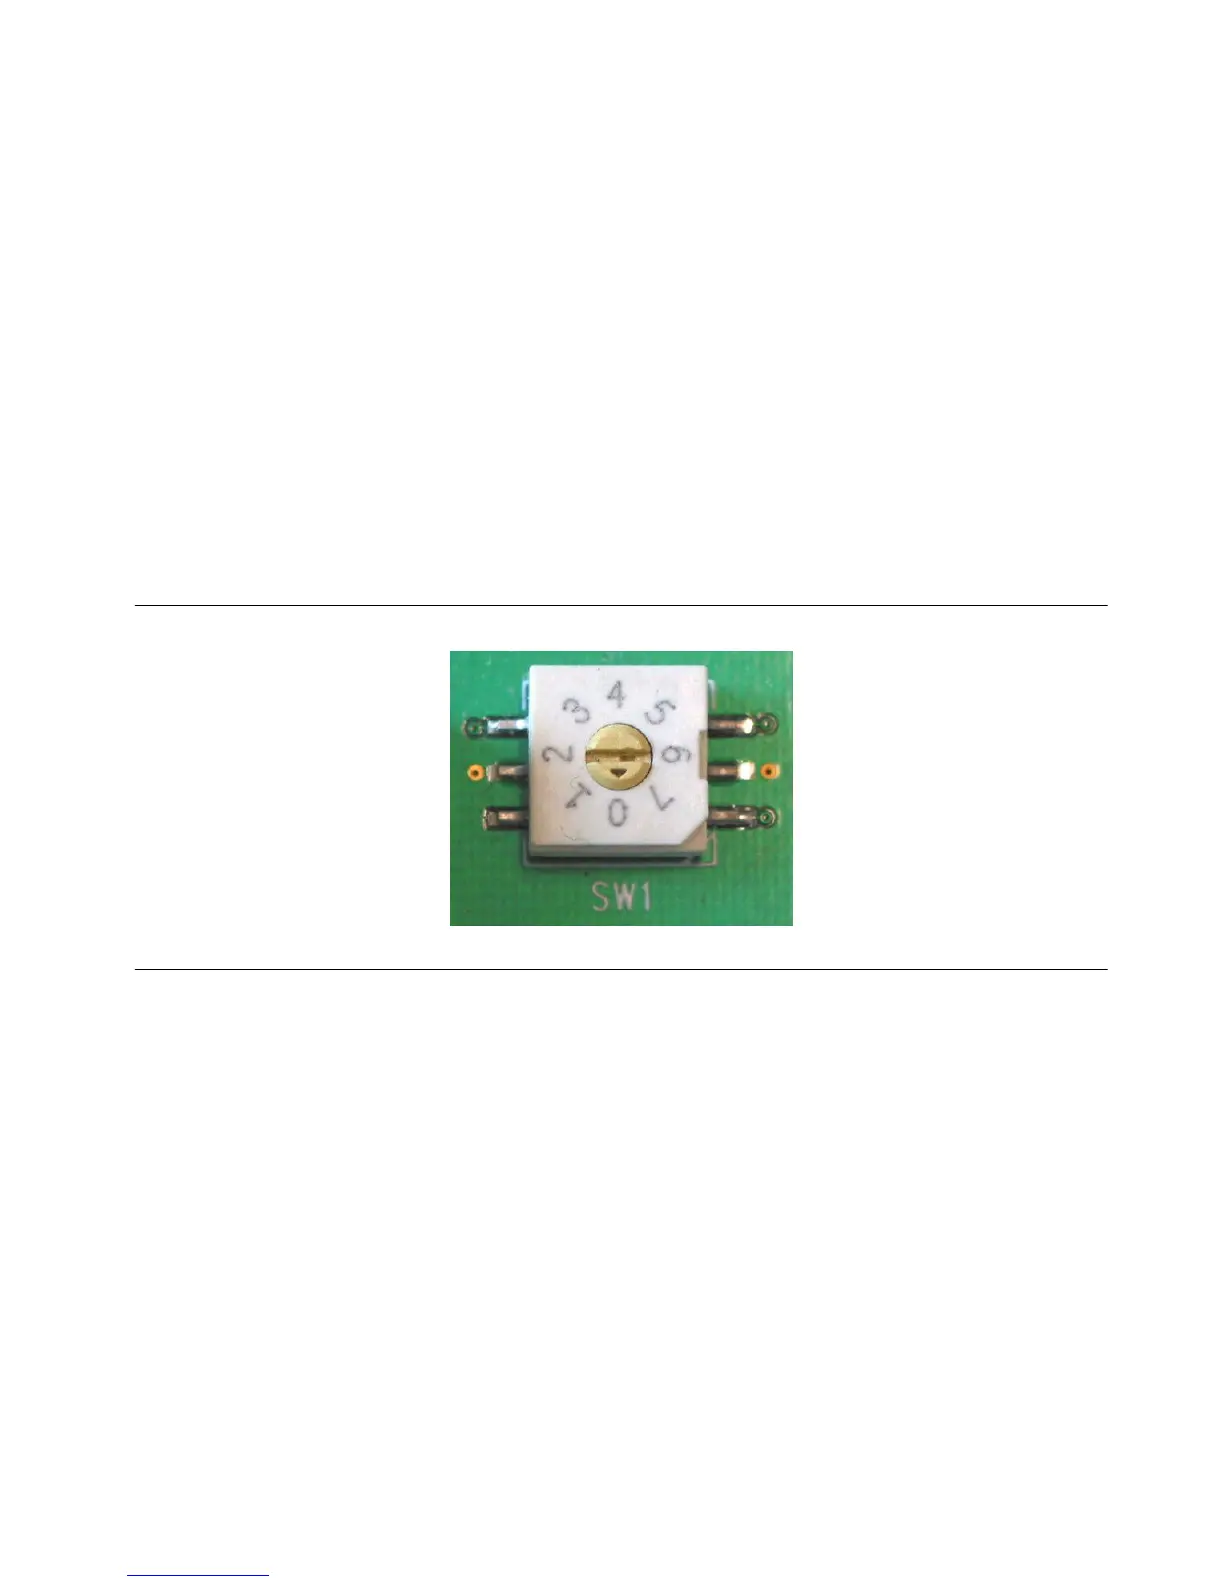
There is an eight-position rotary switch (Figure 3-2) attached to the
backplane printed circuit board that is part of the shelf. If looking directly at
the front of the shelf (the side where you slide in each of the plug-in cards),
the switch is located near the bottom at the left side, in the area occupied by
the Management Card (090-55542-01) when it is inserted. You will only be
able to see the rotary switch if the Management Card is not inserted in the
shelf.
Figure 3-2. TimeHub Rotary Switch
To set the rotary switch, do the following:
1. Make sure that power is not being applied to the shelf. Power is re-
ceived by the shelf via the power terminals located on the back of
the shelf.
2. If necessary remove the Management Card in order to obtain access
to the rotary switch. If convenient, it can be helpful to also remove
CLK1 card from the shelf. Doing so provides improved access to the
switch and better visibility. Also, depending on lighting conditions
it can be helpful to use a flashlight to obtain a better view of the
switch and its value setting.
3. Using a long shafted screwdriver with a small slot blade (or any
other implement that provides similar function), insert the blade
into the slot in the rotary switch and rotate to the desired position.

 Loading...

