RUN MED: Service & Maintenance Manual - rev. 1.0
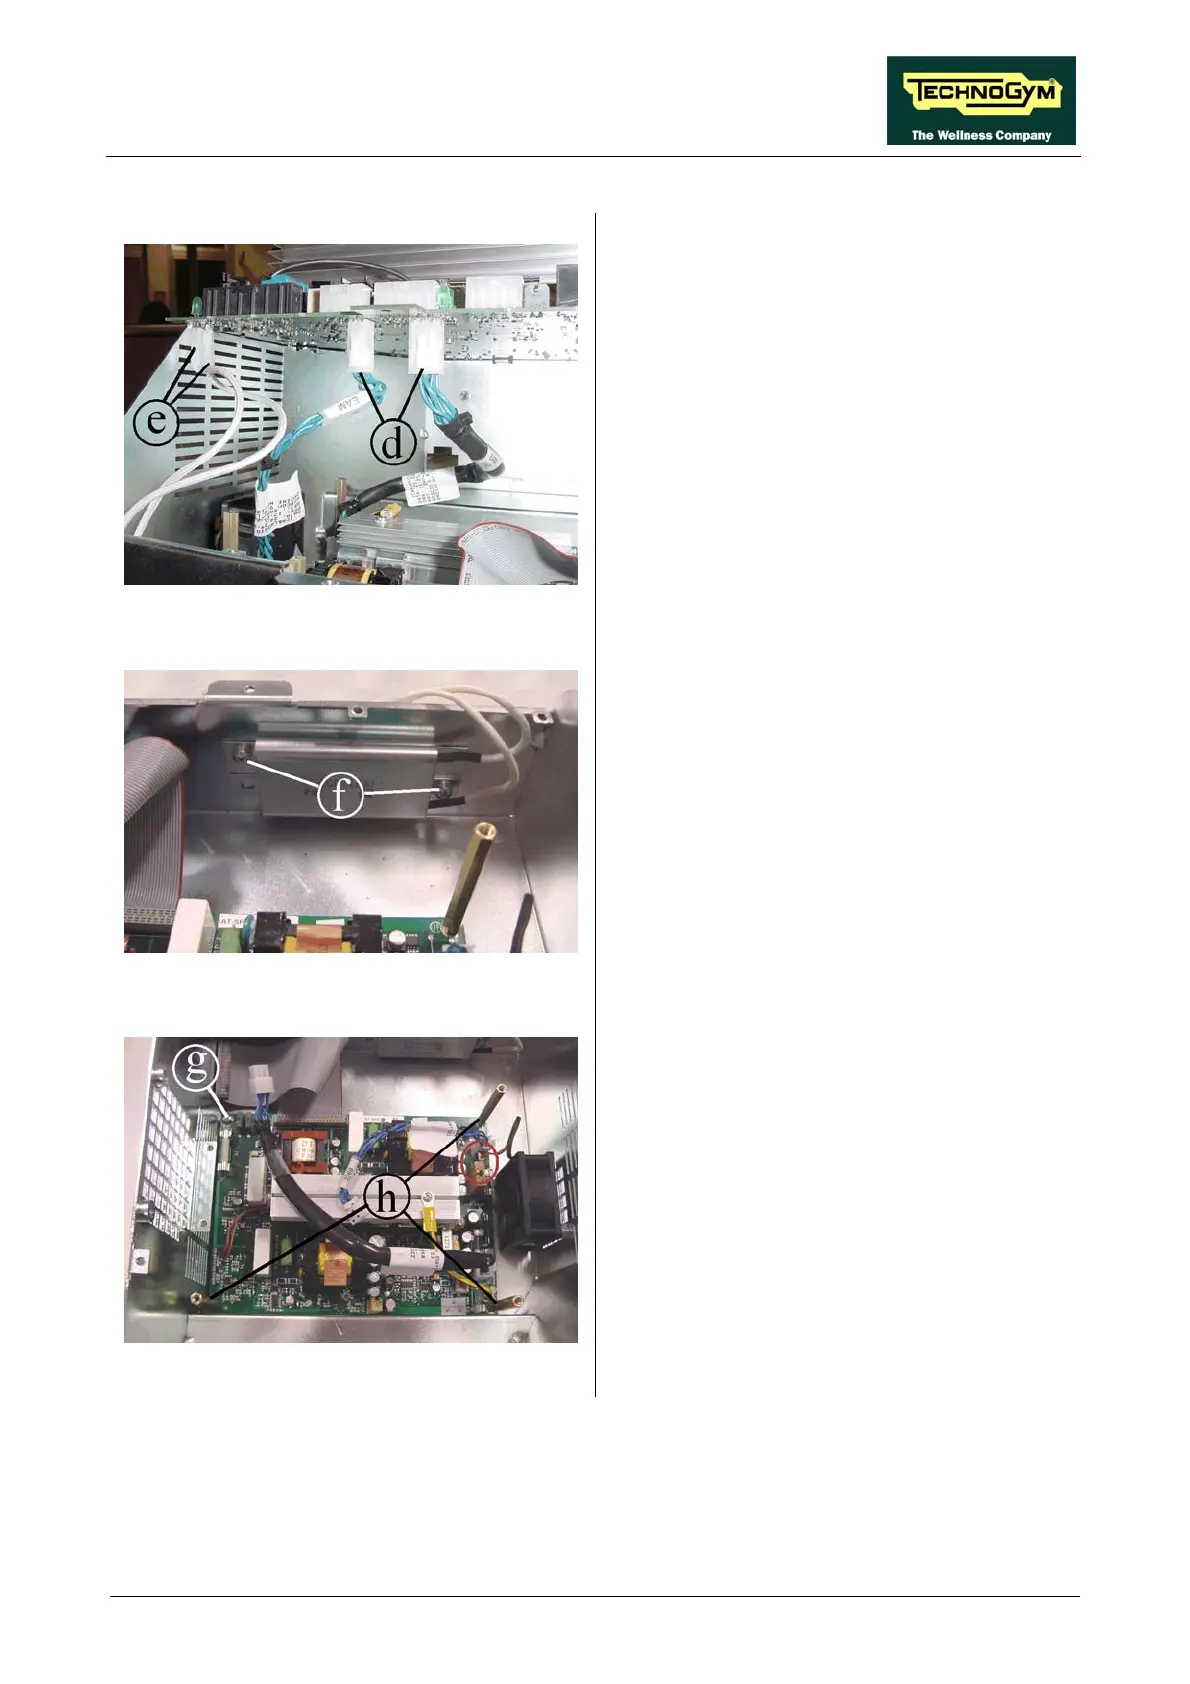
Figure 7.12-4
4. Unplug the two cables d coming from the AT
power supply board.
5. Unplug the faston e of the two cables coming
from the resistance.
6. Remove the AT driver board.
Figure 7.12-5
1. Unscrew the two screw f using a Phillips
. Remove the resistance.
Resistance:
screwdriver.
2
Figure 7.12-6
1. Unplug the cable coming from the fan.
2. Unscrew the screw g using a Phillips
screwdriver.
3. Unscrew the spacer h using a 7-mm wrench.
4. Remove the board.
To reassemble the electronics boards, carry out
the above steps in reverse order.
AT power supply board:
Page 7.15