RUN MED: Service & Maintenance Manual - rev. 1.0
7.4. DISASSEMBLING THE KEYBOARD
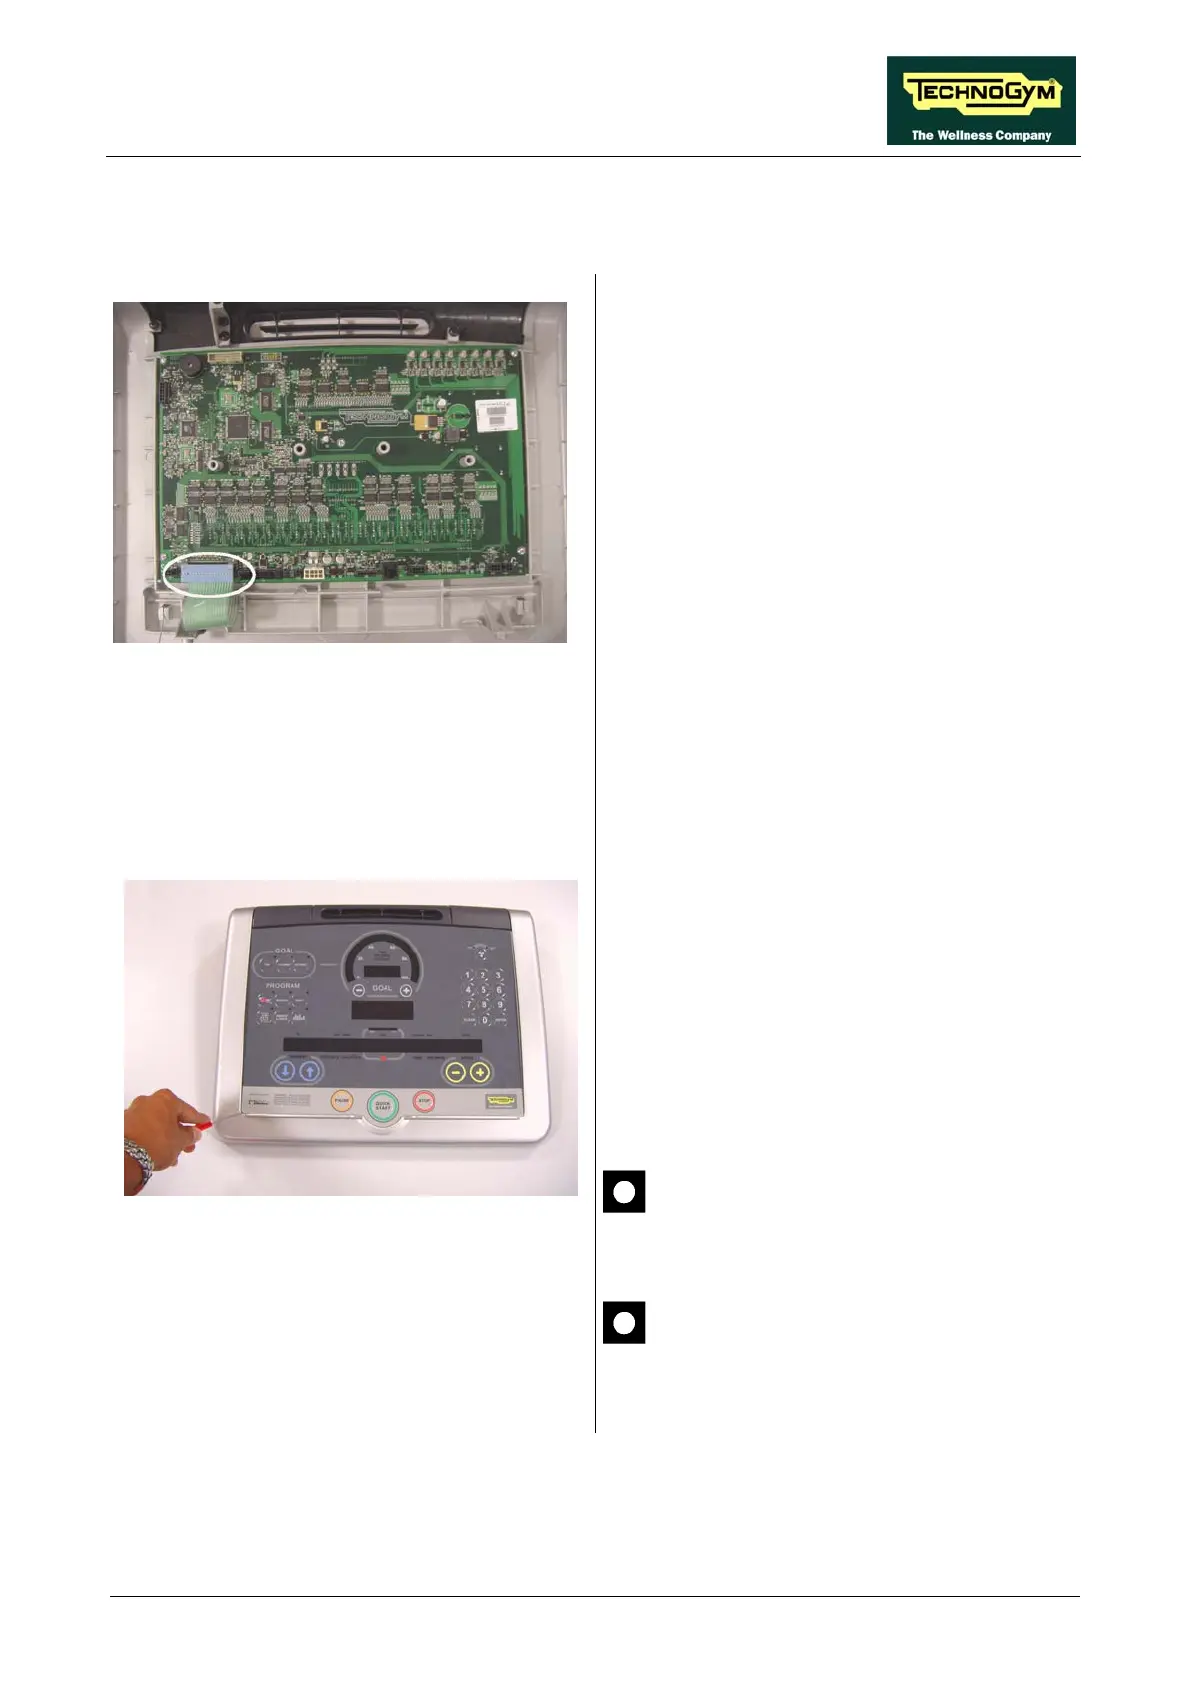
Figure 7.4-1
Carry out the procedure described in paragraph
7.1. “Disassembling the display”.
1. Unplug connector from the keyboard.
Figure 7.4-2
With the display placed on a work bench:
2. Use a sharp tool to lift up and detach a corner
of the keyboard.
To assemble a new keyboard, with the display on
a work bench:
1. Remove the backing film which protects the
adhesive.
2. Apply the adhesive part, starting from the
left and working toward the right, without
bending the keyboard.
3. Insert the connector in the special slot on the
display and connect it to the display board.
4. Remove the protective film.
When reassembling the keyboard, make
sure that none of the keys are bent or
remain pushed in.
The keyboard assembly procedure can
only be carried out once, because
disassembly damages the tracks and
keys.
Page 7.5