D292144.7.fm Taper Setup
Chapter 4: Machine Setup 4- 23
PSA Sealer Setup
1. Return to the HMI screen. Press the
Continuous Advance button in the Leader
section of the Taper tab.
The taping module will begin the advance of the carrier tape and cover tape
through the sealer. The cover tape will be sealed onto the carrier tape as it
advances.
2. Seal Width: Observe whether the sealer’s width is adjusted correctly for the cover
tape. It should seal just inside the outside edges of the carrier tape without going
off the edges or over the pockets. If it is not, stop the taper by pressing the
Continuous Advance button again.
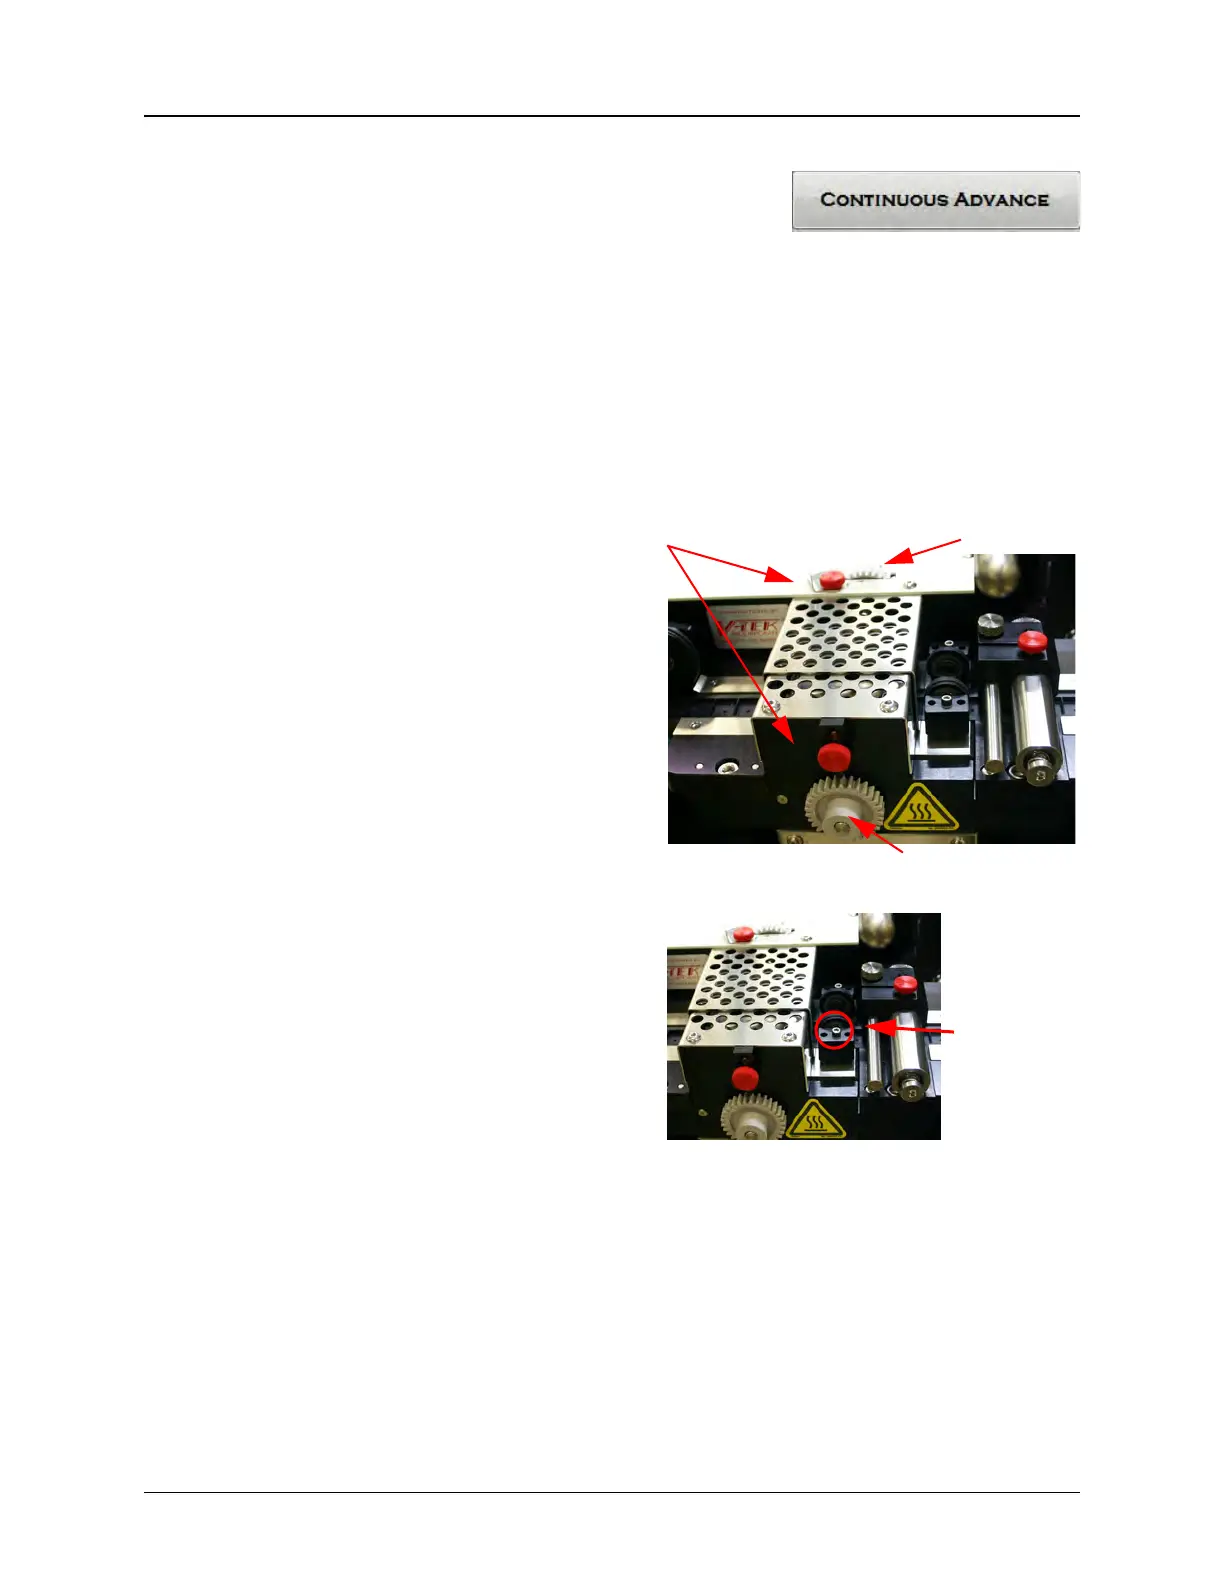
The sealer’s inside and outside
seals are independently adjustable.
If one of the seals needs to be
moved, loosen the corresponding
position lock and turn the adjusters.
Turning the wheel counter-clockwise
will move the guide towards the
operator. Turning it clockwise will
move the guide closer to the
machine. Adjust the Inner Seal
Adjust and the Outer Seal Adjust to
the desired position, then tighten the
Position Locks to secure them.
3. Seal Roller Pressure The second
factor in PSA seal strength is the
pressure applied to the cover tape
as it is sealed to the carrier tape.
The seal should appear as a solid
stripe and it should not show any
inconsistencies. If it does, the
alignment of the cover tape should
be confirmed and then the pressure
to the seal rollers adjusted.
On the top of each sealer block, there are three holes with a screw in the center
hole. With carrier and cover tape loaded, spin the Sealer Wheel. While spinning
the Sealer Wheel, turn the screw clockwise until the wheel no longer spins freely,
then turn the screw another 1/8 turn. The wheel should be firmly in contact with the
tape.
Adjust the seal roller pressure until the PSA adhesive is firmly adhered to the
carrier tape. Experience will allow the operator to judge the correct adjustment by
feel. Repeat for the other sealer wheel.
Step 5:
Setup
Output
PSA
SEALER
Inner Seal Adjust
Outer Seal Adjust
Position Locks
PSA Seal
Adjustment
Screw
Pressure


 To Next Page