Maintenance2751−3/A1
Winterthur Gas & Diesel Ltd.
4/ 5
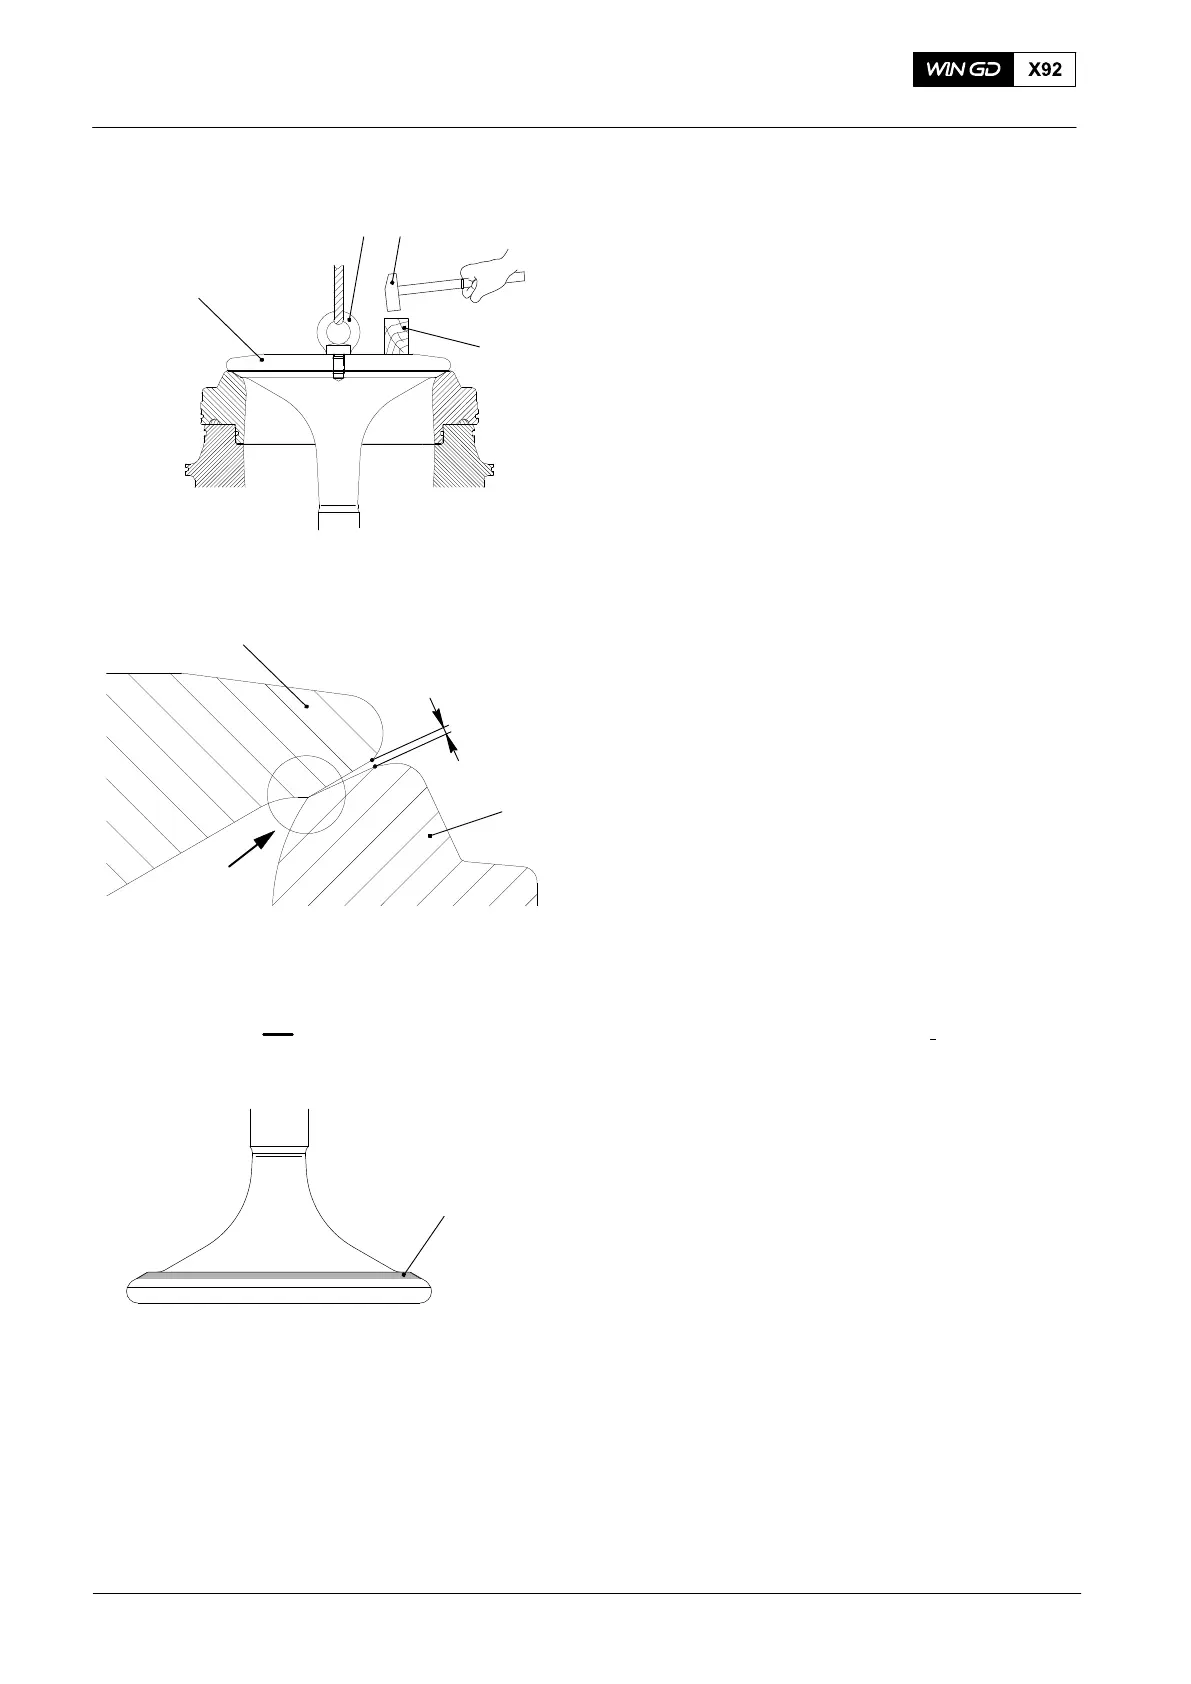
5. Valve seat − check
You do this procedure to make sure that the
sealing face of the valve spindle correctly
touches the sealing face of the valve seat.
1) Put a thin layer of engineer’s blue paste
on the sealing face of the valve spindle
(9) ,see Fig. 5.
2) Lift the valve spindle with an M16 eye
bolt and put the valve spindle (9) in
position in the valve guide bush.
3) Put the wooden block (10) on the valve
spindle (9).
Note: During the step below, do not turn
the valve spindle (9) because this
can cause the sealing faces to
seize.
1) Tap the wooden block (10) with the
hammer (7) three of four times.
2) Use the feeler gage 94122 to do a
check of the clearance between the
sealing faces of the valve spindle (9)
and valve seat (1), see Fig. 6.
The grinded angles are ok when the
clearance X= 0.12mm to 0.15 mm.
3) Remove the valve spindle (9) from the
guide bush.
4) Check the marks of the engineer’s blue
paste. The contact surface must be
equally on the inner part of the valve
spindle seat, see View I
.
2015
Valve Seat − Replace / Grind
78
003.457/00
9
10
003.455/00
I
I
I
9
1
Engineer’s blue
paste mark
Fig. 5
Fig. 6
X