Maintenance3303−2/A1
Winterthur Gas & Diesel Ltd.
2/ 8
2. Bearing Cover −
Removal
1) Remove the round nuts (1), refer to the
procedure in 9403−4 paragraph 2.
2) Operate the manual ratchets (H2, H3)
to carefully lower the bearing cover (3).
3) Do an inspection of the bearing
shell (4, Fig. 1).
4) If the bearing shell (4) is in good
condition, lower the bearing cover to
the bottom of the crankcase for further
maintenance works.
5) If you want to remove the bearing
cover, proceed as follows:
6) Attach the round sling 94038-015 with
a suitable shackle to the gallery, see
Fig.2.
7) Attach manual ratchet 94017−029 (H4)
to the round sling 94038-015.
8) Install the deviation pipe 94117B to the
column.
9) Operate the manual ratchets H2, H3 to
move the bearing cover (1) to the fuel
side.
10) Remove the manual ratchet (H2) from
the bearing cover (1).
11) Connect the hook of the manual
ratchet (H4) to the bearing cover (1).
12) Lift the bearing cover (1) out of the
crankcase.
2015
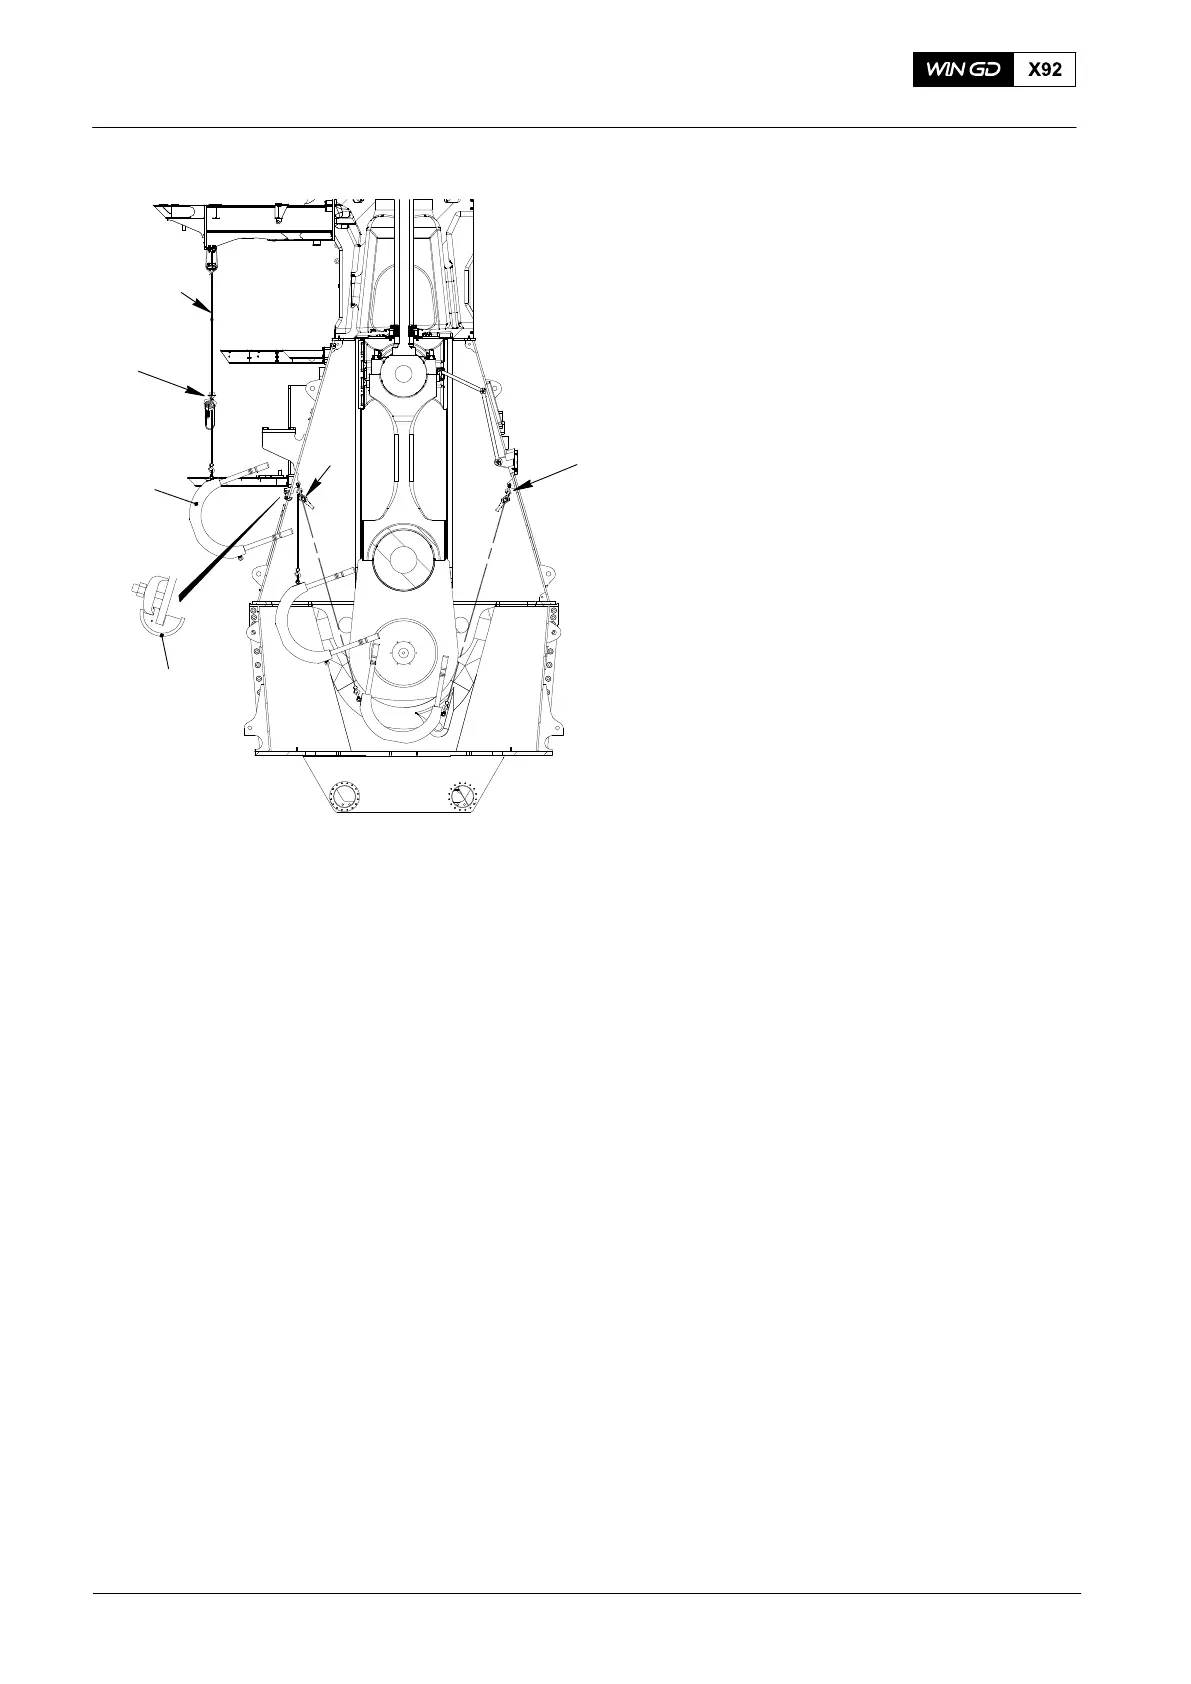
Bottom End Bearing − Removal, Inspection and Installation
Fig. 2
FUEL SIDE
WCH03013
H2
H4
EXHAUST SIDE
94117B
94038−015
H3
1