Maintenance
6420−1/A1
Winterthur Gas & Diesel Ltd.
3/ 4
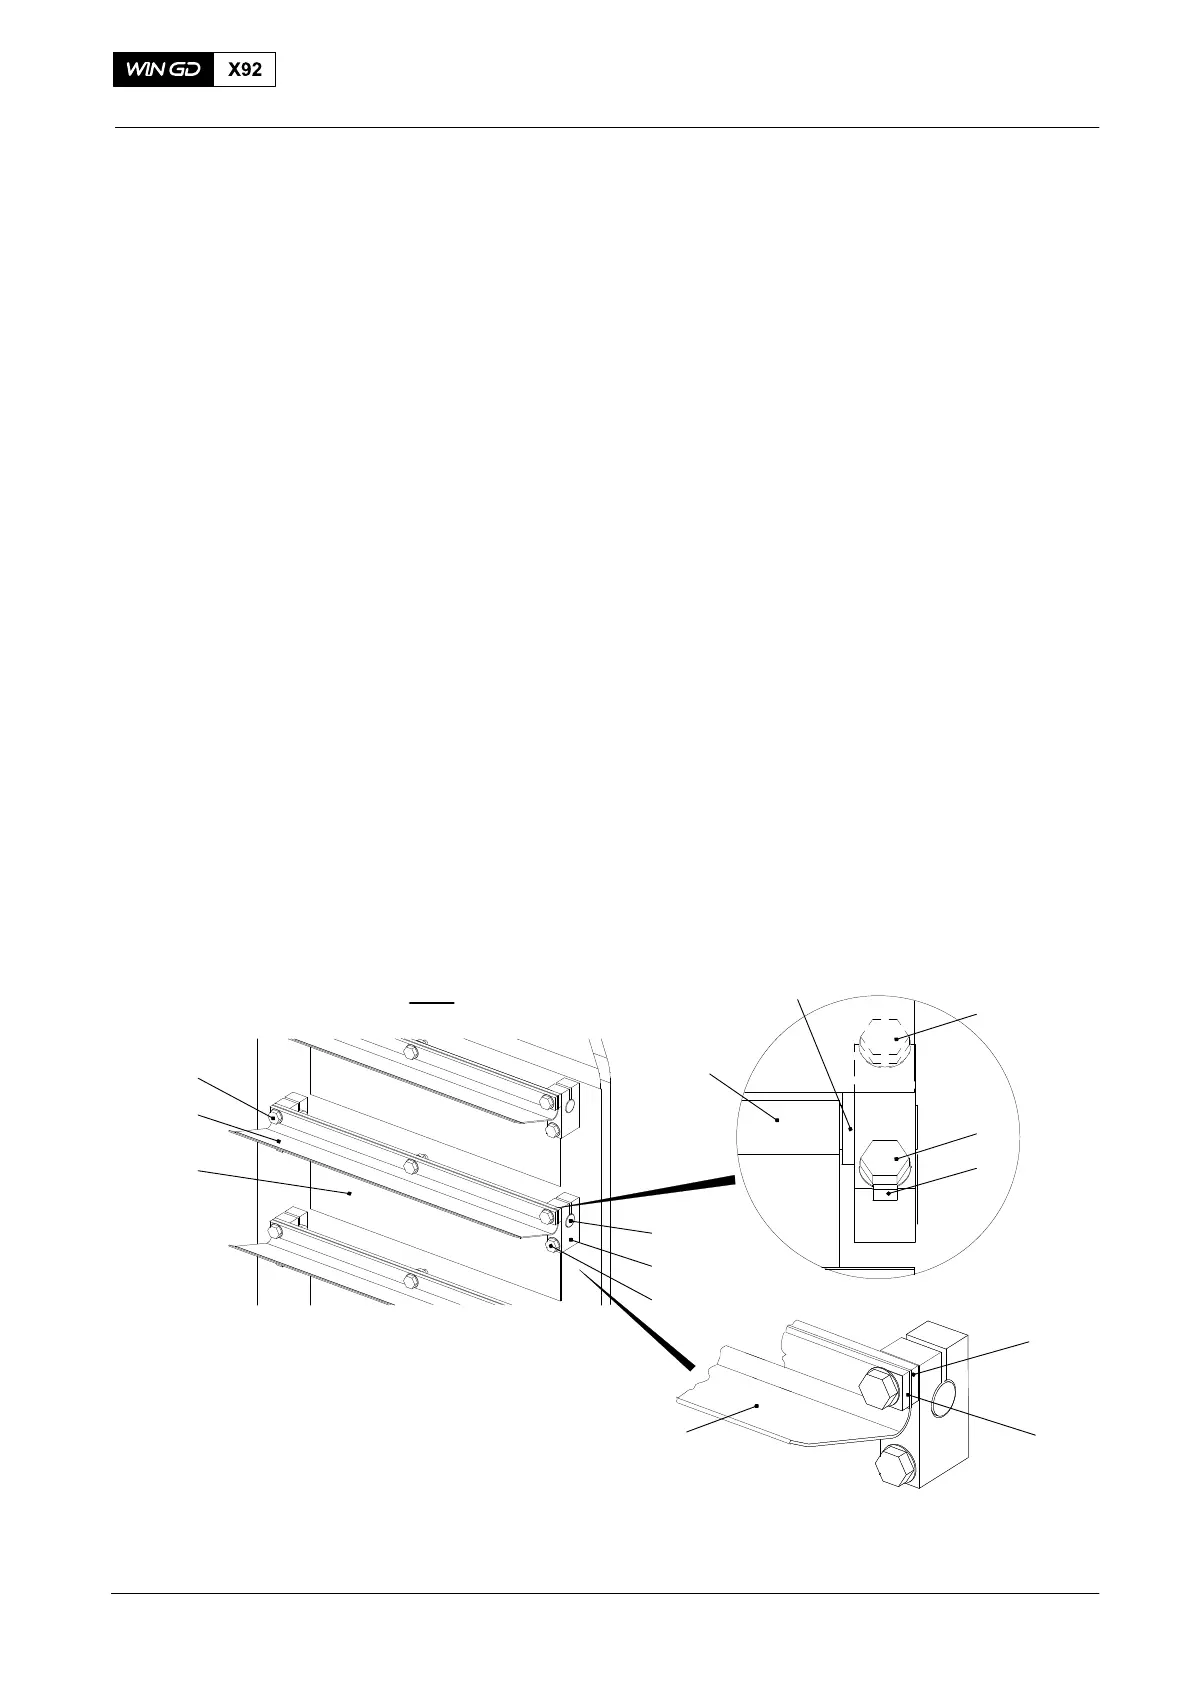
2. Flaps
2.1 Removal
1) Open the covers (4, Fig. 1) to get access to the flaps.
2) Lock the covers (4) in position with the pins (3). This will prevent unwanted
movement.
3) Remove the three screws (7, Fig. 3) and the tab washers (4).
4) Remove the two flat bars (9, 10) and the stop plate 6.
5) Remove the screw (3) and the tab washer (4).
6) Remove the guide (2), distance ring (8), flap (5) and axle (1).
2.2 Installation
1) Put the axle (1), distance ring (8), guide (2) and flap (5) in position.
2) Put the the flat bar (9), stop plate (6), flat bar (10) new locking plates (4), and screws
(7) in position. Do not tighten the screws at this step.
3) Put the screw (3) and new locking plates (4) in position. Do not tighten the screws at
this step.
4) Make sure that the axle (1) and the flap (5) can move freely.
5) Tighten the screws (3, 7).
6) Bend the tab washers (4) to lock the screws (3, 7).
7) Remove (3, Fig. 1) from the locked position.
8) Close the covers (4) and put the pins (3) in the stowage position.
1
3, 4
WCH02966
2
7, 4
5
6
1
IV
8
3
7, 4
4
9
10
6
Fig. 3: Flaps
2015
Scavenge Air Receiver − Clean and do Checks