Using the Settings menu in the printer
1. From the home screen, touch SSeettttiinnggss > FFaaxx > FFaaxx SSeettuupp > GGeenneerraall FFaaxx sseettttiinnggss.
2. Configure the settings.
Using the Embedded Web Server
1. Open a Web browser, then type the printer IP address in the address field.
To view the IP address of the printer, refer to Finding the IP Address of the Printer.
2. Click SSeettttiinnggss >> FFaaxx >> FFaaxx SSeettuupp >> GGeenneerraall FFaaxx SSeettttiinnggss.
3. Configure the settings.
4. Apply the changes.
SETTING UP FAX USING A STANDARD TELEPHONE LINE
CCAAUUTTIIOONN——SSHHOOCCKK HHAAZZAARRDD:: To avoid the risk of electrical shock, do not set up this product or make
any electrical or cabling connections, such as the power cord, fax feature, or telephone, during a lightning
storm.
CCAAUUTTIIOONN——SSHHOOCCKK HHAAZZAARRDD:: To avoid the risk of electrical shock, do not use the fax feature during a
lightning storm.
CCAAUUTTIIOONN——PPOOTTEENNTTIIAALL IINNJJUURRYY:: To reduce the risk of fire, use only a 26 AWG or larger
telecommunications (RJ-11) cord when connecting this product to the public switched telephone network.
For users in Australia, the cord must be approved by the Australian Communications and Media Authority.
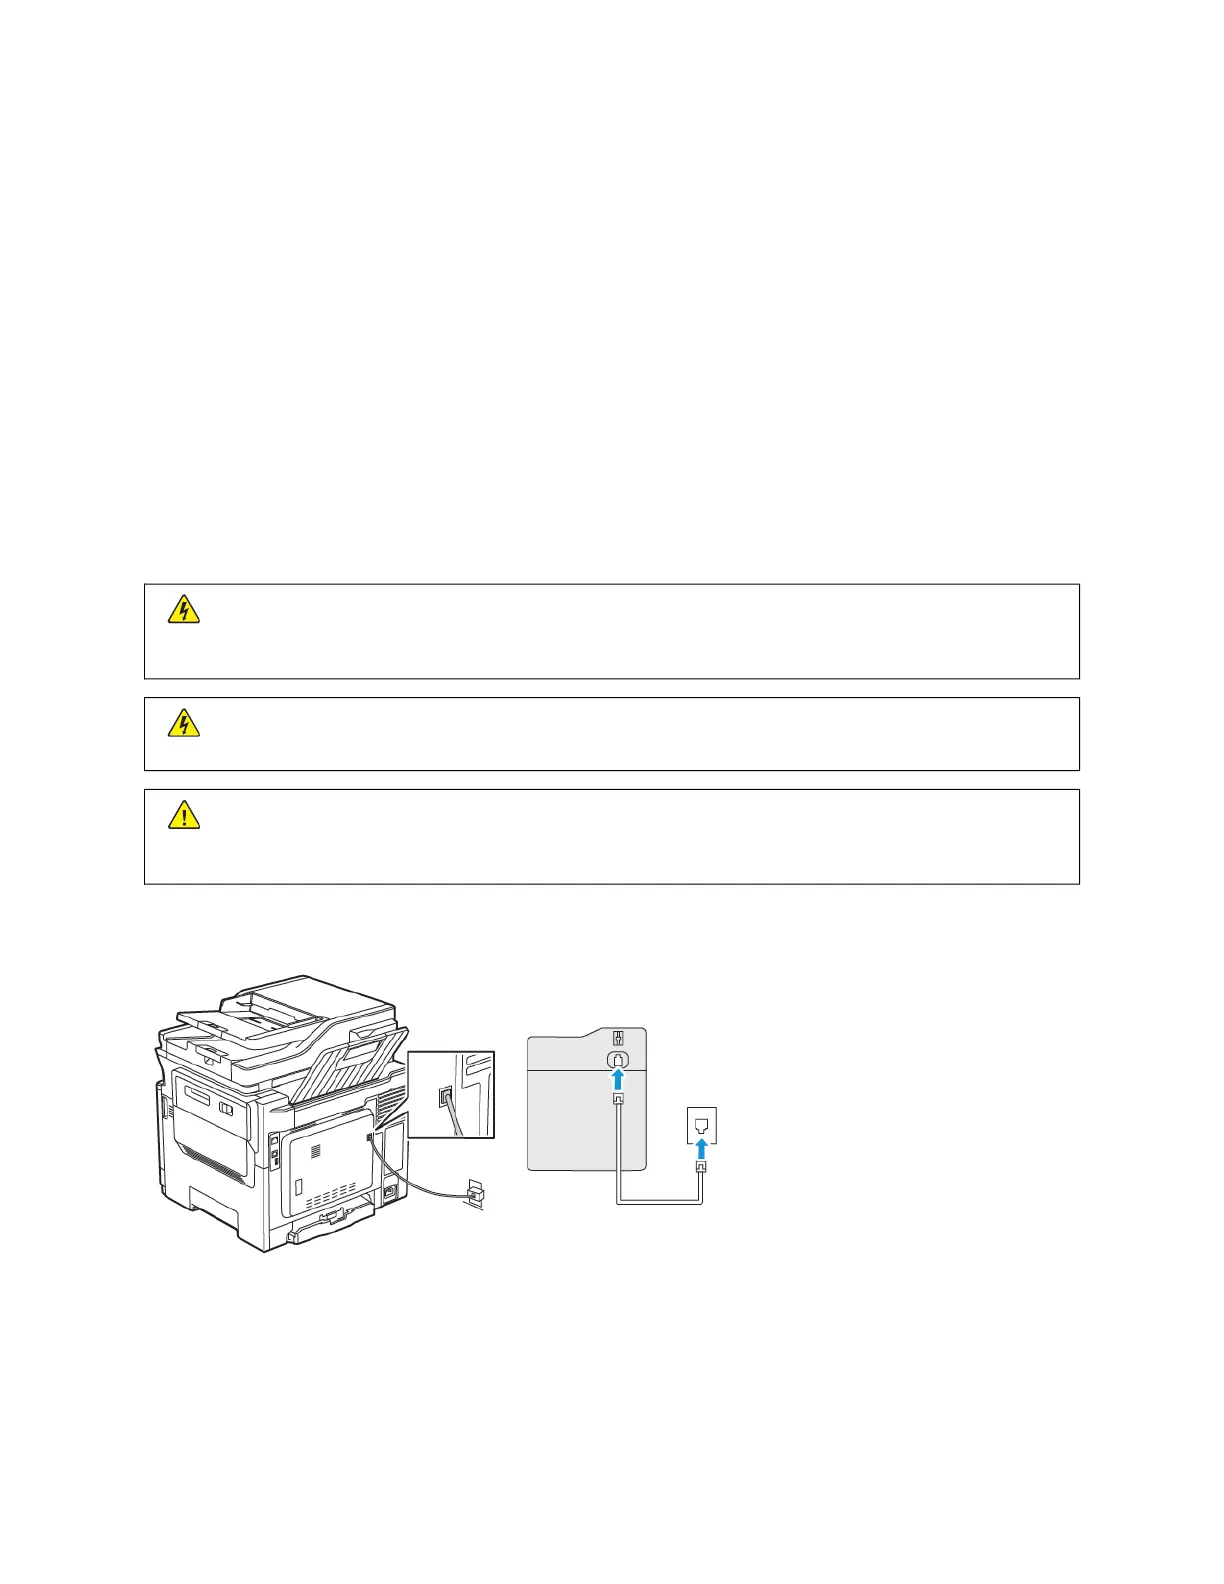
Setup 1: Printer is connected to a dedicated fax line
1. Connect one end of the telephone cable to the line port of the printer.
2. Connect the other end of the cable to an active analog wall jack.
• You can set the printer to receive faxes automatically (Auto Answer On) or manually (Auto Answer Off).
• If you want to receive faxes automatically, then set the printer to pick up on a specified number of rings.
Xerox
®
C315 Color Multifunction Printer User Guide 47
Set up, Install, and Configure