February 2013
4-316
ColorQube® 9303 Family
REP 89.1
Repairs/Adjustments
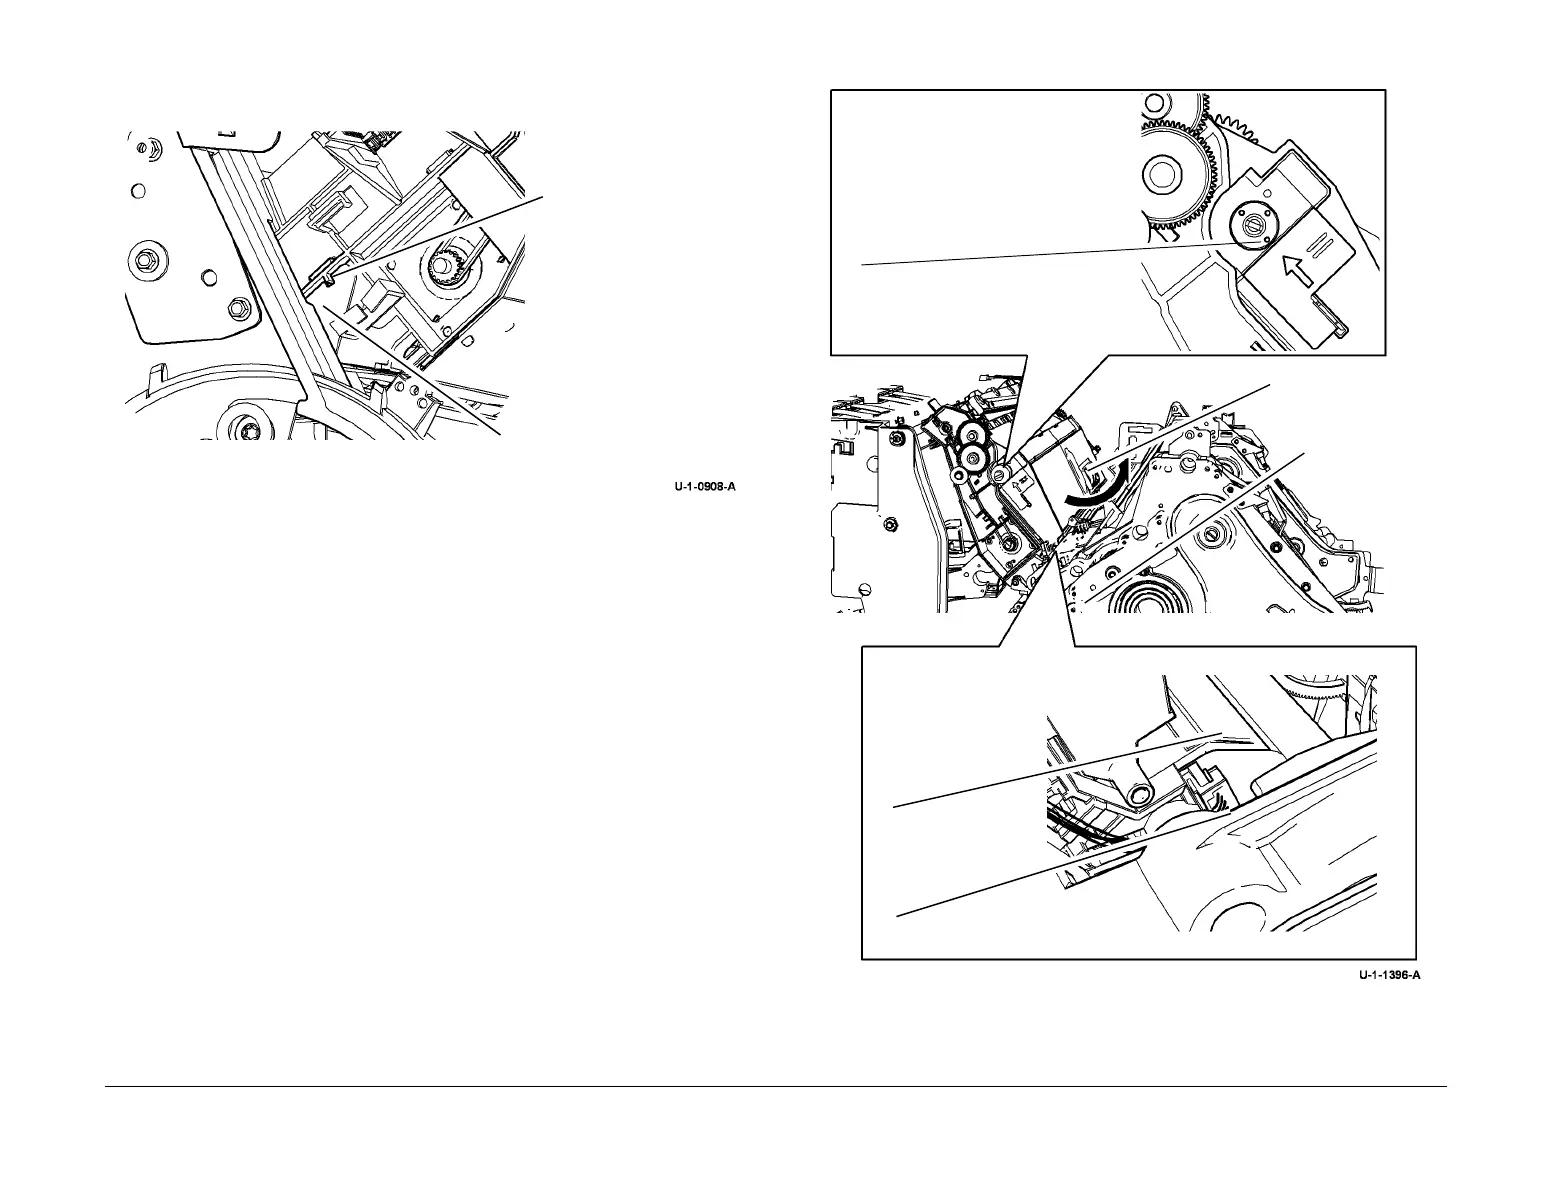
3. If the registration / preheat assembly does not seat properly, verify that the locating tab on
the rear of the registration / preheat assembly is correctly seated in the frame, Figure 3.
Figure 3 Locating tab on rear of machine
4. When installing the horizontal transport leave the single mounting screw for the registra-
tion / preheat assembly loose. Use the top of the registration / preheat assembly as a
guide for when sliding the horizontal transport into position.Tighten the screw after the
horizontal transport is installed.
5. Enter diagnostics dC131 and enter NVM ID 435-13, 435-14 and 435-15 and reset the val-
ues to zero.
NOTE: Only perform step 5 if new parts (new registration / preheat assembly or new nip A
rollers) are installed and before the dC625 routine is run.
6. Run the relevant diagnostic routines, refer to GP 37 Post Part Replacement Routines.
Lower Platelet Assembly Removal
1. Open the front door. Remove the inner cover, PL 81.11 Item 2.
2. Remove the lower platelet assembly, Figure 4.
Figure 4 Removal
Replacement
1. Replacement is the reverse of the removal procedure.
Correct seating position of
the locating tab in the frame
Frame
1
To open the cover assembly. Turn the
dial to align the hole on the dial with the
arrow, as shown.
3
Remove 1 screw
2
Raise the cover
assembly.
4
Disconnect the connector.
5
Remove the lower plate
assembly.
 Loading...


