February 2013
4-360
ColorQube® 9303 Family
REP 91.25
Repairs/Adjustments
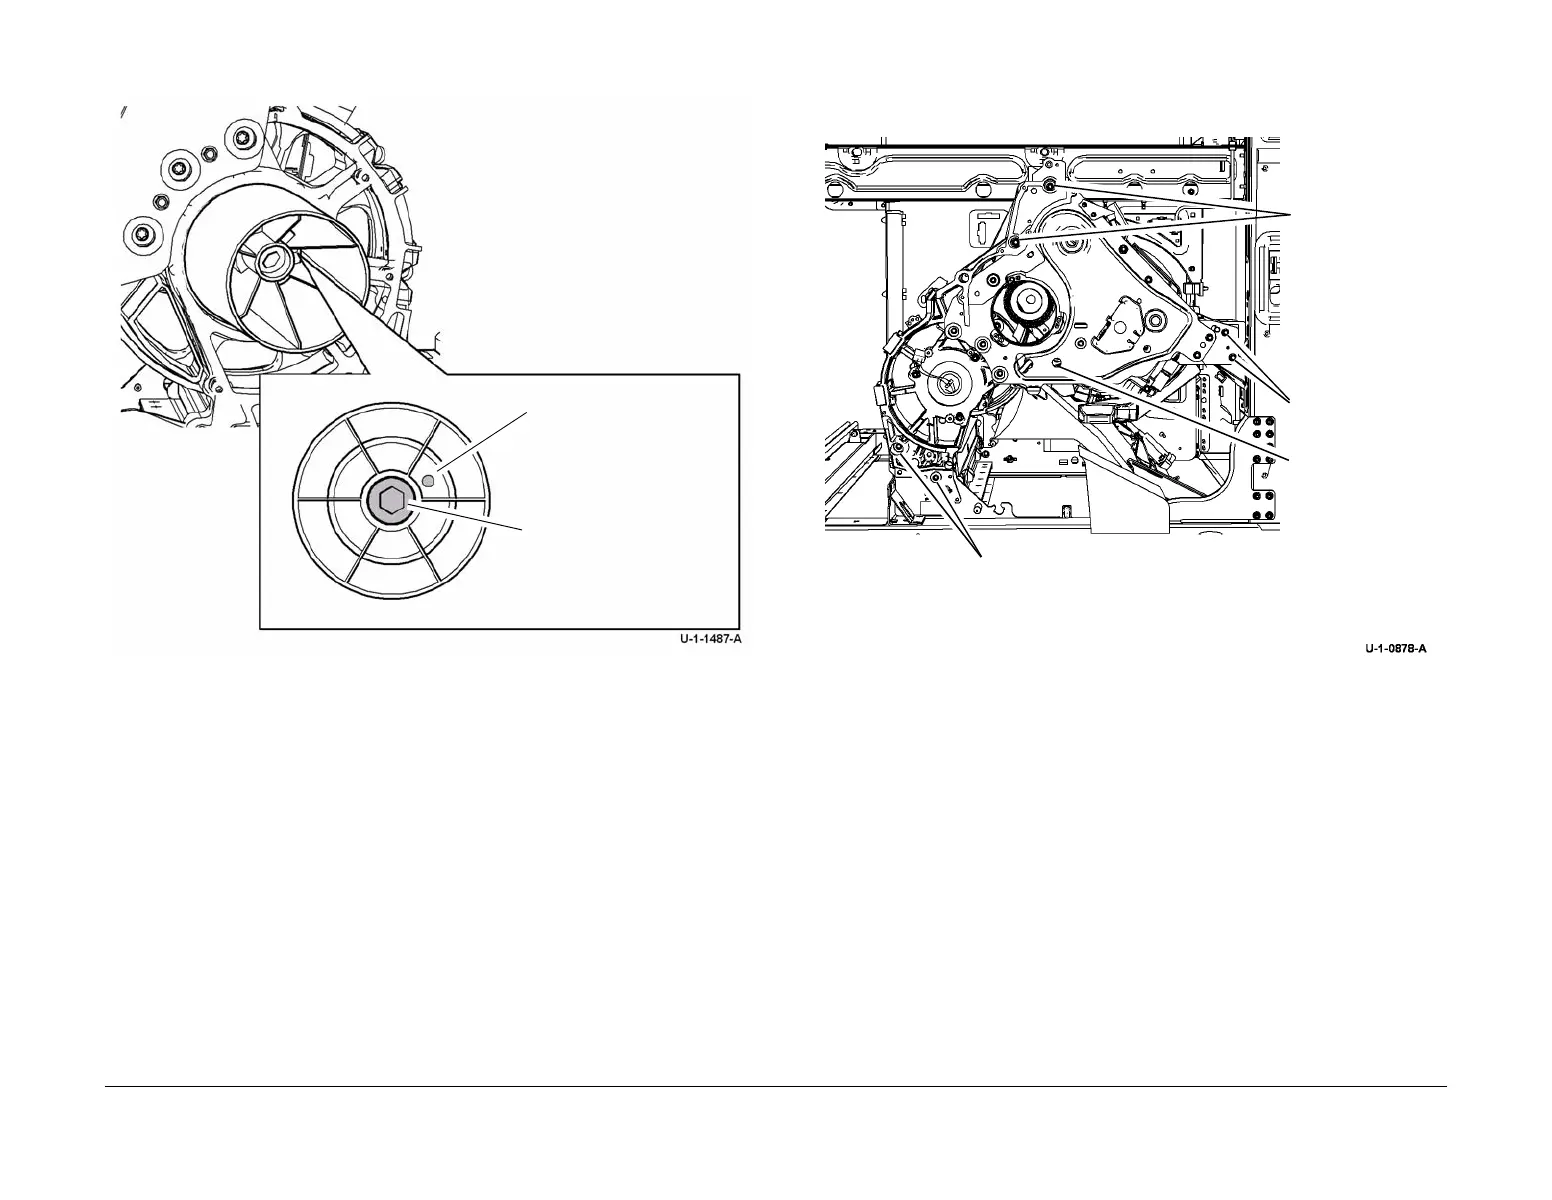
17. Install the removal drum alignment tool on the rear of the drum prior to removal, Figure 1.
Figure 1 Drum alignment tool
18. Prepare to remove drum and front drum frame assembly, Figure 2.
Figure 2 Preparation
1
Align the hole in the tool
with the guide pin.
2
Tighten the T30 screw to
secure the tool
1
Remove 2 screws (T30). High torque is
required to remove the screws.
3
Remove 2 screws.
4
Remove 2
recessed long
screws.
2
Remove screw. If
transfix linkage is
obstructing the
removal, rotate the
transfix drive screw,
5, until it no longer
obstructs the screw

 Loading...


