February 2013
4-361
ColorQube® 9303 Family
REP 91.25
Repairs/Adjustments
CAUTION
If the marking unit has not been removed. Take care not to contact the printheads with the
drum during removal.
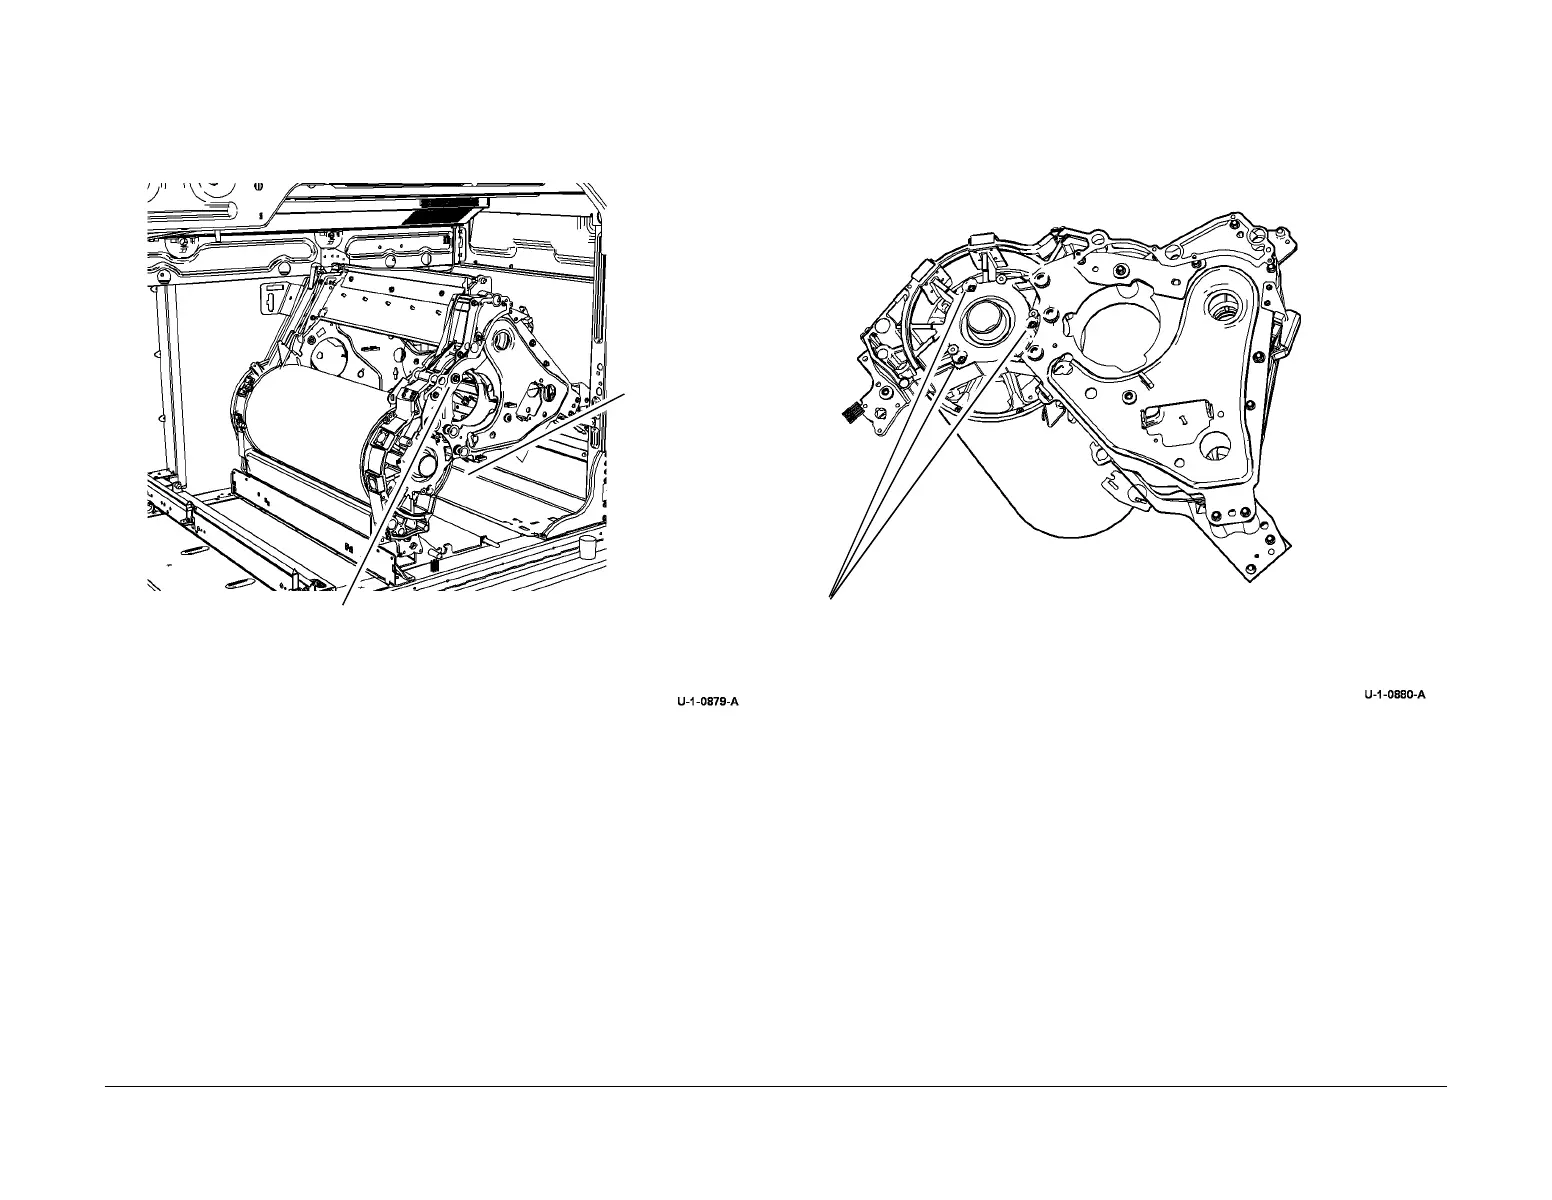
19. Remove drum and front drum frame assembly, Figure 3.
Figure 3 Removal
20. Release the drum from the front drum frame assembly, Figure 4.
NOTE: Use the top section of the replacement drum packaging to support the old drum.
This will help to keep the drum stable during the separation.
Figure 4 Release the drum
Replacement
Replacement is the reverse of the removal procedure. Observe the following points at the
appropriate steps.
NOTE: High pressure bearing grease, PL 26.11 Item 3, is used in the following locations.
• Drum bearing housing in the front drum frame casting.
• Drum pulley bearing housing in the rear drum frame casting.
• Outside diameter of the transfix roller bearing holder at the front of the transfix roller.
During normal removal and replacement the existing bearing grease used during manufacture
will be sufficient. Only apply grease when both sides of any bearing surface are being
replaced, or if the surfaces have been wiped clean. Apply the grease very sparingly.
1. A replacement drum will have a drum protector and drum alignment tool supplied with the
drum. Install these items onto the drum before installing the drum.
2. Attach the drum to the front drum frame assembly.
3
Remove the drum and
front drum frame assem-
bly by pulling them away
from the rear assembly.
1
Support the rear
underside of the
drum with right
hand through the
opening.
2
Hold front assembly
with left hand.
1
Remove 3 screws.
2
Separate the drum and front
drum frame assembly.
 Loading...


