February 2013
6-18
ColorQube® 9303 Family
GP 6
General Procedures/Information
CAUTION
Ensure the carriages are both in the parked position. If the marking unit is moved while the car-
riages are not parked the printheads can contact the drum.
2. Ensure the carriages are in the parked position, Figure 4 and Figure 5.
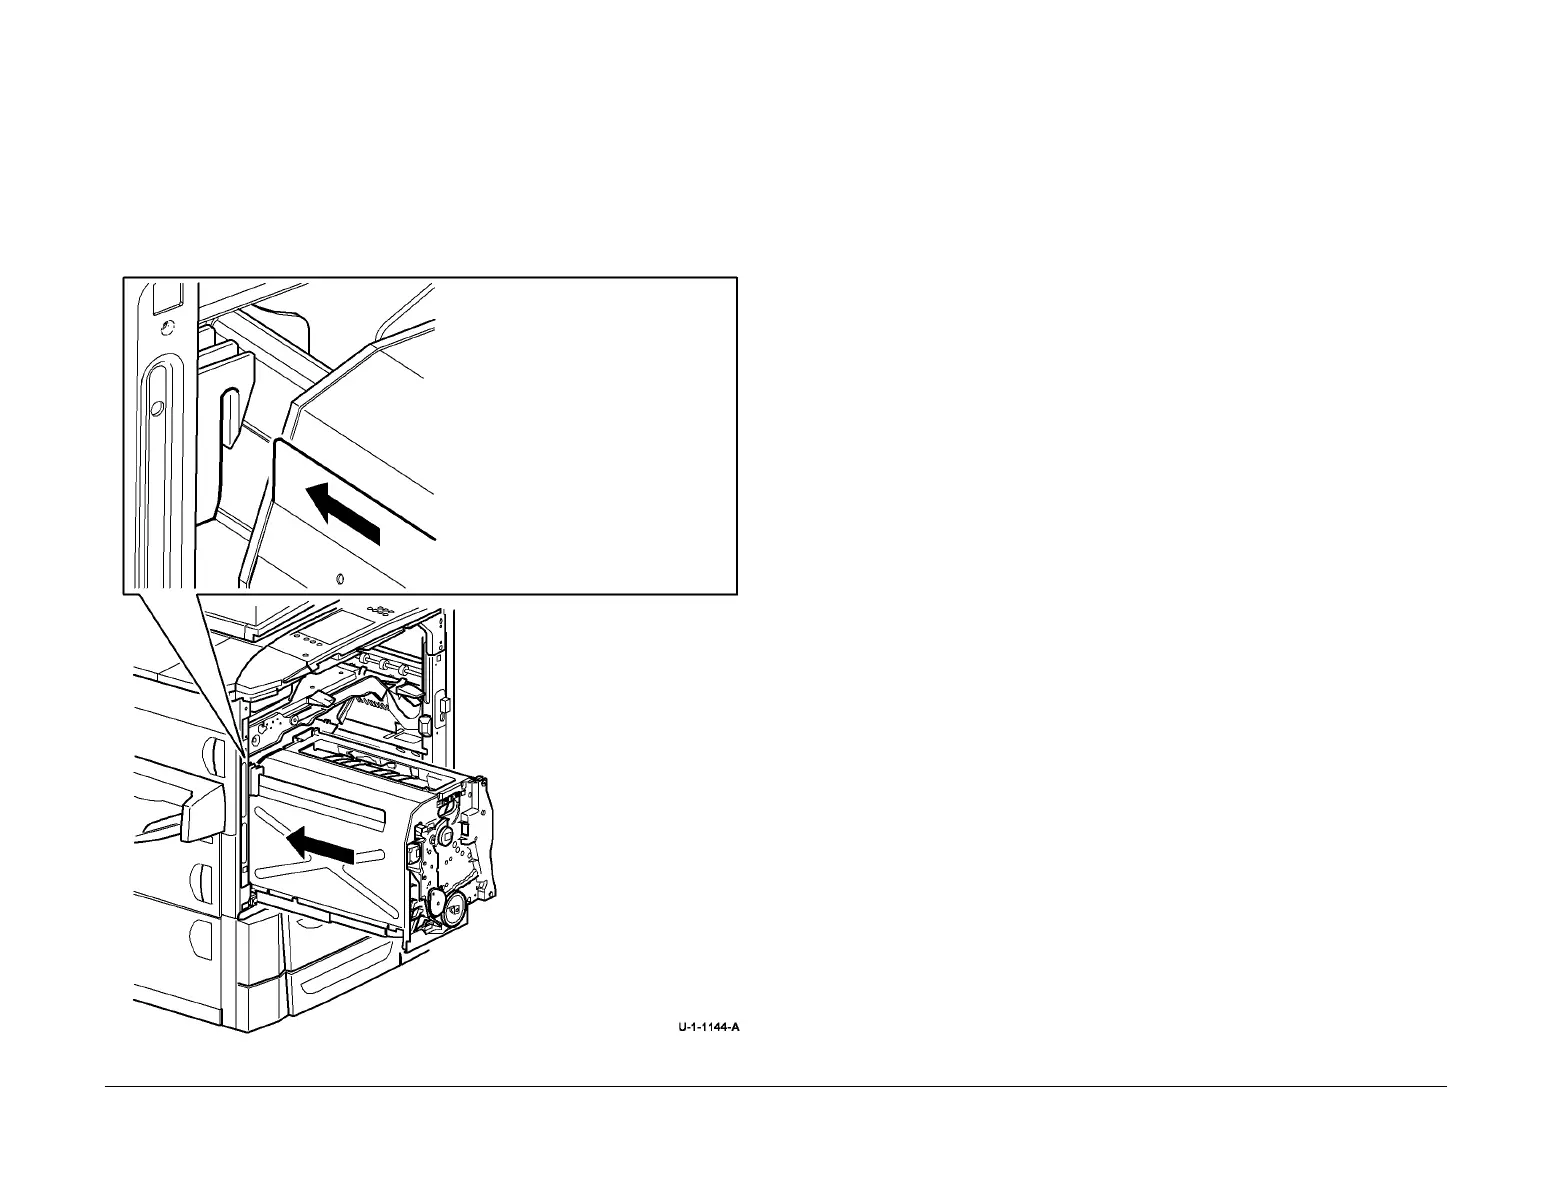
3. Move the marking unit into the operation position, Figure 3.
NOTE: The marking unit often sticks during the last bit of travel going into the operating
position. Push directly on the two screw hole locations, located at the bottom of the frame
to fully seat the marking unit.
Figure 3 Marking unit into operation position
4. Reinstall the waste tray.
5. Reinstall the two screws to secure the marking unit.
6. Reinstall the inner cover.
Move the Carriages to the Parked Position
1. Move the upper carriage to the parked position, Figure 4.
1
Push the marking unit into
the machine.
CAUTION
Ensure the guide is correctly positioned.
 Loading...


