February 2013
3-35
ColorQube® 9303 Family
IQ 9
Image Quality
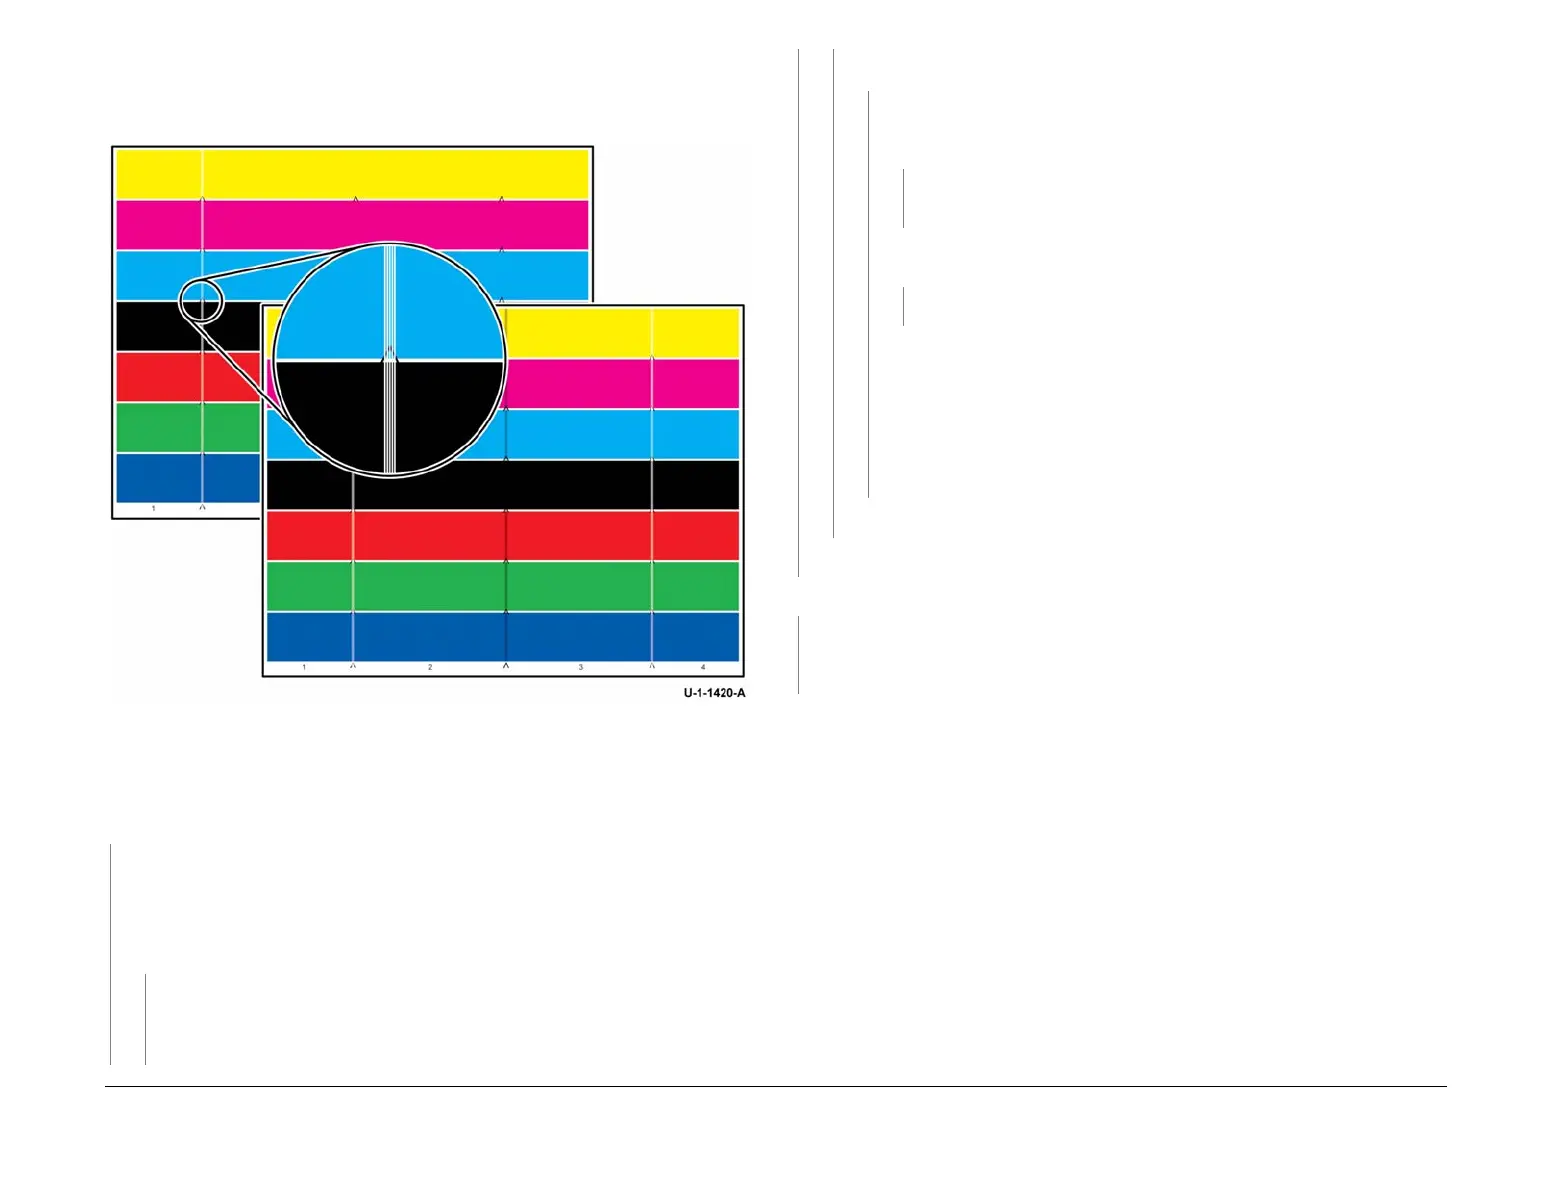
X-Stitch Defect Checkout
Refer to Figure 1.
Figure 1 X-stitch defect
Procedure
Perform dC971 Head to Head Alignment Adjustment up to 3 times. Print TP 16 Stitch Identifi-
cation Test Pages after each adjustment. The test pages are good.
YN
Manually disable the IOD align calibration:
1. Enter dC131 NVM read/write NVM ID 490-41 and change value to 3.
2. Enter dC971 and start the routine.
3. Enter dC612 and print TP 16 and check the identification test pages.
The test pages are good.
YN
Manually re-enable the IOD align calibration:
1. Enter dC131 NVM read/write NVM ID 490-41 and change value to 4.
2. Enter dC971 and start the routine.
3. Enter dC612 and print TP 16 and check the identification test pages.
The test pages are good.
YN
Perform dC914 Head to Head Alignment Test. Check the motion of the print-
head stitch adjust motors, PL 91.20 Item 4 and PL 91.25 Item 4. The stitch
adjust motors run.
YN
Check the motion of the printhead X-axis drive motors, PL 91.20 Item 5
and PL 91.25 Item 5.
Go to the 91-504-00, 91-505-00 Printhead Stitch Motor Over Current RAP. The
X-axis drive motors run.
YN
Go to the 91-510-00, 91-511-00 X Axis Motor Over Current RAP.
Print TP 16. Check the test pages for good alignment following motion testing.
If the defect remains, perform the following:
1. Check for obstructions that block carriage and printhead motion.
2. Check the stitch adjust and roll adjust motor lead screws, PL 91.20 Item
21 and PL 91.25 Item 21 for cracks. Install new components as necessary.
3. Clean the IOD, refer to GP 27 Cleaning Procedure.
4. Clean the drum, refer to GP 27 Cleaning Procedure.
Perform SCP 5 Final Actions.
Perform SCP 5 Final Actions.
Print the colour bands test page, TP 26. The test page is good.
YN
Go to the Printhead Maintenance Checkout.
If the stitch defect is still present, swap the print heads around to move the artifact to the
outside of the page.
Perform SCP 5 Final Actions.
A
A
B
B
 Loading...


