February 2013
4-192
ColorQube® 9303 Family
REP 12.53-171
Repairs/Adjustments
REP 12.53-171 Compiler Paper Pusher
Parts List on PL 12.115.
Removal
WARNING
Take care during this procedure. Sharp edges may be present that can cause injury.
WARNING
Switch off the electricity to the machine. Refer to GP 14. Disconnect the power cord
from the customer supply while performing tasks that do not need electricity. Electricity
can cause death or injury. Moving parts can cause injury.
1. Remove the front, rear and top covers REP 12.1-171.
2. Remove the stacker motor gearbox, REP 12.12-171.
3. Remove the stacker shaft front bearing bracket and the exit guide plate front and rear
screws, Figure 1.
Figure 1 Stacker Shaft Front Bearing Bracket
4. Remove the pusher driving motor assembly, REP 12.51-171.
5. Remove the pusher sensor assembly, REP 12.54-171.
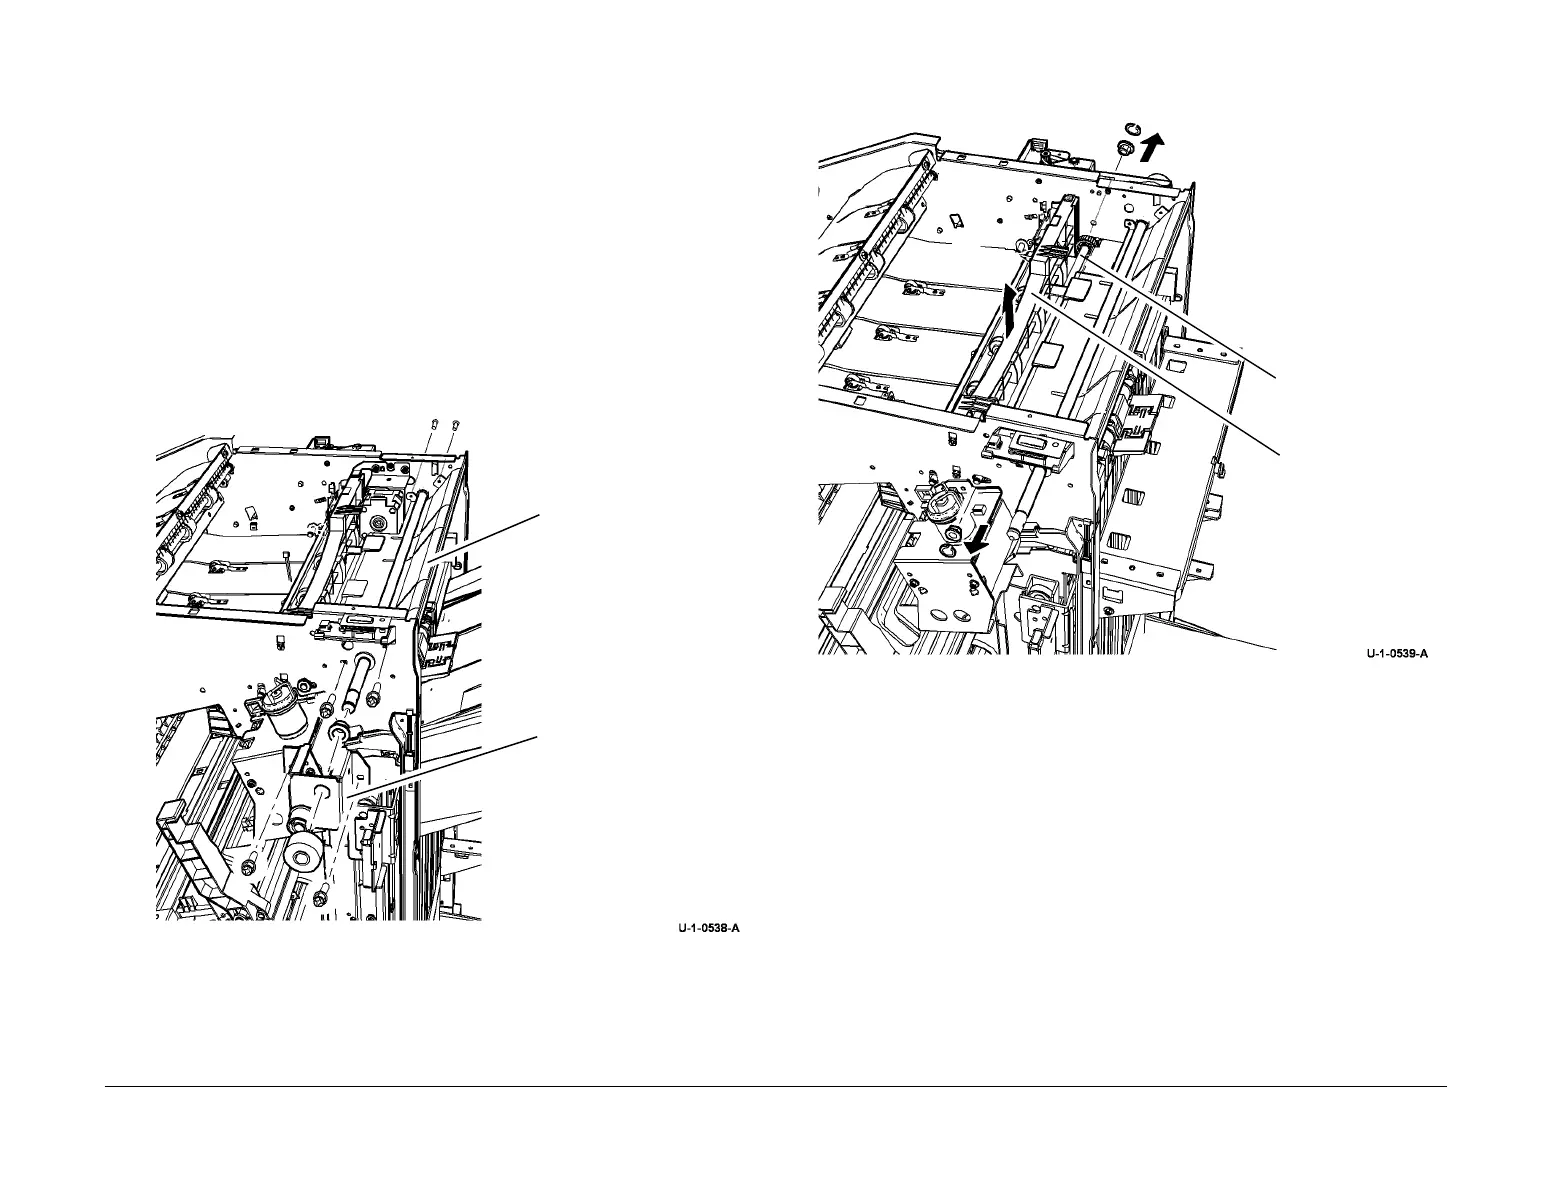
6. Remove the front and rear screws and push the left edge of the compiler exit guide plate
downward away from the pinion shaft, Figure 2.
Figure 2 Pusher Guide and Pinion Shaft
7. Remove the pinion shaft front and rear circlips, the shaft bearings and the front bearing
thrust washers then remove the pinion shaft, Figure 2.
8. Lift the pusher module out of the guides. The mylar strips and dampers are attached to
the pusher module, Figure 2.
Replacement
Reverse the removal procedures to reinstall the compiler paper pusher.
Stacker front bearing
bracket
Exit Guide Plate
Pusher Module
Pinion Shaft
 Loading...


