February 2013
4-215
ColorQube® 9303 Family
REP 12.68-171
Repairs/Adjustments
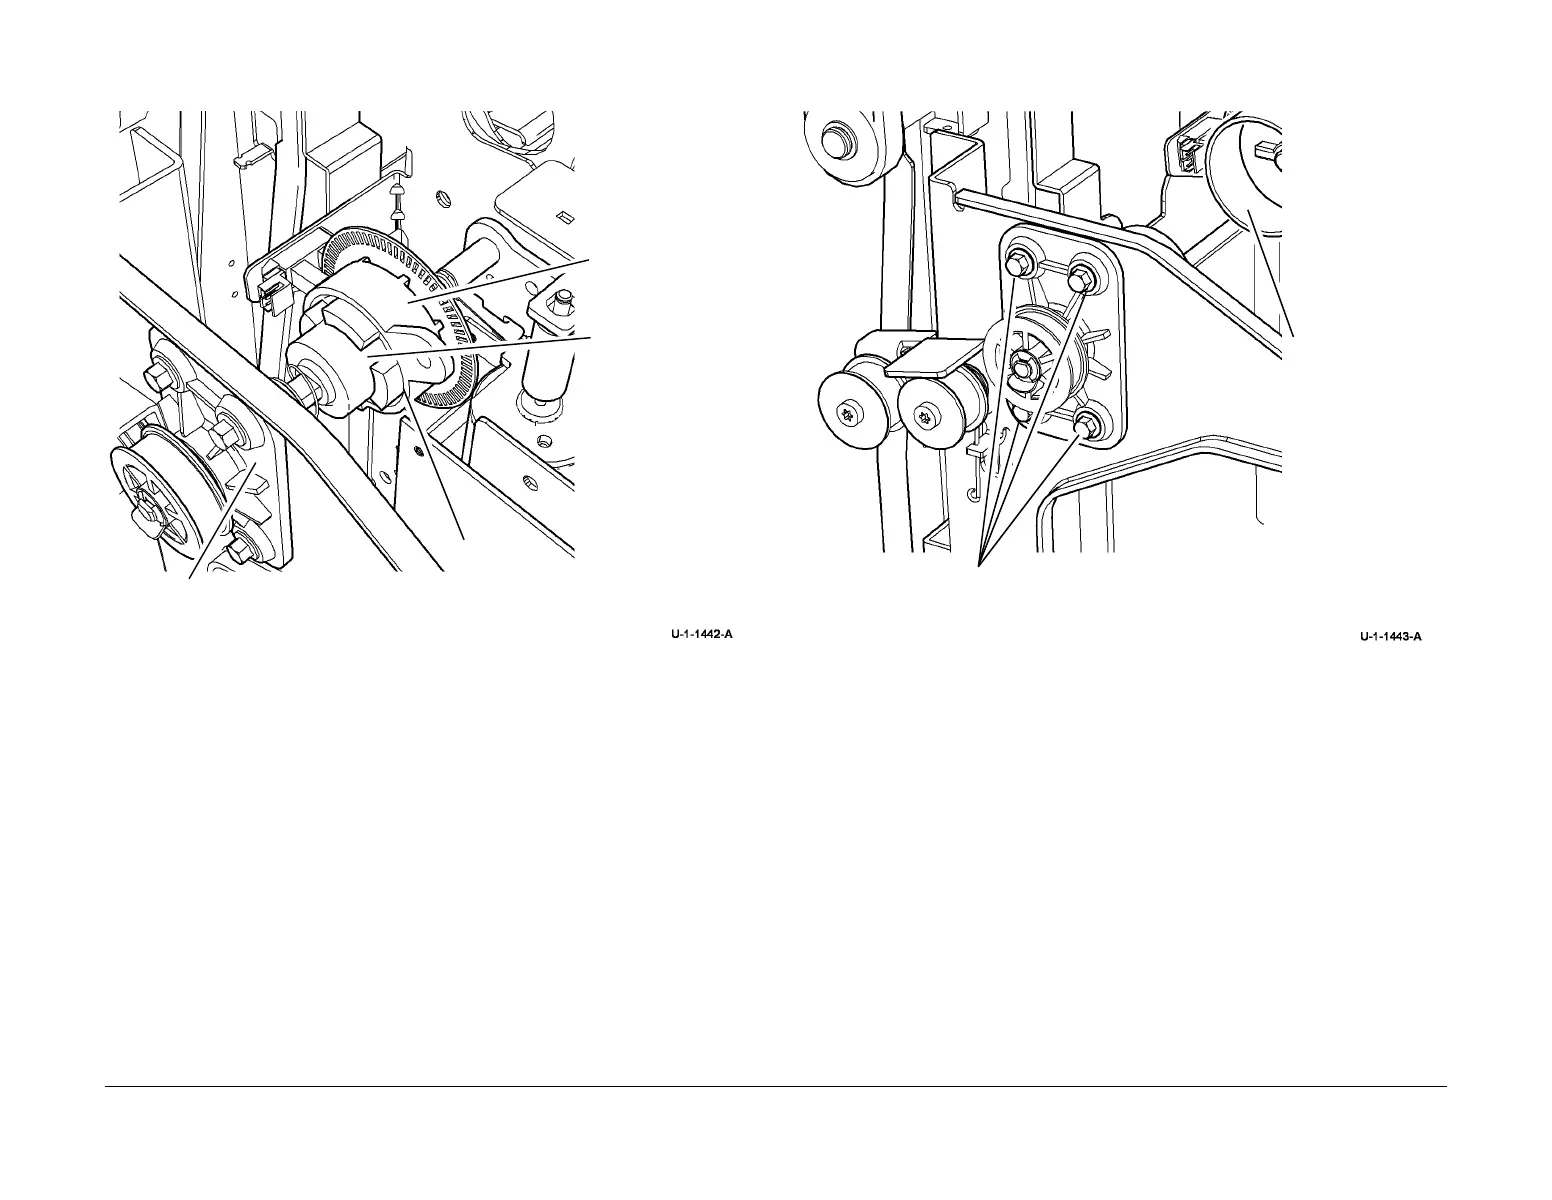
6. Centralize the coupler alignment tool with the drive unit coupler, Figure 5.
Figure 5 Centralize the drive coupler
7. Secure the drive unit in the centralized position, Figure 6.
Figure 6 Secure the drive unit
8. Attach the alignment tool onto the drive assembly for future use.
9. Carefully slide back the BM and engage the drive unit coupler.
10. Check that the harnesses do not obstruct the BM crease roll motor encoder disc.
11. Reverse the removal procedures to replace the tri-folder
1
Adjust the position of the
drive unit.
2
Ensure the drive coupler is centralized
with the alignment tool.
Drive coupler
Alignment tool
1
Secure the drive unit, 4 screws.
2
Slide out the BM
and remove the
coupler alignment
tool.
 Loading...


