7-35
Timing belt
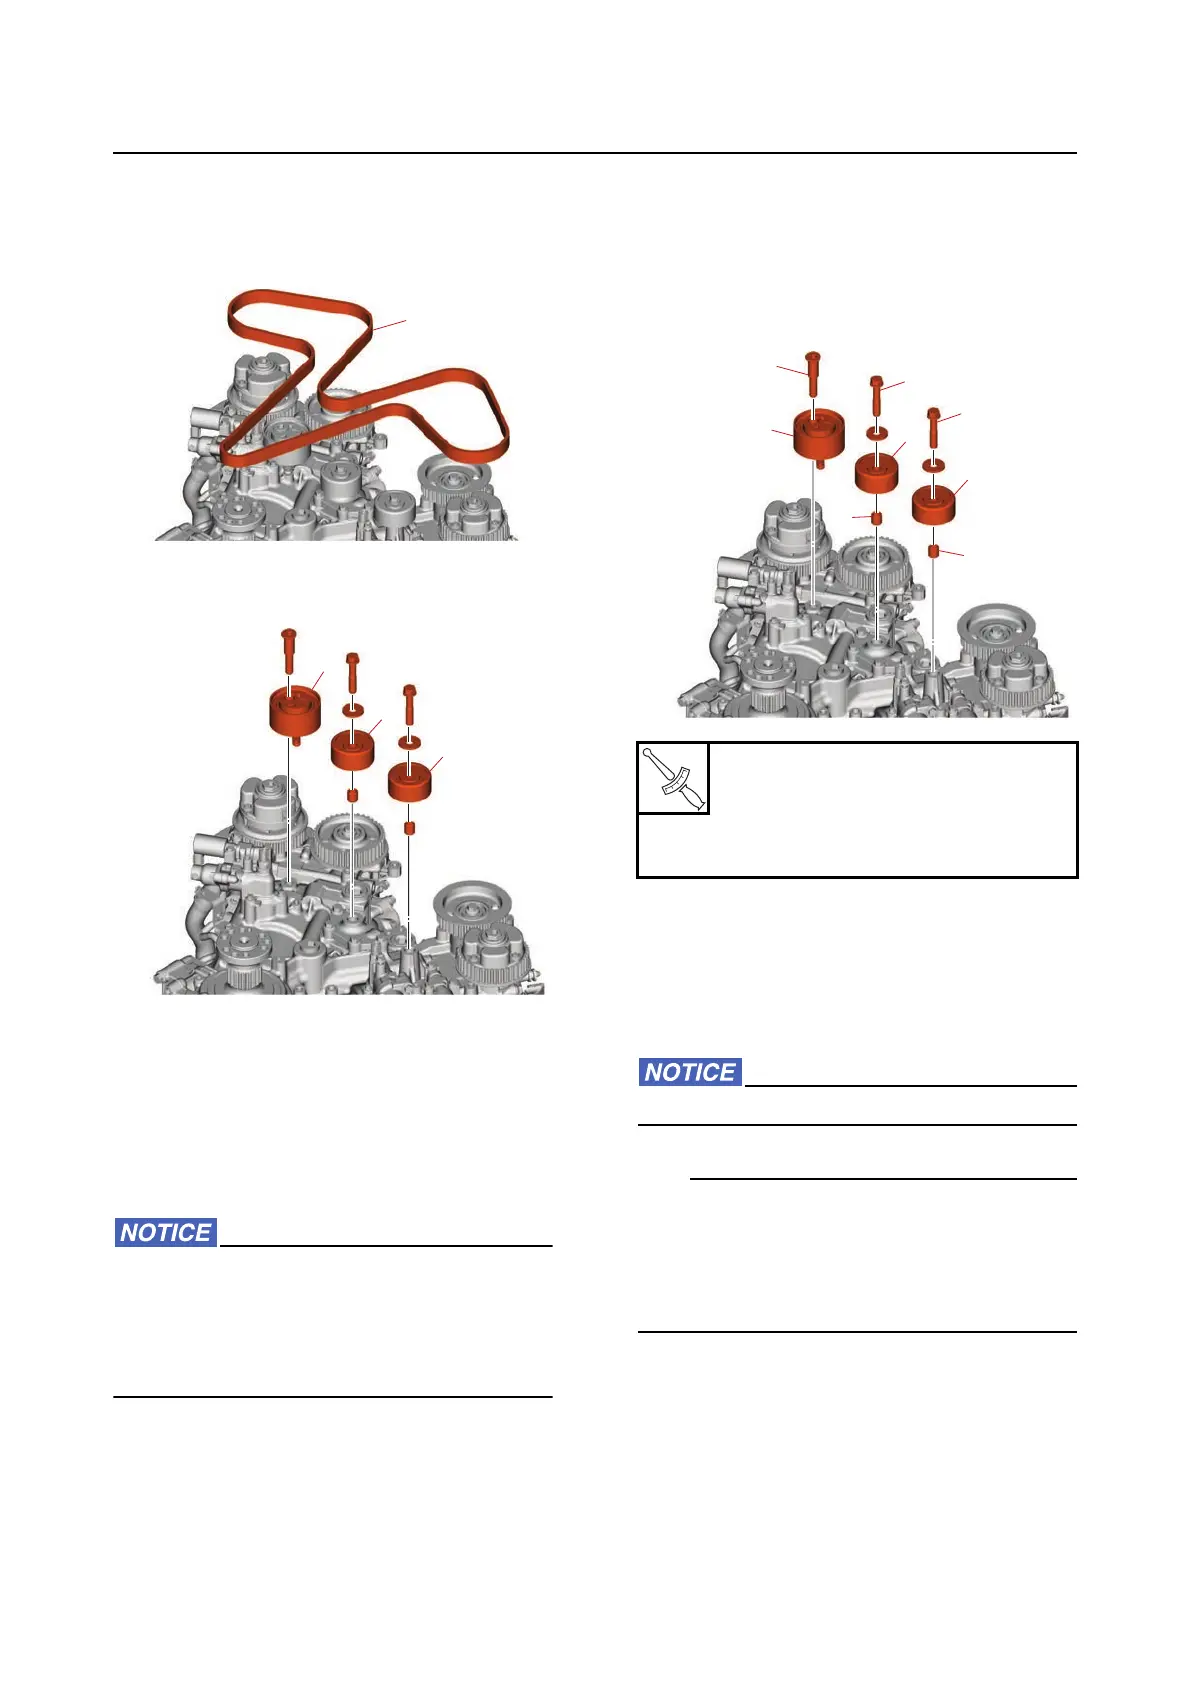
e. Remove the timing belt “1” from the VCT
assembly (PORT) or driven sprocket
(STBD), and then remove it from the
crankshaft.
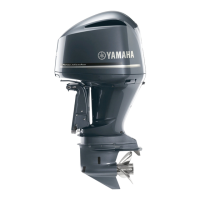
f. Remove the timing belt tensioner “1” and
pulleys “2”.
Checking the timing belt
1. Check:
• Interior and exterior of the timing belt
Cracked/damaged/worn Replace.
Installing the timing belt
When the timing belt is not installed, do not
turn the crankshaft, driven sprocket or VCT
assembly. Otherwise, the pistons and
valves could collide with each other and be
damaged.
1. Install:
• Timing belt
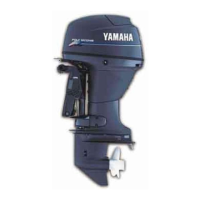
a. Install the timing belt tensioner “1”, collars
“2”, and pulleys “3”, and then tighten the
timing belt tensioner bolt “4” and pulley
bolts “5” to the specified torque.
b. Install the timing belt “1” onto the crank-
shaft so that the part number “a” is in the
upright position and the belt position mark
“b” is aligned with the small “▲” mark on
the crankshaft.
Do not apply grease or oil to the timing belt.
Before installing the timing belt, make sure that
the marks on the crankshaft and cylinder block
are aligned. Also, make sure that the marks on
the VCT assemblies and driven sprockets are
aligned. See “Removing the timing belt” (7-34).
1
1
2
2
Timing belt tensioner bolt “4”
39 N·m (3.9 kgf·m, 29 lb·ft)
Pulley bolt “5”
39 N·m (3.9 kgf·m, 29 lb·ft)
3
3
2
2
5
5
4
1



 To Next Page