3-7
Battery installation
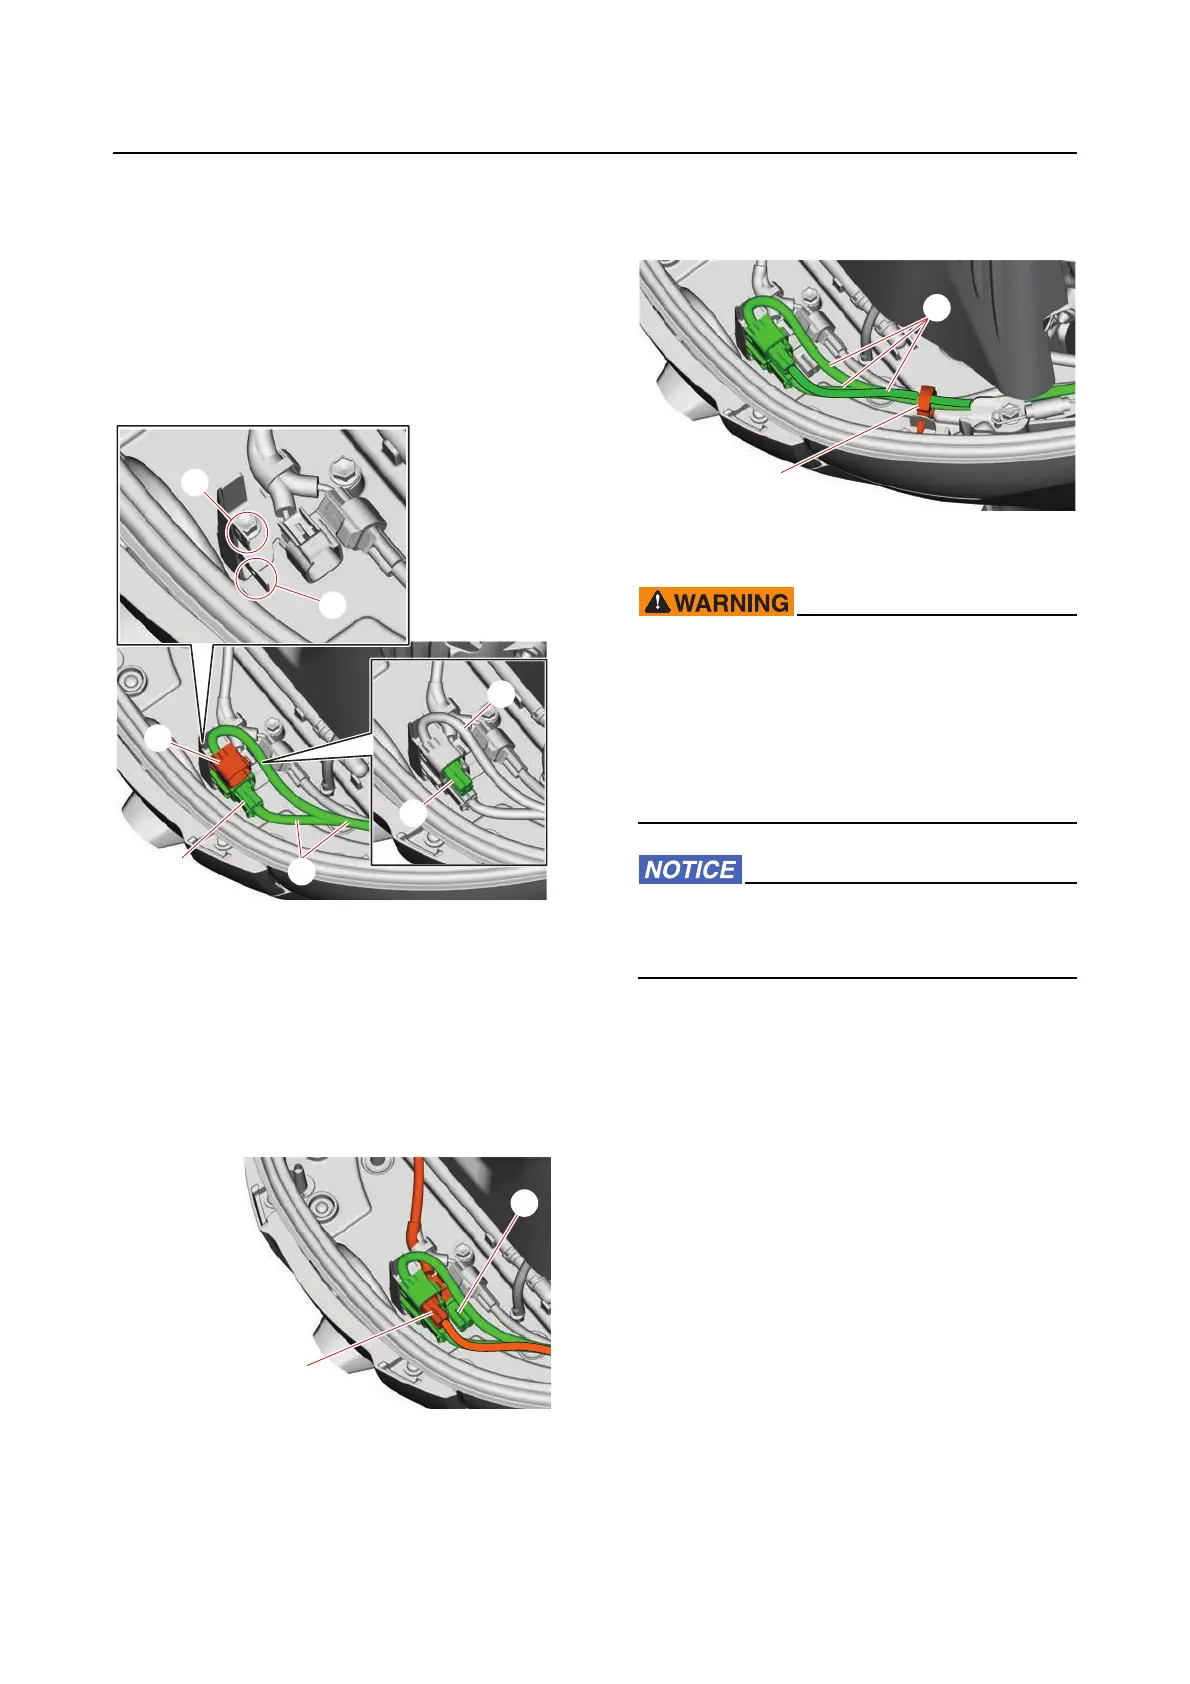
3. Route:
• SCU communication lead “2”
(through the bottom cowling)
4. Install:
• SCU communication lead coupler (6P) “a”
(onto the tab “b”)
• SCU communication lead coupler (4P) “c”
(onto the tab “d”)
5. Connect:
• SCU signal coupler (4P) “a”
(to the SCU communication lead coupler
(4P))
6. Install:
•Cap “1”
(to the main wire harness coupler (4P))
7. Fasten:
• SCU communication lead “1”
(using the holder “2”)
Battery installation
• Make sure to connect the battery properly
and select the proper cable sizes. Other-
wise, a fire could result.
• If an optional isolator lead is installed and
connected to a house battery, overcurrent
protection in compliance with ABYC (E-
11) or equivalent must be provided.
Do not reverse the battery connections.
Otherwise, the charging system could be
damaged.
a
c
1
2
2
d
b
1
a
2
1



 To Next Page