8-34
Drive shaft and lower case (regular rotation model)
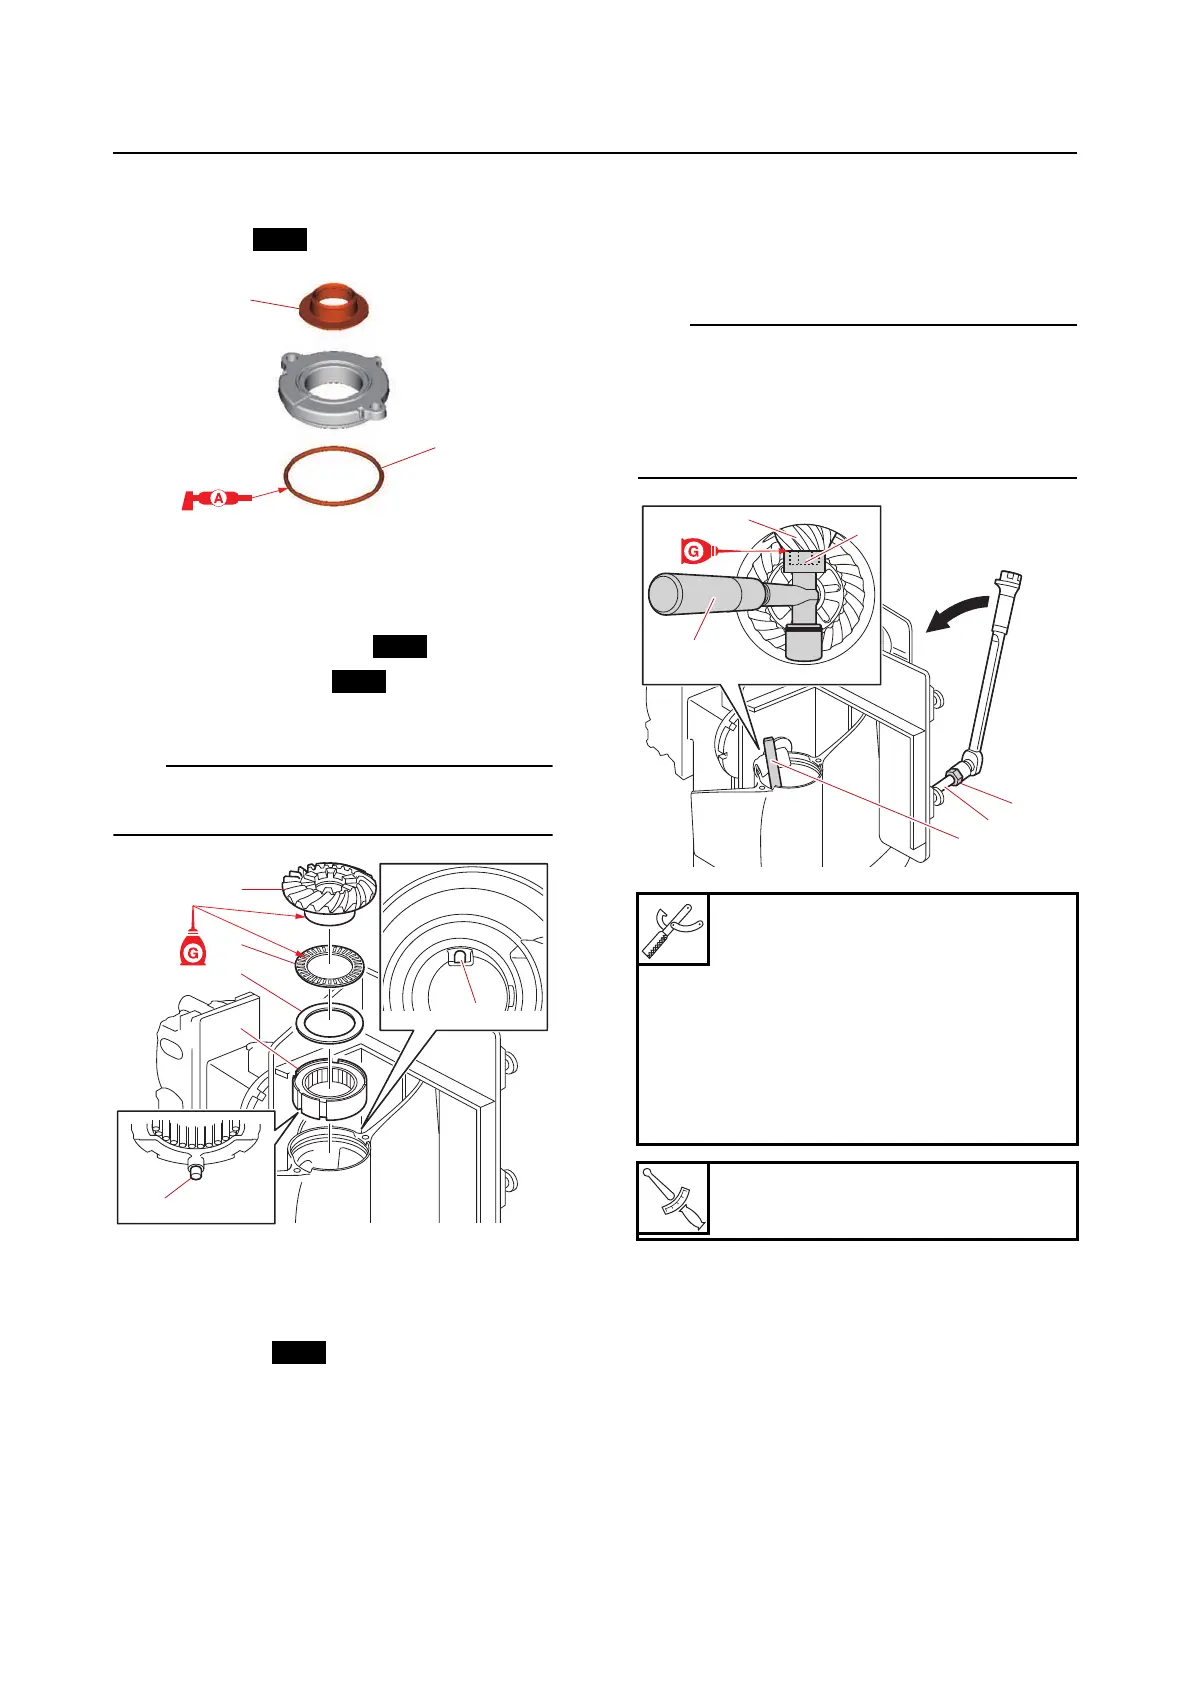
3. Install:
• Cover “1”
• O-ring “2”
Installing the forward gear
1. Install:
• Adapter assembly “1”
• Forward gear shim “2”
• Thrust bearing “3”
• Forward gear assembly “4”
Make sure to fit the dowel “5” into the slot “a” in
the lower case.
Installing the drive shaft
1. Install:
• Washer
• Pinion shim
• Drive shaft
2. Install:
• Pinion “1”
• Pinion nut “2”
a. Check that the drive shaft turns smoothly.
• When installing the pinion “1”, lift up the drive
shaft “3” slightly and align the splines on the
drive shaft with the splines on the pinion.
• Place a rag at the point where the special ser-
vice tool “5” contacts the lower case.
a
1
2
3
4
5
Drive shaft holder 6 “4”
90890-06520
Driveshaft holder “4”
YB-06520
Pinion nut holder “5”
90890-06451
Pinion nut holder “5”
YB-06715
Pinion nut “2”
165 N·m (16.5 kgf·m, 121 lb·ft)



 To Next Page