9-51
PTT cylinder
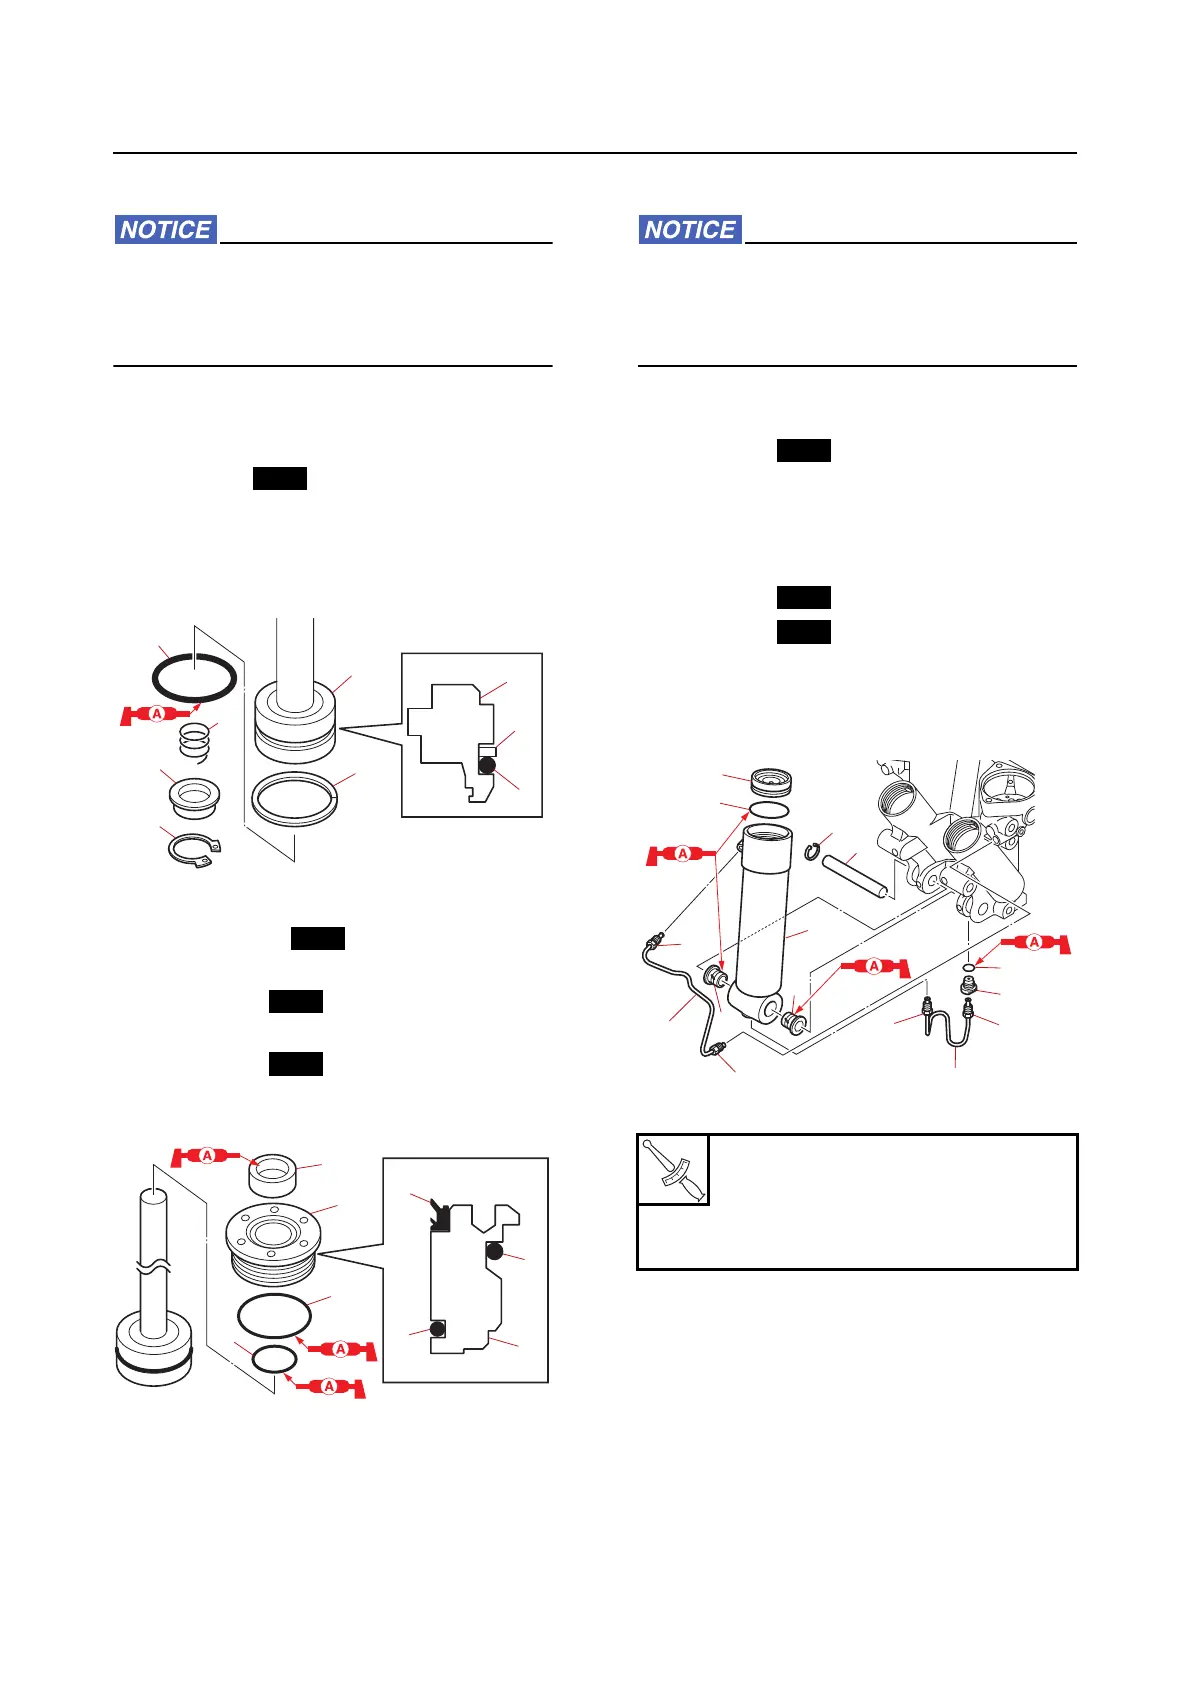
Assembling the trim ram
When assembling the PTT unit, do not use
a rag. Otherwise, dust and particles could
get on the PTT unit components, causing
poor performance.
1. Install:
• Backup ring “1” (to piston “6”)
• O-ring “2” (to piston “6”)
• Spring “3” (to piston “6”)
• Adapter “4” (to piston “6”)
• Circlip “5” (to piston “6”)
• Piston “6”
2. Install:
• Dust seal “1” (to trim cylinder end
screw “4”)
• O-ring “2” (to trim cylinder end
screw “4”)
• O-ring “3” (to trim cylinder end
screw “4”)
• Trim cylinder end screw “4”
Installing the tilt cylinder
When assembling the PTT unit, do not use
a rag. Otherwise, dust and particles could
get on the PTT unit components, causing
poor performance.
1. Install:
• O-ring “1”
• Free piston “2”
• Tilt cylinder “3”
• Bushing “4”
• Shaft “5”
• Circlip “6”
• O-ring “7”
• Pipe joint adapter “8”
• Pipe “9”, “10”
• Pipe joint “11”
1
2
6
1
5
4
3
2
6
1
1
4
3
22
3
4
Pipe joint adapter “8”
20 N·m (2.0 kgf·m, 15 lb·ft)
Pipe joint “11”
15 N·m (1.5 kgf·m, 11 lb·ft)
9
2
1
3
4
4
11
10
6
8
5
7
11
11
11



 To Next Page