9-33
PTT unit
c. Check the fluid level. See step (1) in
“Checking the hydraulic pressure” (9-30).
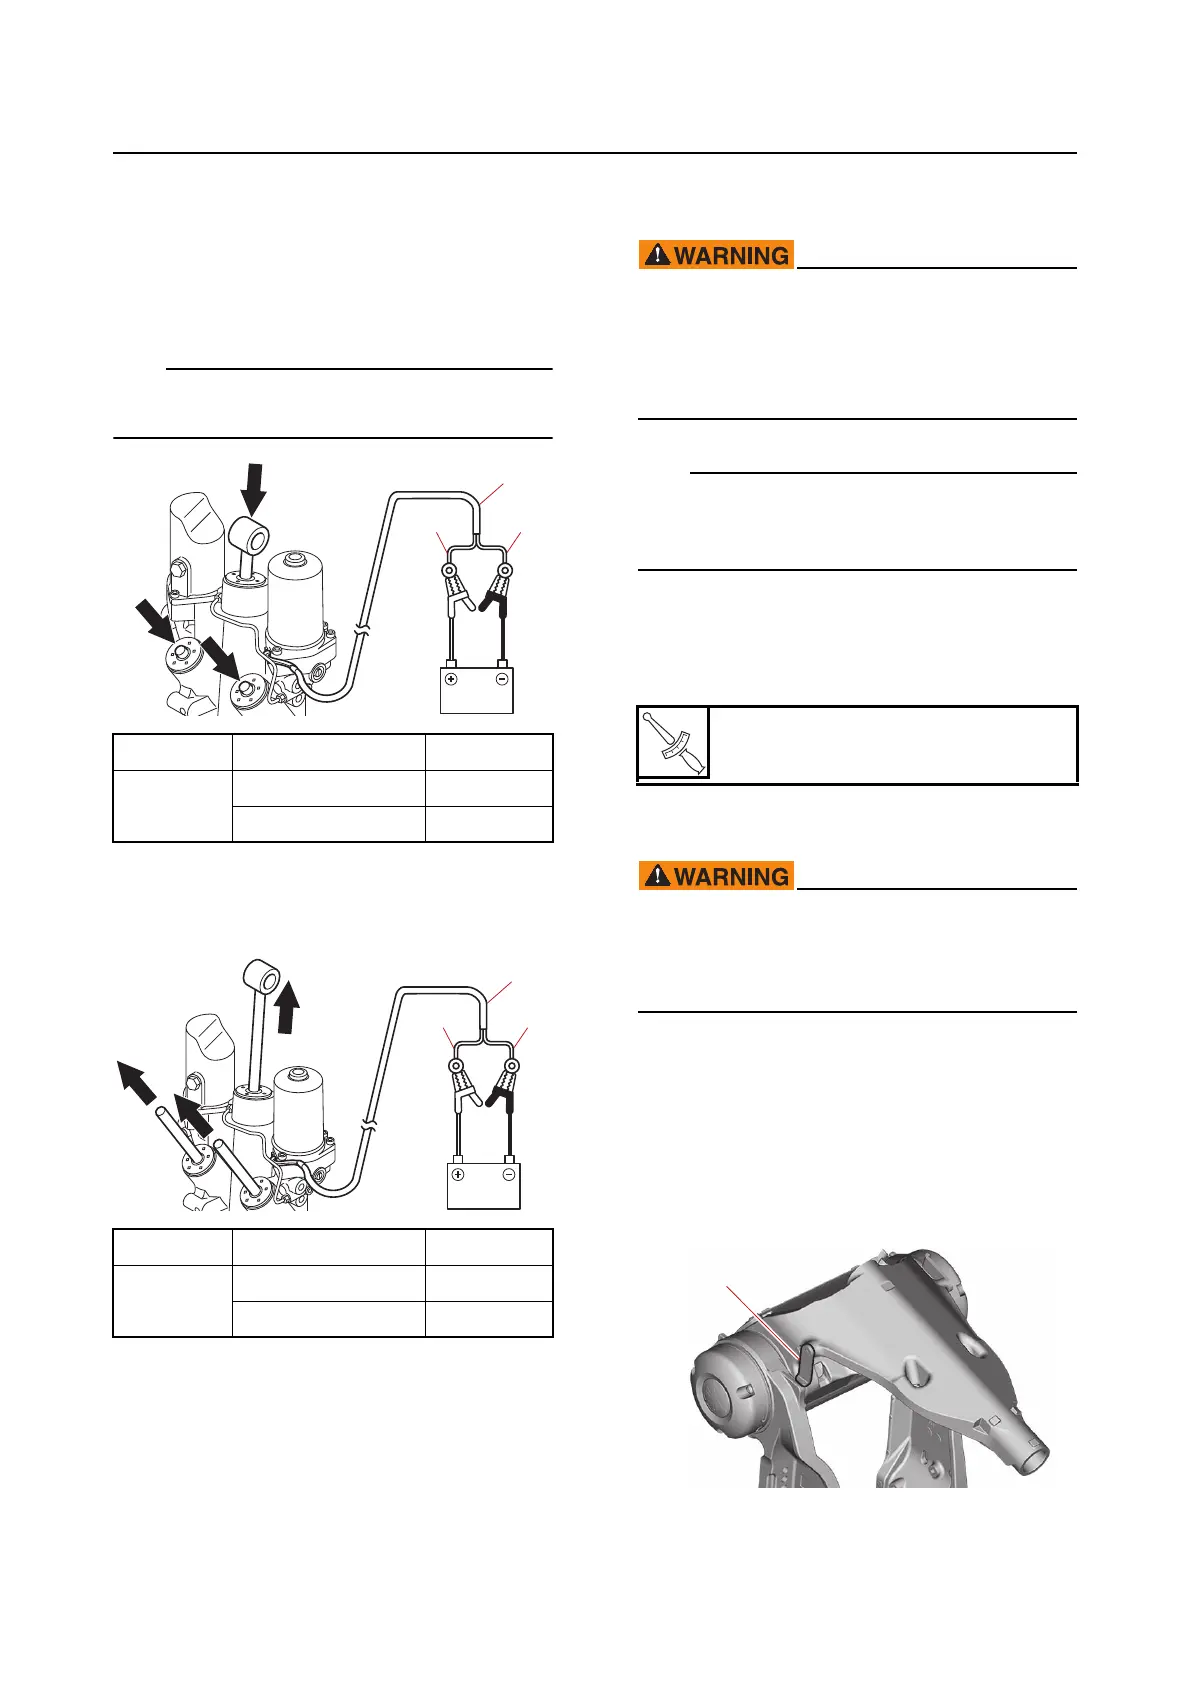
d. Connect the battery jumper leads to the
PTT motor lead “1” to fully retract the PTT
rams.
If the PTT rams do not move down easily, push
on the PTT rams to assist operation.
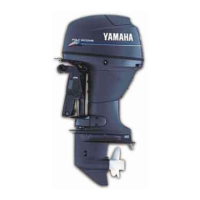
e. Reverse the connection between battery
jumper leads and the PTT motor lead “1” to
fully extend the PTT rams.
f. Repeat steps (d) and (e) to fully extend
and retract the PTT rams 4 or 5 times.
g. Fully extend the PTT ram.
h. Remove the reservoir cap, and then check
the fluid level in the reservoir.
Before removing the reservoir cap, make
sure that the PTT rams are fully extended.
Otherwise, fluid could be expelled forceful-
ly from the PTT unit due to internal pres-
sure.
If the fluid is below the proper level, add the
recommended PTT fluid. Repeat steps (c)–(g)
until the fluid remains at the proper level.
i. Install a new O-ring and the reservoir cap,
and then tighten the reservoir cap to the
specified torque.
Installing the PTT unit
When removing or installing the PTT unit
with the power unit or upper case assembly
installed, make sure to suspend the out-
board motor.
1. Install:
• Bushing
(into the swivel bracket)
• PTT unit
a. Fully tilt the swivel bracket up, and then
support it using the tilt support lever “1”.
Ram PTT motor lead Battery
Retract
Green (G) (+)
Blue (L) (–)
Ram PTT motor lead Battery
Extend
Blue (L) (+)
Green (G) (–)
L
G
1
Reservoir cap
7 N·m (0.7 kgf·m, 5.2 lb·ft)
1