8-6
Lower unit
Removing the lower unit
• Make sure to disconnect the battery ca-
bles from the battery, and remove the clip
from the engine shut-off switch.
• When removing or installing the lower
unit with the power unit installed, make
sure to suspend the outboard motor. Oth-
erwise, the outboard motor could fall sud-
denly and result in severe injuries.
When disassembling the lower unit, measure
the backlash before disassembly. See “Mea-
suring the forward gear backlash and reverse
gear backlash” (8-42) or “Measuring the for-
ward gear backlash and reverse gear back-
lash” (8-62).
1. Drain:
• Gear oil
See steps (1) and (2) in “Changing the
gear oil” (10-17).
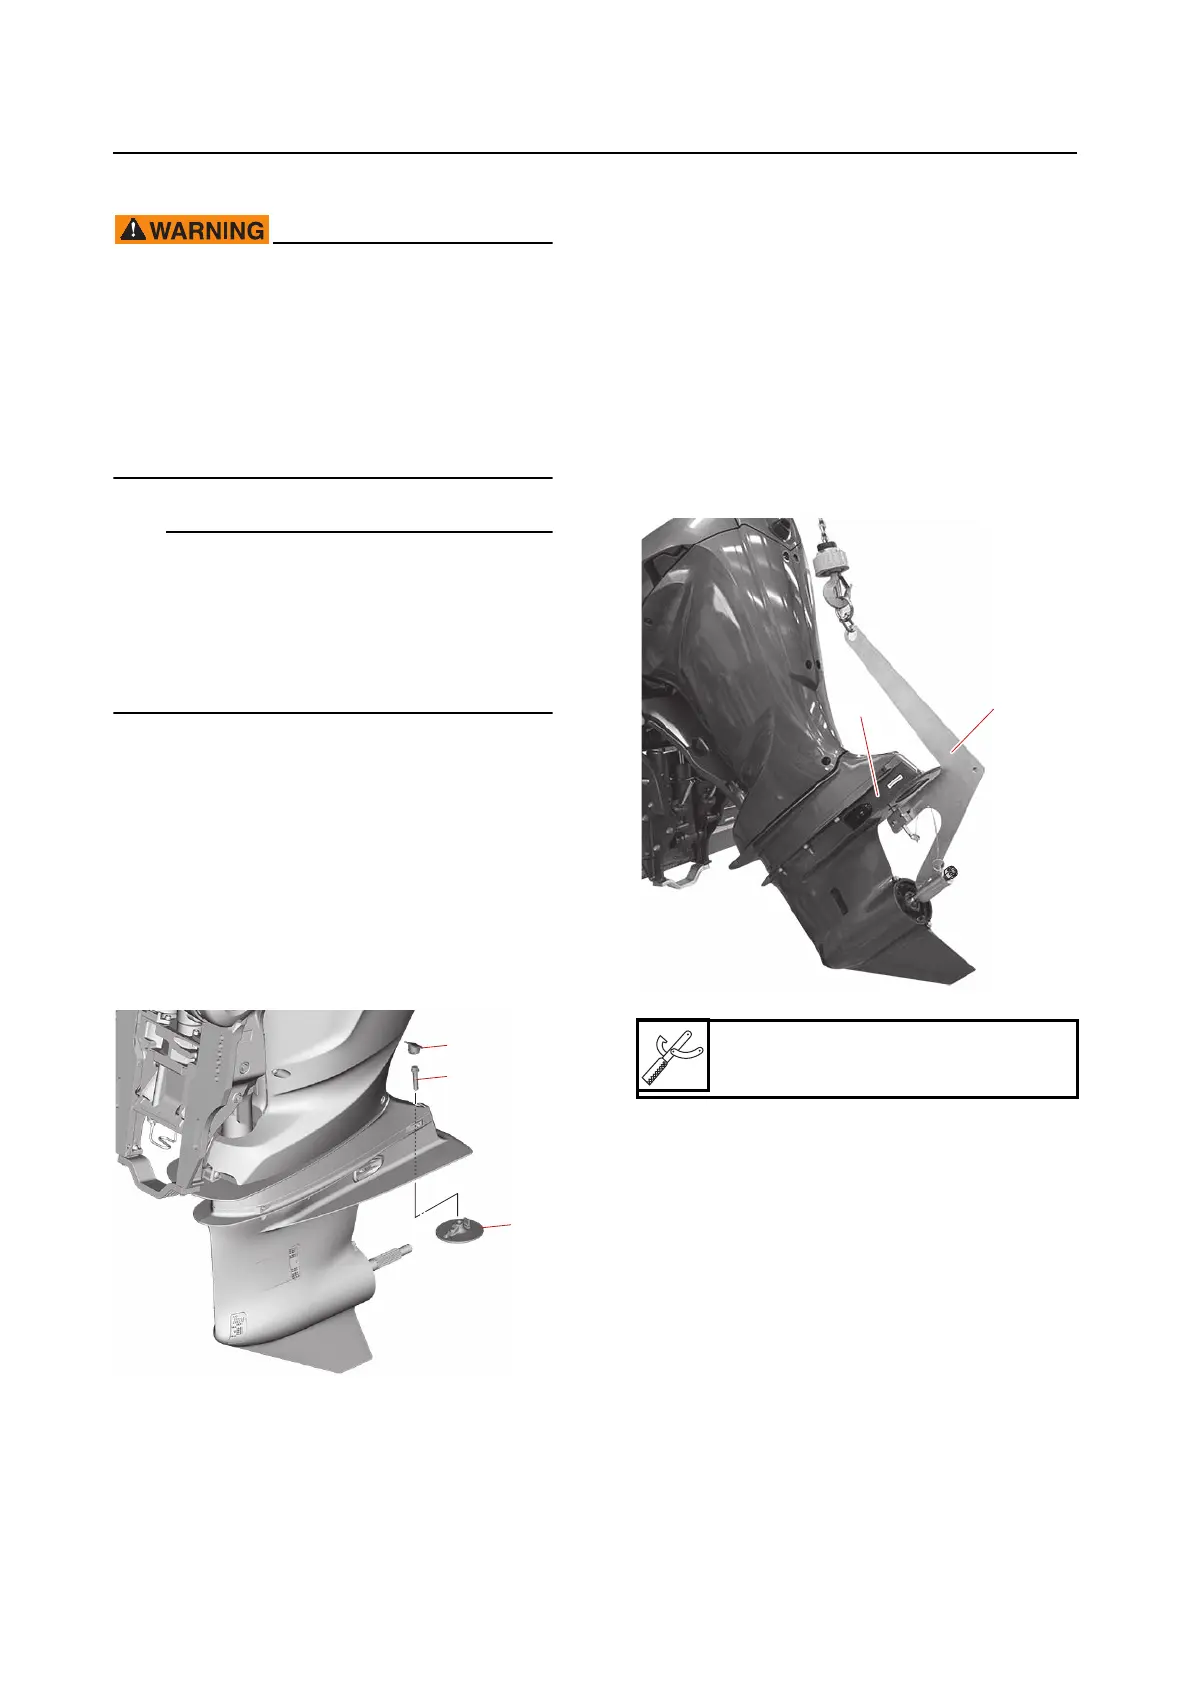
2. Remove:
• Grommet “1”
• Anode bolt “2”
• Anode “3”
3. Remove:
• Lower case mounting bolt (X-transom
model)
• Lower case mounting nut (except for X-
transom model)
• Lower unit
a. Place the outboard motor in an upright po-
sition.
b. Tilt the outboard motor up, and then install
the special service tool “1” to the lower unit
“2”.
c. Remove the lower case mounting bolts.
(X-transom model)
Remove the lower case mounting nuts.
(except for X-transom model)
d. Hook a lifting harness onto the special ser-
vice tool.
e. Remove the lower unit.
1
2
3
Lifting hanger “1”
90890-06951
12



 To Next Page