8-43
Shimming (regular rotation model)
1. Install:
• Adapter assembly
• Specified forward gear shim (T1)
• Thrust bearing
• Forward gear assembly
See “Installing the forward gear” (8-34).
Do not reuse a shim if deformed or scratched.
2. Install:
• Determined pinion shim (T3)
• Drive shaft
•Pinion
• Pinion nut
• Drive shaft ring nut
See steps (1)–(3) in “Installing the drive
shaft” (8-34).
• Do not reuse a shim if deformed or scratched.
• Check that the drive shaft turns smoothly.
3. Install:
• Specified reverse gear shims (T2)
• Propeller shaft assembly
• Propeller shaft housing assembly
•Key
• Claw washer (do not bend the tabs)
• Ring nut
See steps (1)–(5) in “Installing the propel-
ler shaft housing assembly” (8-24).
• Do not reuse a shim if deformed or scratched.
• Check that the drive shaft turns smoothly.
4. Install:
• Shift rod assembly
See “Installing the shift rod” (8-14).
5. Measure:
• Forward gear backlash
Out of specification Repeat steps from
the selection of the forward gear shim (T1)
and reverse gear shims (T2).
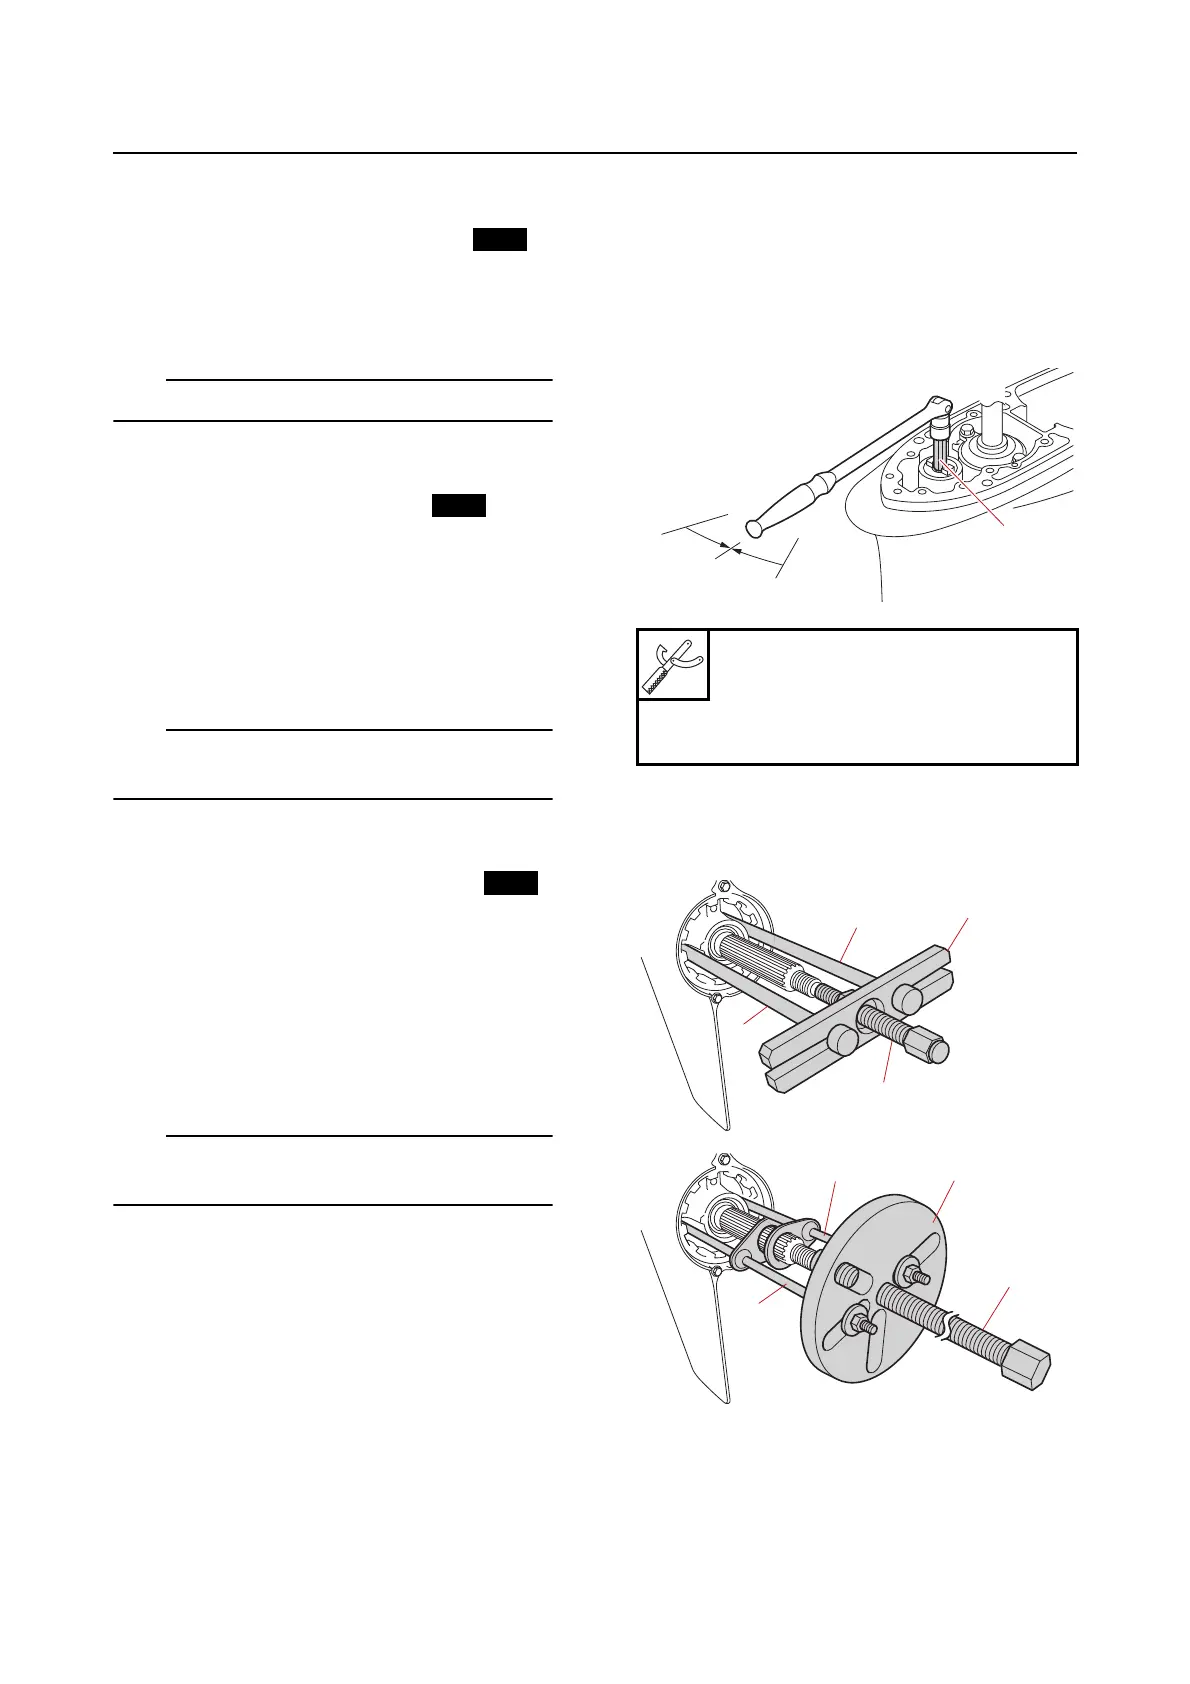
a. Set the gear shift to the N position.
b. Set up the special service tools “1”, “2”,
and “3”, and then tighten the center bolt “3”
to the specified torque.
Shift rod socket “1”
90890-06681
Shift rod socket “1”
YB-06681
A. Worldwide
B. USA and Canada
R
N
F
1
1
1
2
3
A
1
1
2
3
B



 To Next Page