Chapter 2 Hardware Installation and Connection
MES3500 Series User’s Guide
24
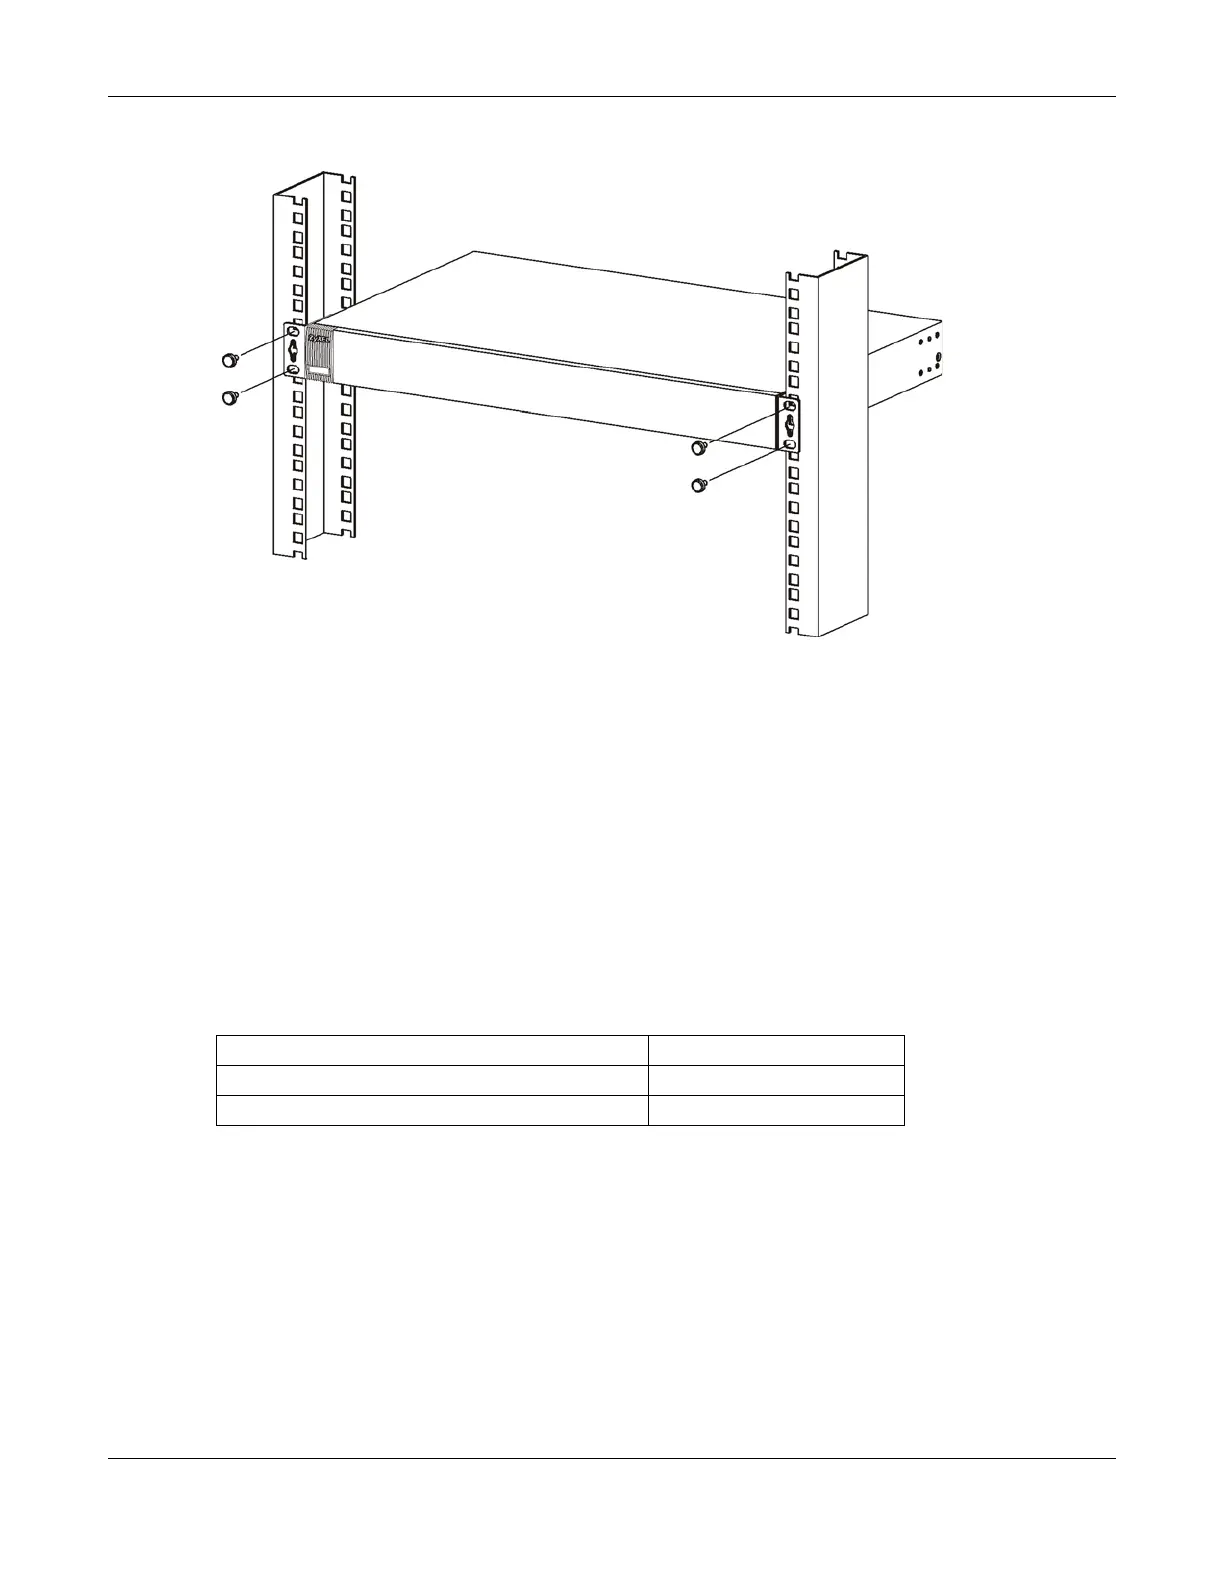
Figure 6 Mounting the Switch on a Rack
2 Using a #2 Philips screwdriver, install the M5 flat head screws through the mounting bracket holes
into the rack.
3 Repeat steps 1 and 2 to attach the second mounting bracket on the other side of the rack.
2.4 Wall Mounting
See Table 1 on page 18 for the Switch models that can be wall-mounted. Do the following to attach
your Switch to a wall.
You may need screw anchors if mounting on a concrete or brick wall.
1 Select a position free of obstructions on a wall strong enough to hold the weight of the device.
2 Mark two holes on the wall at the appropriate distance apart for the screws.
Be careful to avoid damaging pipes or cables located inside the wall
when drilling holes for the screws.
Table 2 Wall Mounting Information
Distance between holes 198 mm
Self-tapping screws (Diameter: 3 mm) Two
Screw anchors (optional) Two
 Loading...