72 XFC G4 2103335 Rev AB
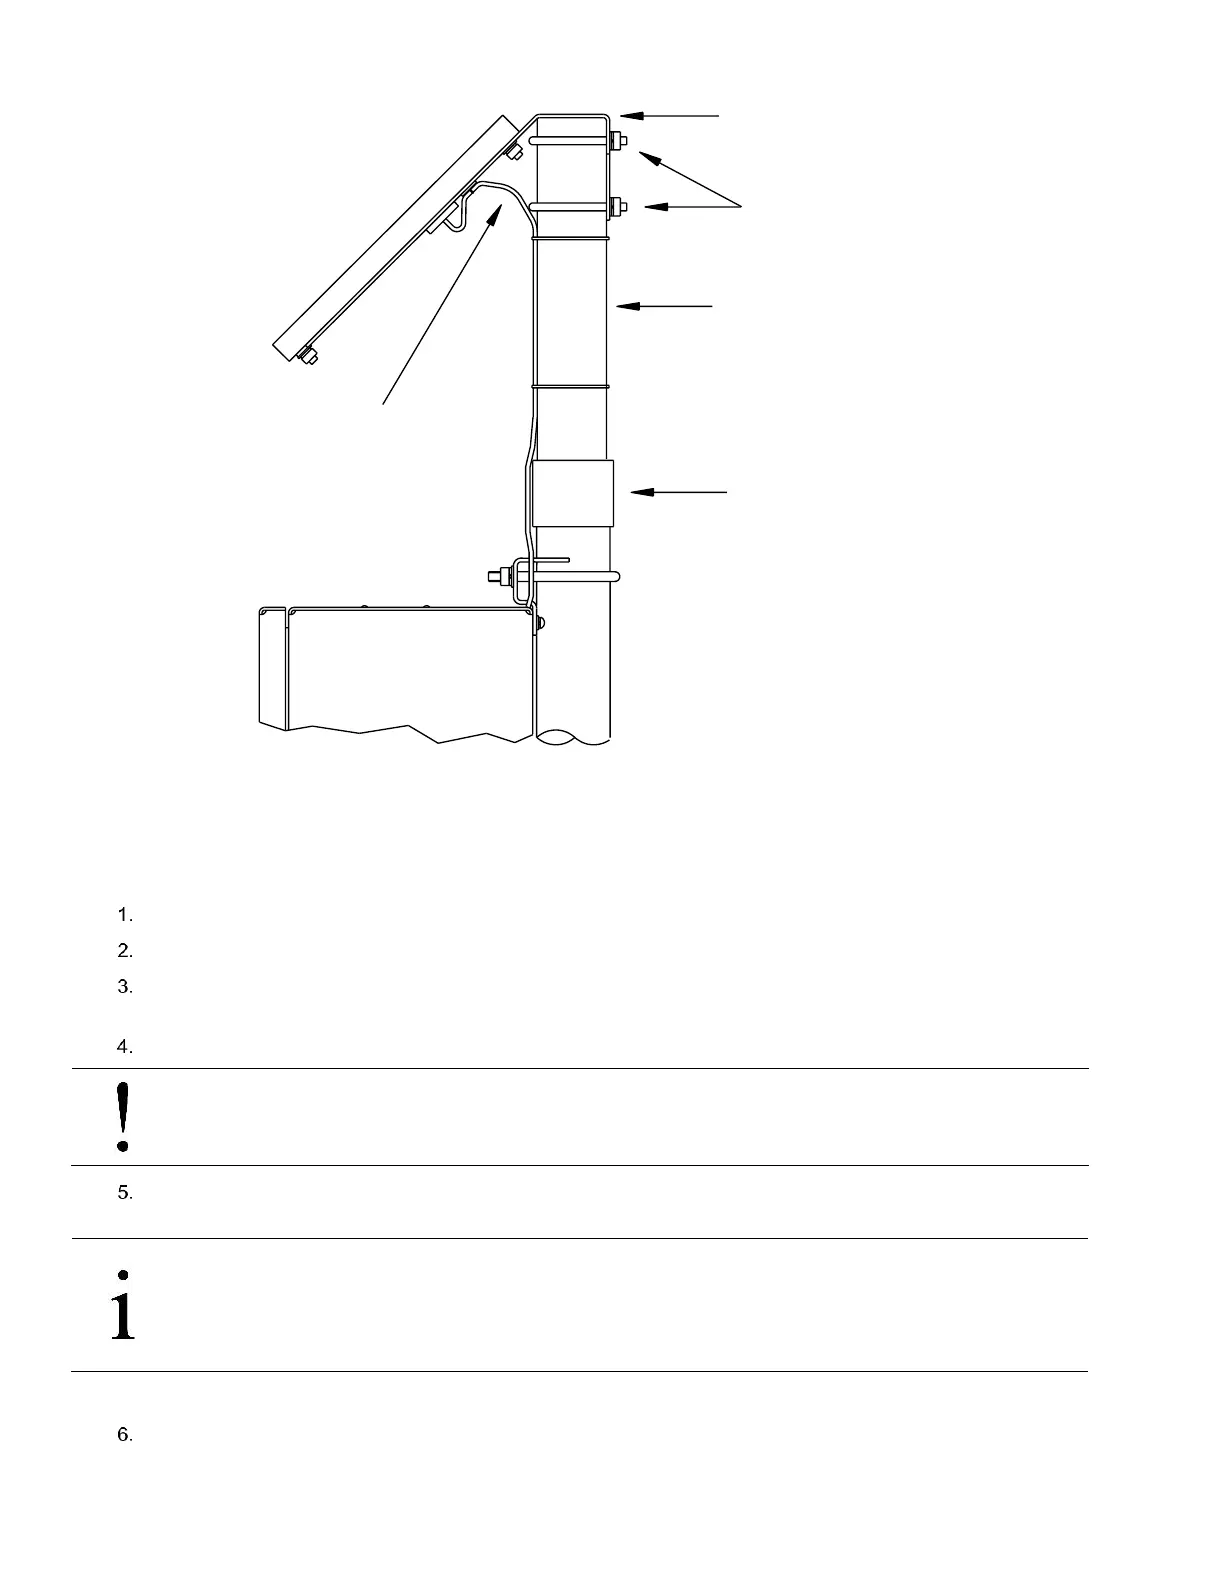
Figure 54 Typical Solar Panel Installation
4.10.1 Step-by-Step Instructions
To install the solar panel:
Attach the 2” pipe coupling to the top end of the flow computer 40” mounting pipe. Securely tighten.
Attach the 2” pipe extension into the coupling, and securely tighten.
Check the solar panel using a Multi Meter to verify polarity and output voltage. Voltage will vary depending on the
amount of sun, angle to sun, etc.
Install the solar panel on the mounting bracket with the provided hardware, if required.
NOTICE- Equipment damage: Do not connect the other end of the solar panel cable to the flow computer until
instructed to do so.
Attach the solar panel mounting plate to the top end of the 2” extension pipe with the U-bolts and associated mounting
hardware. Do not tighten the U-bolts until the solar panel has been correctly positioned.
IMPORTANT NOTE: For northern hemispheres, position the solar panel facing south. For southern
hemispheres, position the solar panel facing north. For optimum charging, the solar panel should not be
in the shadows for the majority of the day. The panel should be kept clean for maximum charging.
Remove the CHGR Input terminal block (J5) from the digital board.
Solar Panel
Mounting Bracket
2 " Coupling
2 " Extension Pipe
Cable
Solar Panel
U - Bolts