40 Installation, Operation, and Maintenance
Part 1, Installation
2 Installation
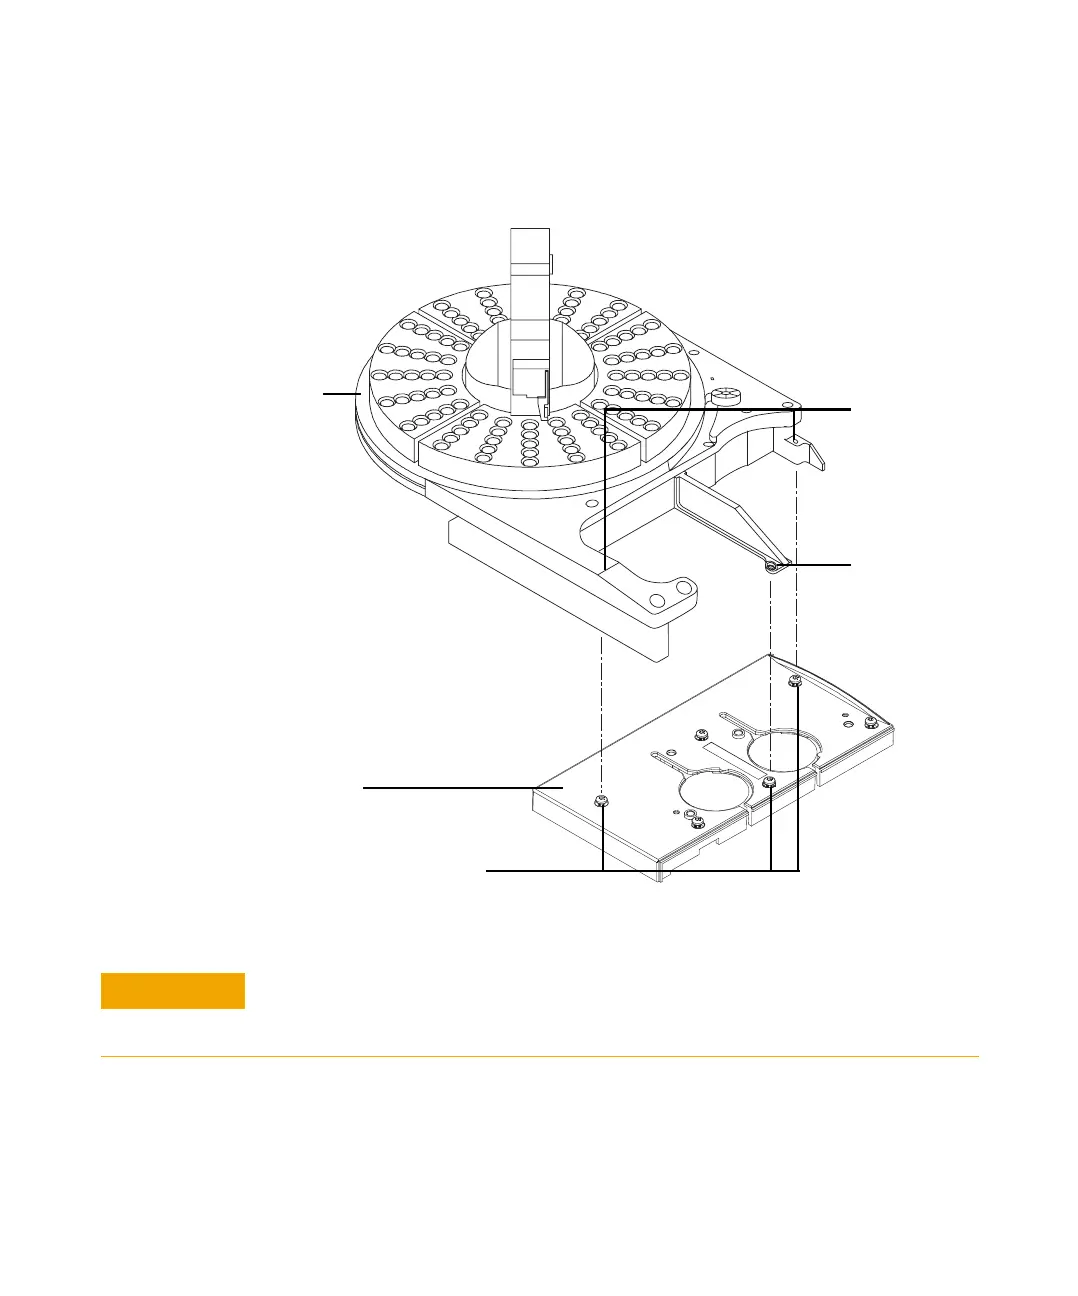
5 Remove the three inlet cover Torx screws (Figure 12).
6 Align the tray over the two left holes in the inlet cover. Tighten the short
screw in the center of the tray mounting arm to hold the tray. Install the
two long mounting screws into the tray and tighten until the tray is secure.
Figure 12 Installing the tray
Tra y
Remove screws from cover
Inlet cover
Long mounting
screws
screws
Short mounting
CAUTION
Do not move or manipulate the robotic arm or gripper. Moving the arm or gripper back
and forth can cause damage. If necessary, rotate the arm assembly a few degrees until
there is enough clearance.
 Loading...