TABLE OF FIGURES
Figure 1: Functional design overview 27
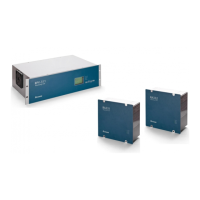
Figure 2: RA333, RA332, RA333 and RPV311 47
Figure 3: Front View of the RPV311 50
Figure 4: Back view of the RPV311 50
Figure 5: Front and back views of the RA331 52
Figure 6: Front and back views of the RA332 53
Figure 7: Front and back views of the RA333 54
Figure 8: Initial configuration screen 59
Figure 9: Equipment identification configuration section 61
Figure 10: Equipment Ethernet configuration section 63
Figure 11: Equipment serial port configuration section 64
Figure 12: Links between RPV and acquisition modules configuration section 66
Figure 13: Analog inputs configuration section 67
Figure 14: Sampled Values subscriptions links configuration section 68
Figure 15: Analog inputs configuration section for Sampled Values channels 69
Figure 16: Equipment access control configuration section 70
Figure 17: Adding new user section 71
Figure 18: Changing the administrator password section: Changing the administrator
password section 72
Figure 19: Record management configuration section 73
Figure 20: Auto upload configuration section 74
Figure 21: Email/Fax configuration 75
Figure 22: Adding and editing voltage circuits 77
Figure 23: Adding and editing current circuits 79
Figure 24: Adding and editing power circuits 80
Figure 25: Adding and editing digital channels 82
Figure 26: Adding and editing DC channels 84
Figure 27: Adding and editing a voltage threshold 87
Figure 28: Adding and editing a current threshold 89
Figure 29: Adding and editing a power threshold 90
Figure 30: Adding and editing a DC threshold 93
Figure 31: Fault recorder – triggered recording configuration section 94
Figure 32: Fault recorder – continuous recording configuration section 95
 Loading...