Installing the Recorder Software 5-4
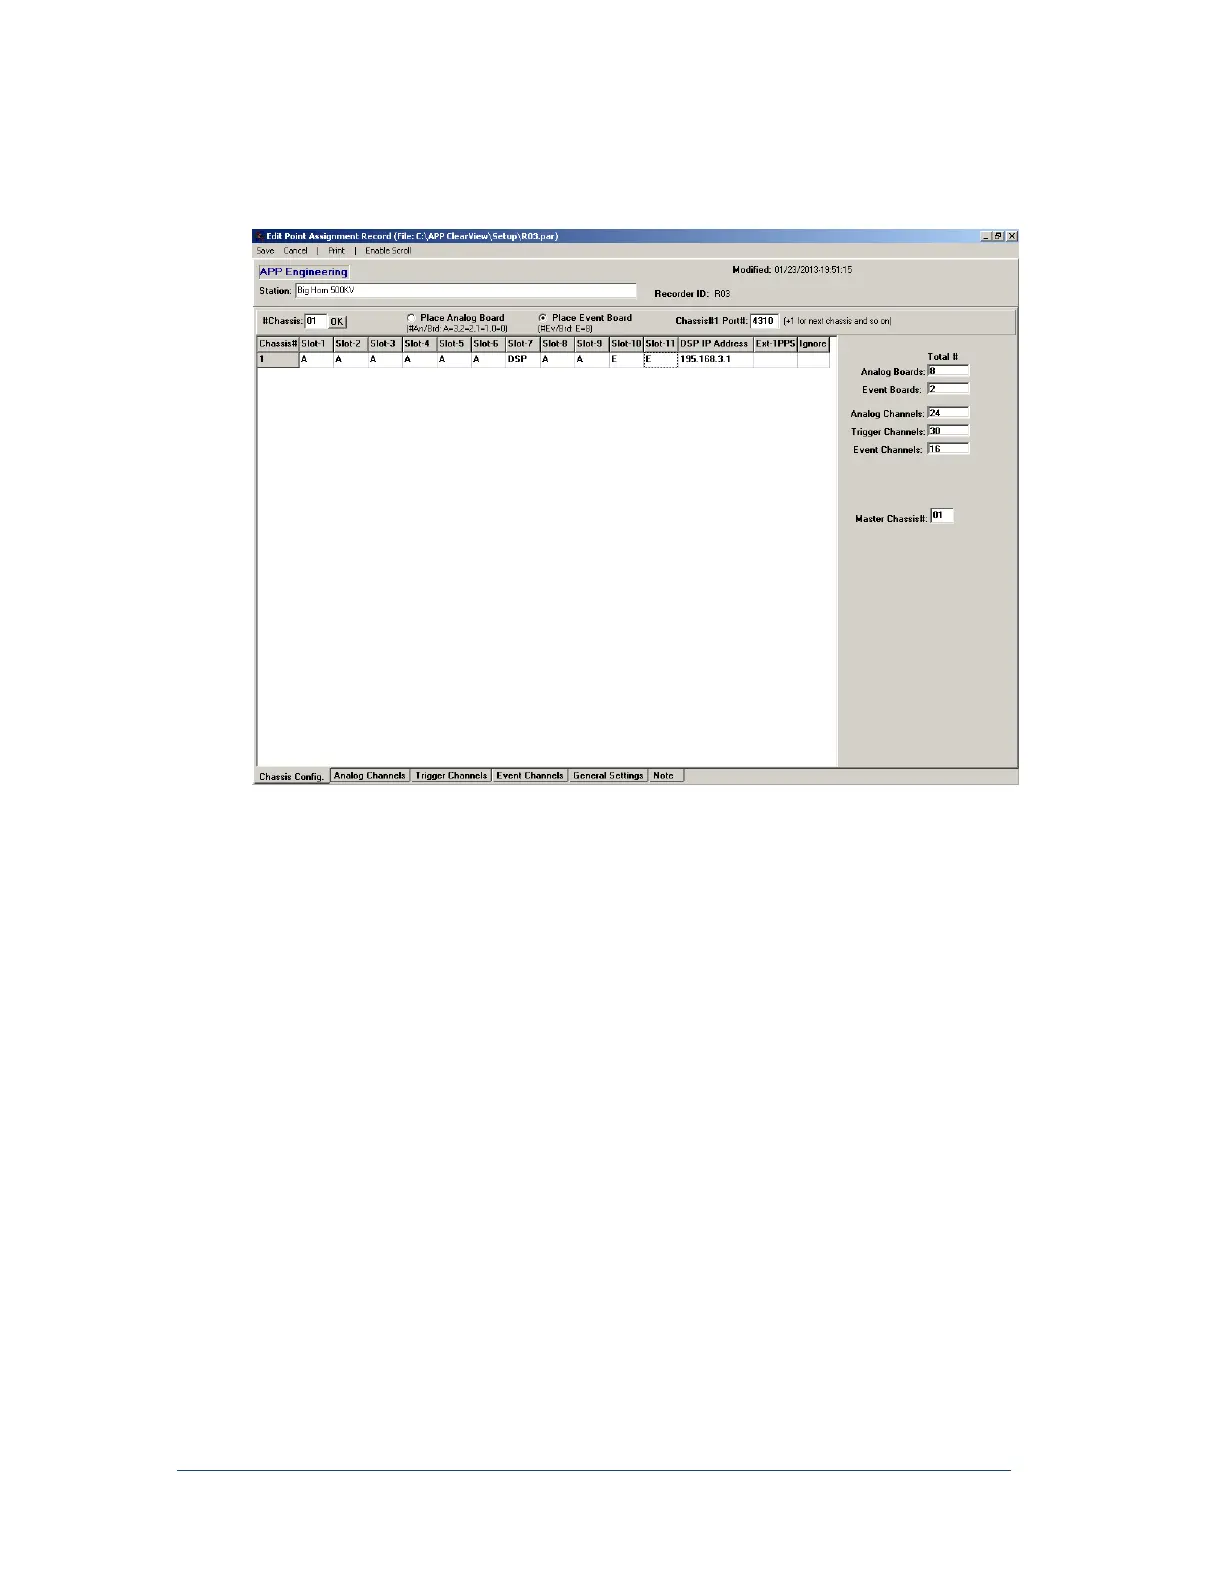
16. At the bottom of the Point Assignment window, click the Chassis Config. tab. At the top of the
page, enter the name of station or location of the recorder. Next to “#chassis”, enter the sum total
of Data chassis.
Figure 17: Point Assignment Window’s Chassis Configuration
17. For each chassis, enter the type of circuit board inserted into slots 1, 2, 3, 4, 5, 6, 8, 9, 10, and 11.
For example, if slot-1 contains an analog board then click Place Analog Board then click in the
Chassis 1/Slot-1 box. An A will appear in the box. An A can also be placed in the box by simply
selecting the box and typing the letter A.
If slot-1 contains an event board, then click on Place Event Board then click in the Chassis
1/Slot-1 box. An E will appear in the box. An E can also be placed in the box by simply selecting
the box and typing the letter E.
Note: Slot-7 is always reserved for the DSP circuit board. Slot-12 is always reserved for
the alarm output circuit board and slot-13 is always reserved for the chassis
power supply board.
18. Each DSP circuit board, one per chassis, is assigned an IP address. That IP address must be
entered in the “IP Address” column for each chassis/DSP board. The default IP address is
195.168.3.X where X is the chassis number such as 1, 2, 3 etc.
19. Towards the upper right hand portion of the page is a “Chassis #1 Port#.” A port number is
automatically selected for each chassis. This number can be changed if any conflict arises.
20. After the chassis and slot information are entered, the number of Analog Boards, Event Boards,
Analog Channels, and Event Channels will appear at the far right-hand side of the page.
21. Click on the tab at the bottom of the page labeled General Settings. The window shown in Figure
18 should appear.