Operation
5-29
5
P/N 6525032M1 - X6
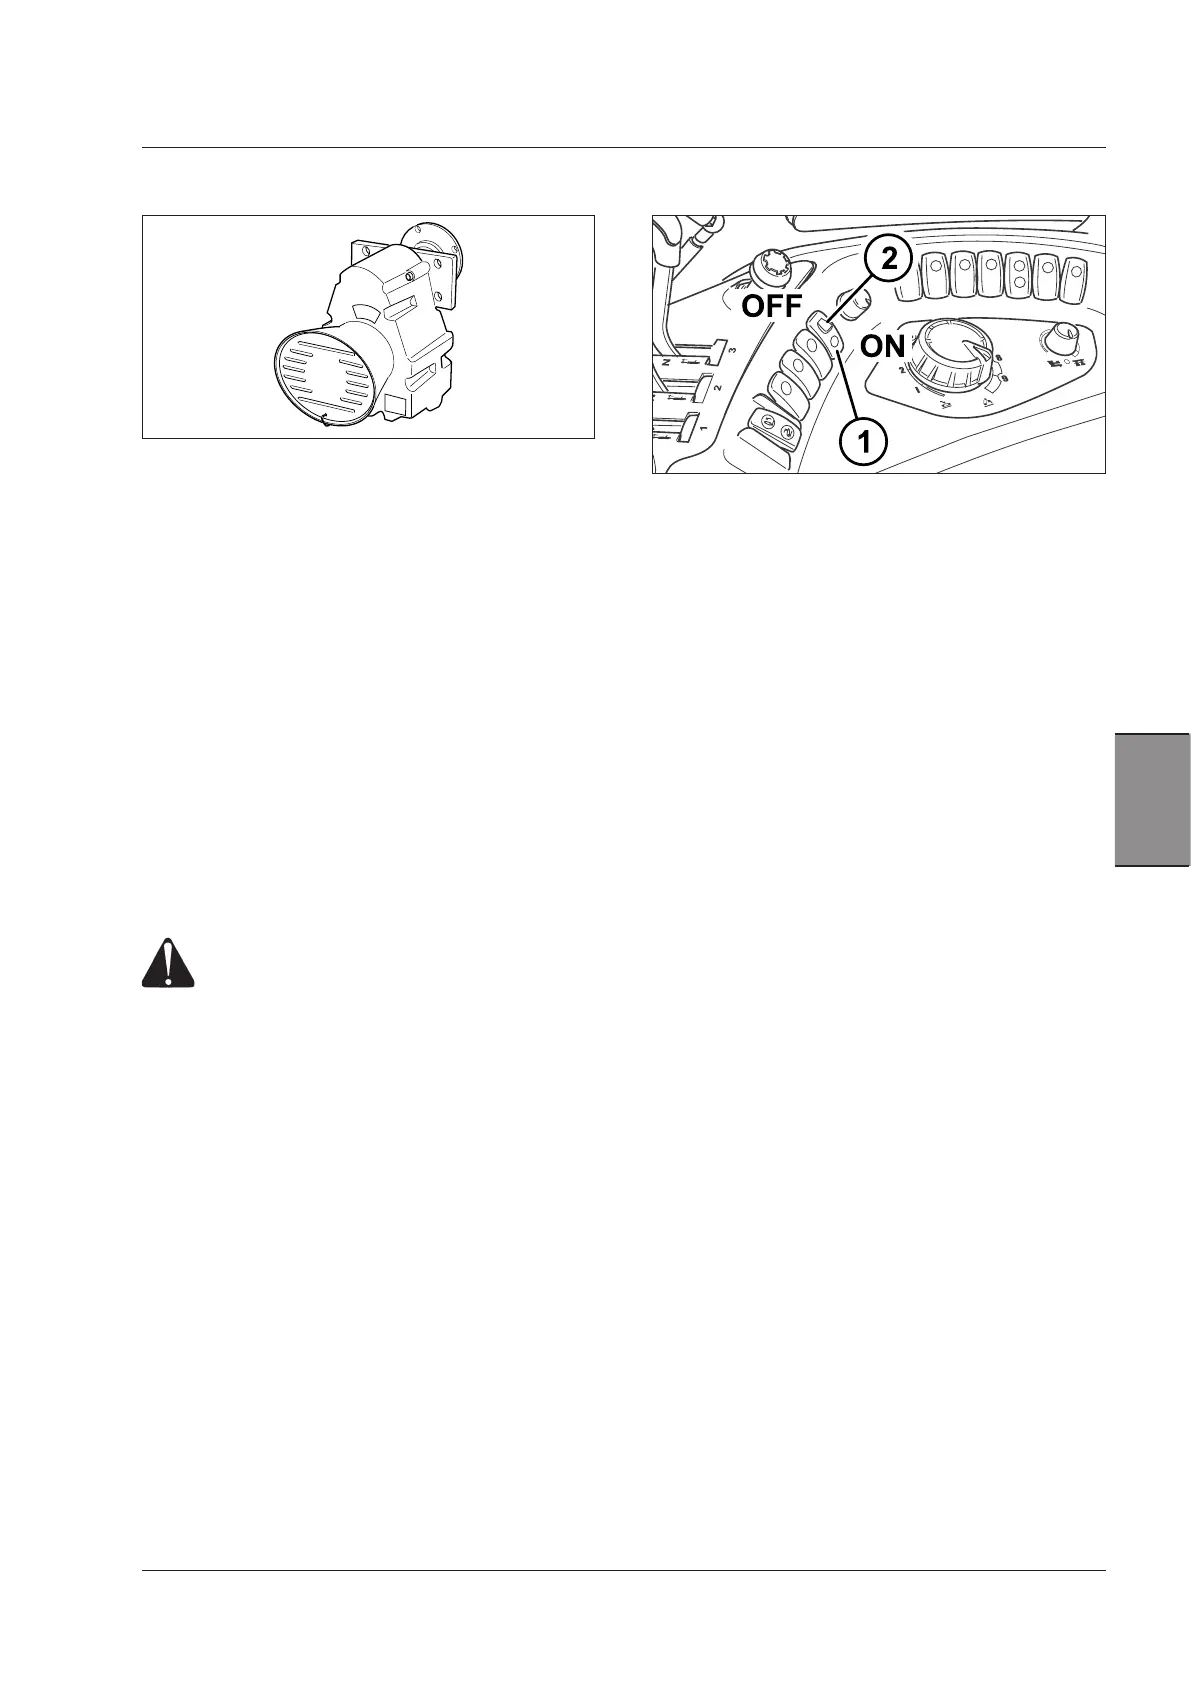
The front power take-off has a 6 spline output shaft
which rotates at 1000 rpm (fixed gear). The engagement
is electro-hydraulic and is operated by the button (1 - Fig
5-21B). Depending upon market requirements, the front
PTO can be supplied with two different directions of rota-
tion (clockwise or counter-clockwise).
IMPORTANT: When using implements that cause shock
loads, always use a safety coupler between the implement
and the PTO drive shaft.
Before using the implement, check the correct operation
both of the safety coupler and of the implement.
IMPORTANT: When using implements with quickly
moving parts (such as mowers, reapers, snowploughs)
ALWAYS fit an overrun device on the implement drive
shaft, as a protection against possible PTO faults.
IMPORTANT: Ensure that the implement PTO shaft is
not too long or the PTO is not damaged when the front
mounted implement must be lifted fully up.
WARNING: Before connecting or using imple-
ments and trailers, ALWAYS read thoroughly
and follow the instructions of the operator's
manual provided by the manufacturer.
Engagement of the front PTO Fig. PF1
To engage the front PTO proceed as follows.
Sit down in your seat: the PTO CANNOT be started if you
are not seated.
To engage the PTO, release the switch (1) by pushing the
orange switch lock (2) down and at the same time press
the switch down (ON).
The lamps in the control (1) and the front PTO icon on the
instrument cluster will light up (see chapter "Power take-
off menu" in sction 4 of this manual for further information
on the indications).
The PTO shaft starts turning.
IMPORTANT:PTO will not engage if engine is started
with the switch in the engage position.
Move switch to disengage and then engage.
IMPORTANT: Never try to release dead-locked imple-
ments
by repeated clutch engagement and disengagement. The
front power take-off clutch will slip and become damaged.
FRONT POWER TAKEOFF (if equipped)
Fig. 5-21B
Disengage the PTO as follows:
STEP 1
Reduce the engine speed.
STEP 2
Push the bottom of the switch (1) down to the off position.
The indicator lamp on the instrument cluster will go out
when the front power take-off is disengaged.
STEP 3
When the engine is switched off the front power take-off
is automatically disengaged. The indicator lamp in the
switch will go out to indicate the front PTO is disengaged.
STEP 4
Always install the PTO shaft guard when the PTO is not
being used.
IMPORTANT:High-inertia implements do not become
stationary immediately when PTO is disengaged. Wait for
the implement to slow down and stop completely.
IMPORTANT: If the operator leaves his/her seat for longer
than 5 seconds, the controller will deactivate the PTO as
safety measure. In this case, to start the PTO again, first
push down the control (1) to the OFF position, then to the
ON position again.
NOTE: If the control (1) is in the ON position at engine
ignition, the lamp in the control (1) will start flashing to
indicate that the control (1) must be pushed down to the
OFF position.
In this condition, the engine will start normally, but the PTO
shaft will not operate.
Push down the control (1) to the OFF position: the indica-
tor lamp will go out.
To disengage the front PTO, push down the control (1)
to the OFF position.



 To Next Page