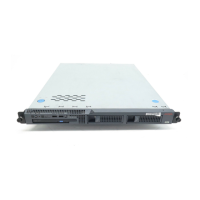
Job Aid: Replacing the Avaya S8500/B/C server
52 Job Aids for Field Replacements (FRUs) for the Avaya S8500 Server
Powering up the S8500B server
To power up the S8500B server:
1. Plug the power cord into the power receptacle on the rear of the server.
2. If necessary press the Power button located on the front right-hand side.
3. Log into the server after the startup to make sure that the installation is complete.
4. Check the original Ethernet configuration settings by selecting Server Configuration >
Configure Server from the Maintenance Web Interface.
5. Confirm that the server’s Ethernet configuration settings are the same as before.
Checking network activity on the S8500B server
To check for network activity look at the LEDs by each of the network ports in Figure 11:
1. After the server is back in service, check the LEDs for network activity on:
l Services and/or customer network (Notes 2 and 9 in Figure 11)
l Optional dual NIC card (Notes 3 and 4 in Figure 11)
Figure 11: S8500B rear panel
Figure notes:
1. Mouse connector (not used)
2. Connection to customer’s network in
nondedicated control network, or
direct connection to gateway IPSI in
dedicated control network
3. Optional dual network interface card
(NIC)
4. Optional dual network interface card
(NIC)
5. Connection to services laptop for
Server Availability Management
Processor (SAMP)
6. Eth 1 on SAMP (not used)
7. SAMP USB modem port
8. SAMP power supply
9. Connection to services laptop
10. Additional USB ports
11. Video port (not used)
12. RS-232 serial interface — can be used for
console redirection to perform BIOS
upgrades
13. Keyboard connector (not used)
2
h2ms85b2 LAO 101204
910
111213
7
1 2 3 4 5
6
8

 Loading...