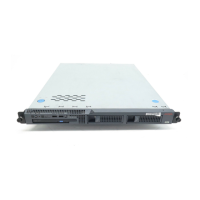
Job Aid: Replacing the Hard Drive on the Avaya S8500 server
80 Job Aids for Field Replacements (FRUs) for the Avaya S8500 Server
Final tasks
You must install the Linux operating system and Avaya Communication Manager on the blank
hard drive, then restore the backed up system files to the server.
6 Replace the hard drive l S8500C see Replacing the hard drive in the S8500C
server on page 85
l S8500B: see Replacing the hard drive in the S8500B
server on page 87.
l S8500: see Replacing the hard drive in the S8500
server on page 88.
8 Slide the server back in place S8500 only: release the retaining tabs on the rails and slide
the server back into place in the data rack.
9 Power up the server Plug the power cords into the server and RSA/SAMP. Press
the power-control button on the front of the server.
Note: Wait at least 3 minutes for the server to complete its
power up. Watch the power-on LED on the server (the green
LED is on steady).
10 Reconnect attached devices Reconnect all attached devices, including the laptop, both
modems, and the external flashcard reader (if used).
Tasks for replacing a hard drive on an S8500 server (continued)
9 Task Description
2 of 2
Final tasks for replacing a hard drive in an S8500 server
9 Task Description
1 Disconnect the RJ45 cable Disconnect the Ethernet RJ45 cable from the Services port
on the server.
2 Clear ARP cache on laptop From a DOS command link, type arp -d 192.11.13.6
and press Enter.
3 Connect laptop to the RSA/
SAMP card
Connect to the Ethernet port (to the right of the serial
connector) on the back of the RSA/SAMP card using a
crossover cable.
4 Log onto the RSA/SAMP Open an internet browser window. In the Address field, type
192.11.13.6 and press Enter.
On the Enter Network Password screen, use the default
login craft and password used before the hard drive was
removed.
1 of 5

 Loading...