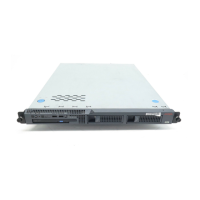
Job Aid: Replacing the Avaya S8500/B/C server
66 Job Aids for Field Replacements (FRUs) for the Avaya S8500 Server
!
CAUTION:
CAUTION: Make sure the SAMP card is completely and correctly seated in the expansion
slot before you apply power to the S8500C server. Incomplete insertion might
cause damage to the system board or to the SAMP card.
6. Replace the cable assembly from the SAMP to the motherboard with the replacement cable
that is included with the replacement SAMP.
7. Reinstall the PCI support bracket, making sure that
l The PCI support bracket is aligned with the two guides and fully seated in the riser-card
connector.
l The cable is routed so that it is not pinched.
8. Tighten the captive screw on the PCI support bracket (Figure 14: Removing/replacing the
S8500C SAMP card on page 65, note 1).
Reusing the dual NIC (S8500C)
This section describes the steps required to replace an existing dual network interface (dual
NIC) card on the S8500C server.
Removing the old network interface card from the S8500C server
To remove the old NIC:
1. Remove the cable that connects the SAMP card to the motherboard.
2. Remove the PCI-BUS expansion carriage by lifting straight up.
Note:
Note: The PCI-BUS carriage holds both the SAMP and dual NIC cards.
3. Remove the dual NIC card from its slot.
Replacing the new network interface card in the S8500C server
To install the replacement dual NIC in the S8500C server:
1. Carefully grasp the new NIC by the top edge or upper corners and align it with the PCI-2
expansion slot on the motherboard. (The SAMP is connected on the other side of this
connector.) Press the NIC firmly into the expansion slot. See Figure 15: Inserting the
network interface card in the S8500C server on page 67.

 Loading...