!
Biodex Medical Systems, Inc. © 2016 137
Figure 6.8. A Geometry Test with data.
To Perform A Geometry Test:
1. From the QA Dose Calibrator screen touch <Geometry Test>. The Geometry Test screen is
now displayed.
2. If only one detector is connected, skip to step 3. If more than one detector is connected,
touch <Select Detector> and select the detector to test. Zero Background if necessary.
3. The isotope for the Geometry Test always defaults to the first isotope on the button list,
usually Tc-99m. If a different isotope is to be used, touch <Select Isotope> and then select the
desired isotope as previously described.
4. Touch <Set Test Parameters>. The parameters screen is now displayed.
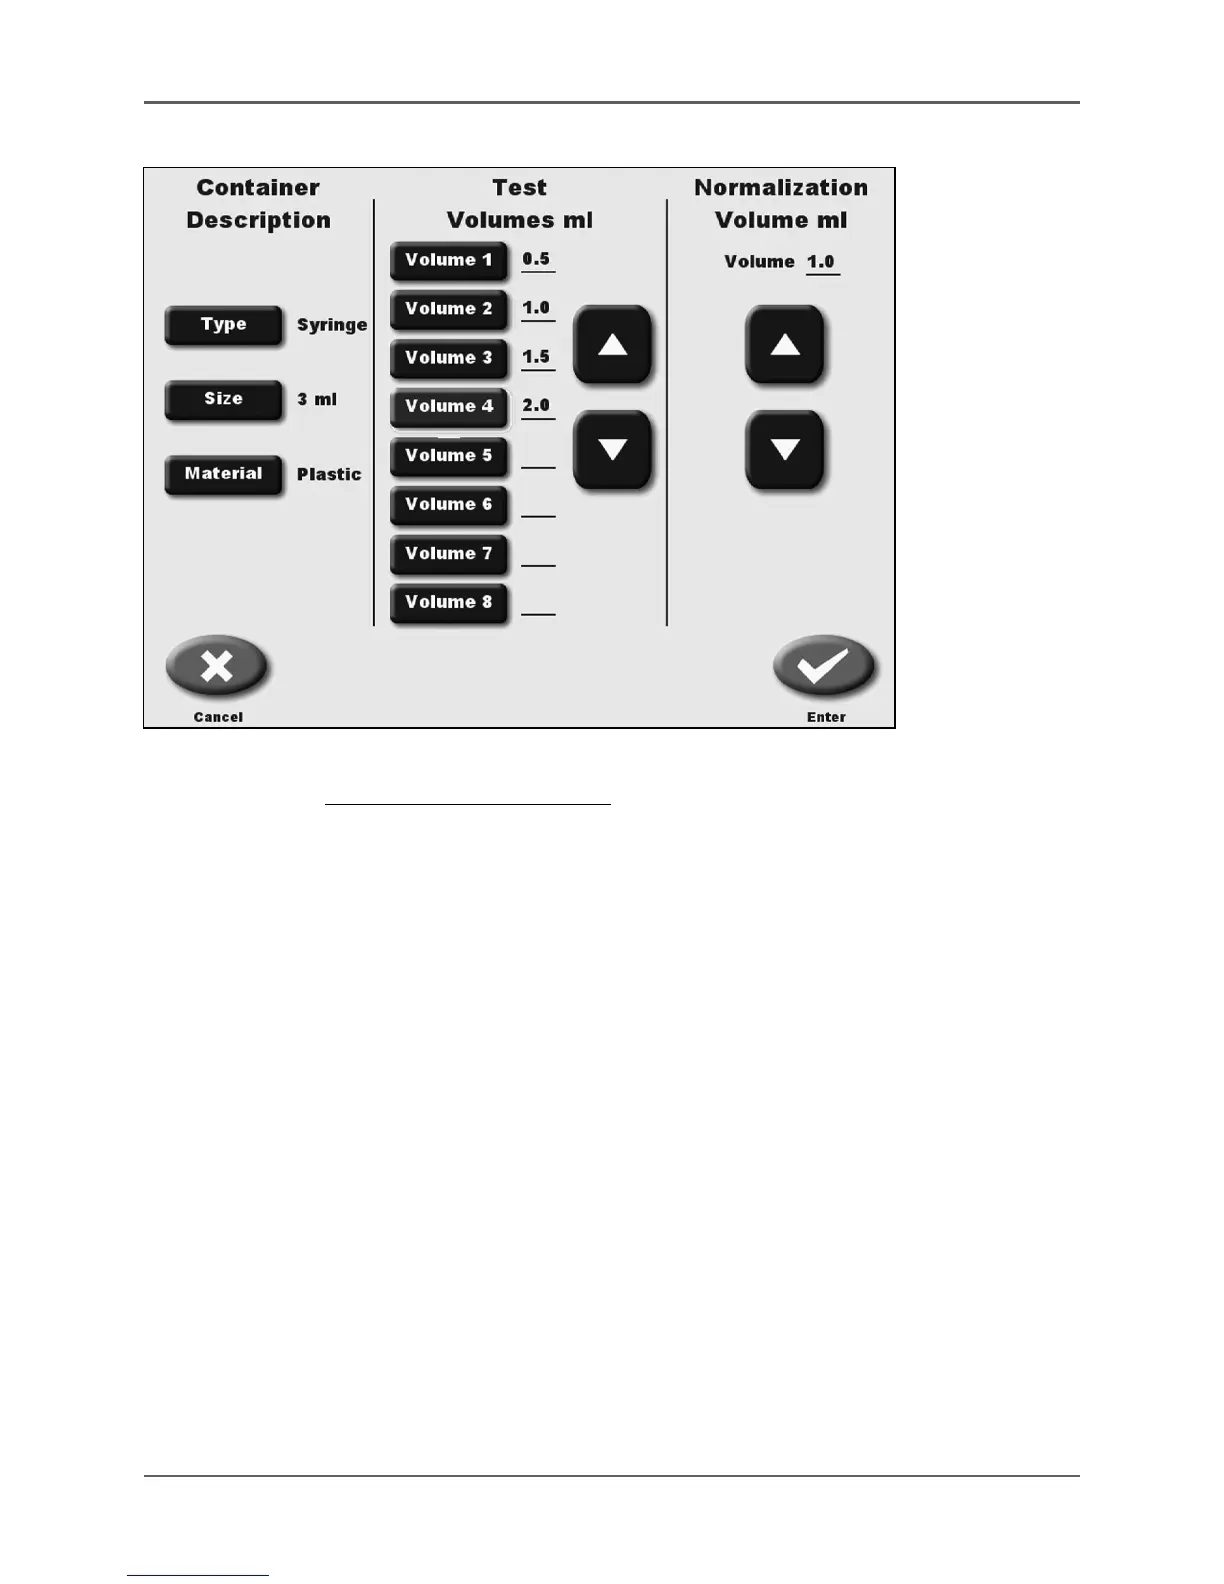
5. Set the Container Description by touching the <Type>, <Size> and <Material>
icons to scroll though the choices. <Type> adjusts syringe or vial, <Size> adjusts from 1 to
30 ml, <Material> is glass or plastic.
6. Touch to highlight volume 1 and then use the <▲> and <▼> arrows to adjust the value.
then touch volume 2 and the system automatically increases by the appropriate volume. If
you want a different increase, use the <▲> and <▼> arrows to adjust the volume. Touch
volume 3 and the system automatically increases by the appropriate volume. Use the <▲>
and <▼> arrows to adjust the value. Continue entering the volumes until you reach the
maximum volume for which you will test.
7. Use the <▲> and <▼> arrows to set the normalization volume.
8. Touch <Enter> when all parameters are set to return to the Geometry Test screen.
9. Touch <Zero Background> to zero the background reading, if necessary. The Background
live reading is displayed next to the first volume.