!
72 ATOMLAB 500 DOSE CALIBRATOR
9. Touch <QA>Database to view the dataset options. Choose from “All” datasets, or continue
touching <QA Dataset> to scroll through the list of individual datasets: Daily Constancy,
Expanded Constancy, Geometry, Accuracy, Decay, Lineator and Calicheck.
10. Touch <Export Prep> to export the selected dataset and return to the summary view of Stored
QA Data screen, or <Back> to return to the summary view of Stored QA Data screen without
exporting data.
11. Select <Export USB> or <Export Serial>. The system exports the data, notes that the export
has been completed, and returns to the QA Data Export Prep screen.
To Import QA Data:
1. On the System Maintenance screen, touch <Data Management> and enter your password. The
Data Management screen should now be displayed.
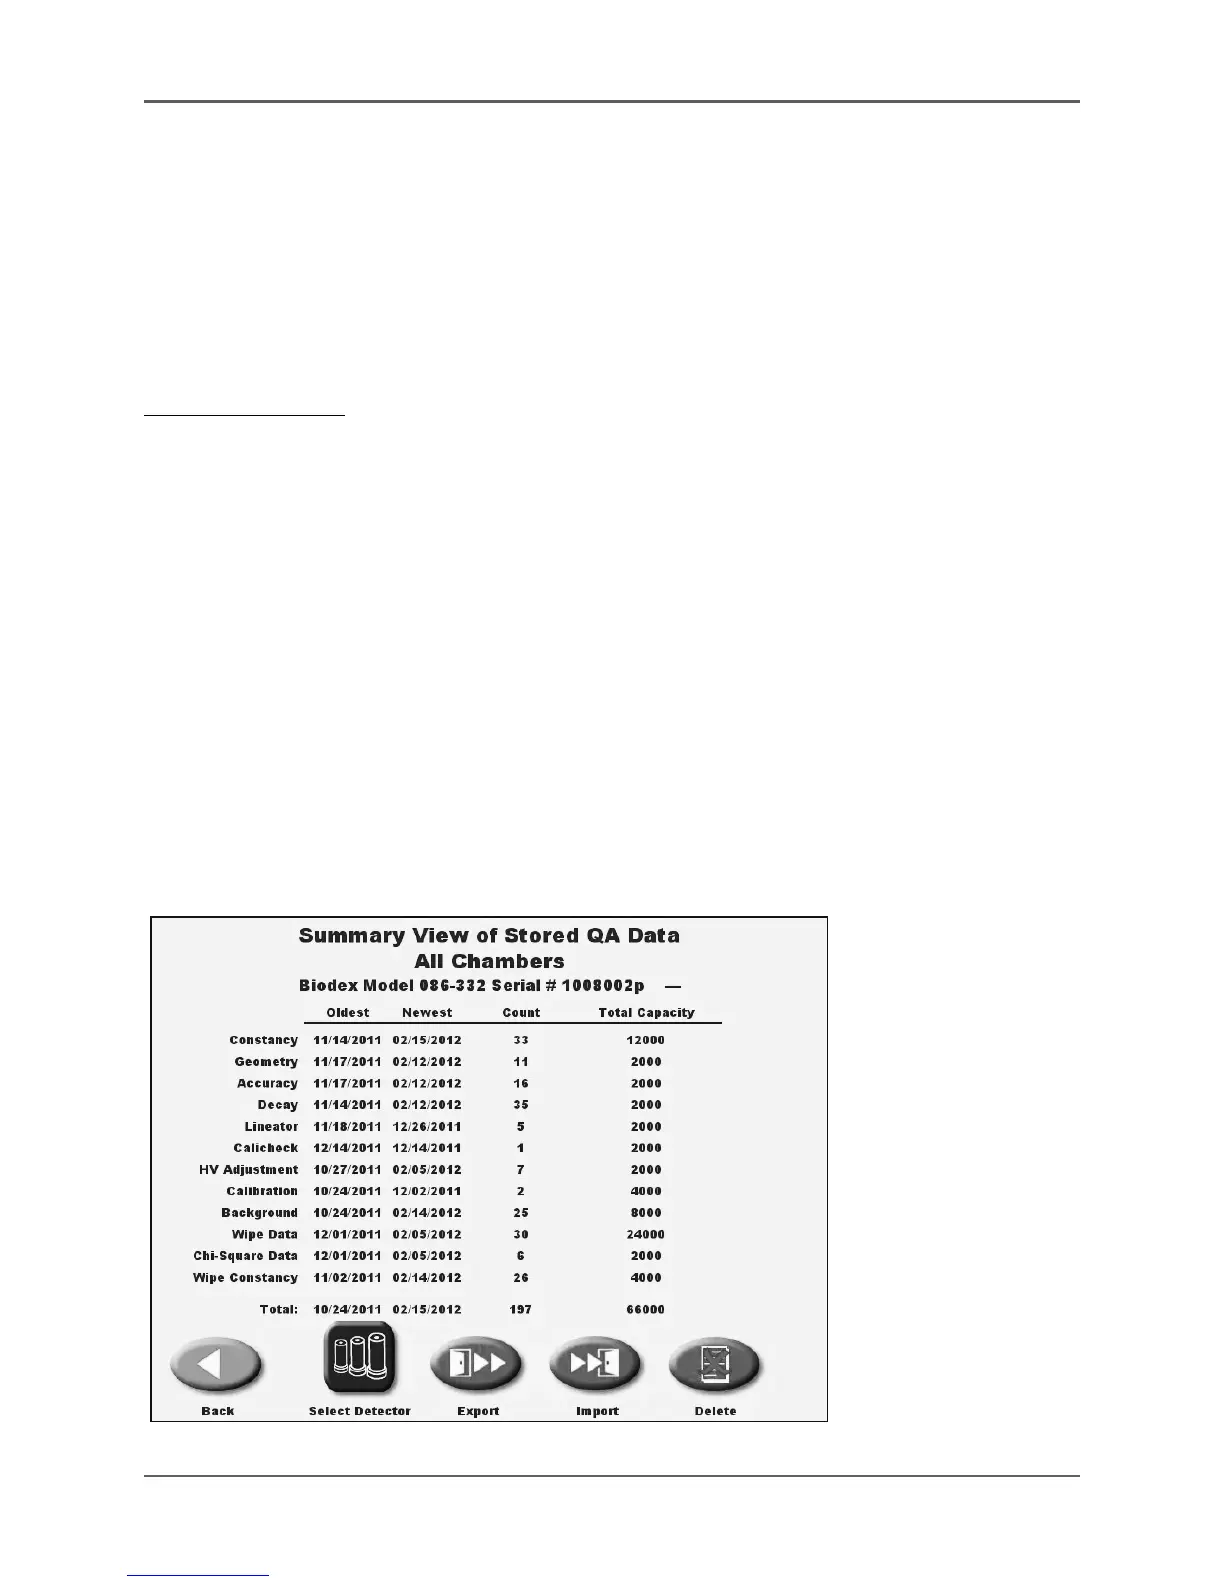
2. Touch <QA Data Management>. The summary view of Stored QA Data screen is now dis-
played with results for all tests on all detectors listed (or results for a specific detector, if
selected.)
3. Make sure a thumb drive containing data is plugged into one of the USB ports on the back of
the display.
4. Touch <Import>. The QA Data Import screen is now displayed with the drive from which to
import data noted at the top of the screen.
5. Use the up and down arrows to scroll to the data you wish to import. Touch the data name
to highlight and advance to the Okay To Proceed screen.
6. Touch <Yes> to import the data selected. The system shows an export screen while the data is
transferred. Once the data transfer is complete, the import completed successfully screen is
displayed. Touch <No> to return to the QA Data Management screen without importing data.
7. At the Import Successfully Completed screen, touch <OK> to return to the Summary View of
Stored QA Data screen.
Figure 4-30. The summary view of All Stored QA Data.