info@biopac.com
support@biopac.com
www.biopac.com
BIOPAC Hardware | SS11LA & TSD117 | Page 4 - 7 Updated: 12.2.2013
4. Pull down the Presets pop-up menu and
select Airflow.
5. Click on the View/Change Parameters
button.
6. Click on the Scaling button.
7. Click on Cal1: Leave the Input value
reading and enter 0 for the Scale value.
8. For Cal2 Input Value, add 300µV (or
.3 mV) to the Cal1 Input Value. For
Cal2 Scale value, enter 1.
9. Click OK for each window to exit
Channel Setup.
Note: Add 300µV to the Cal1 Input Value for Cal2.
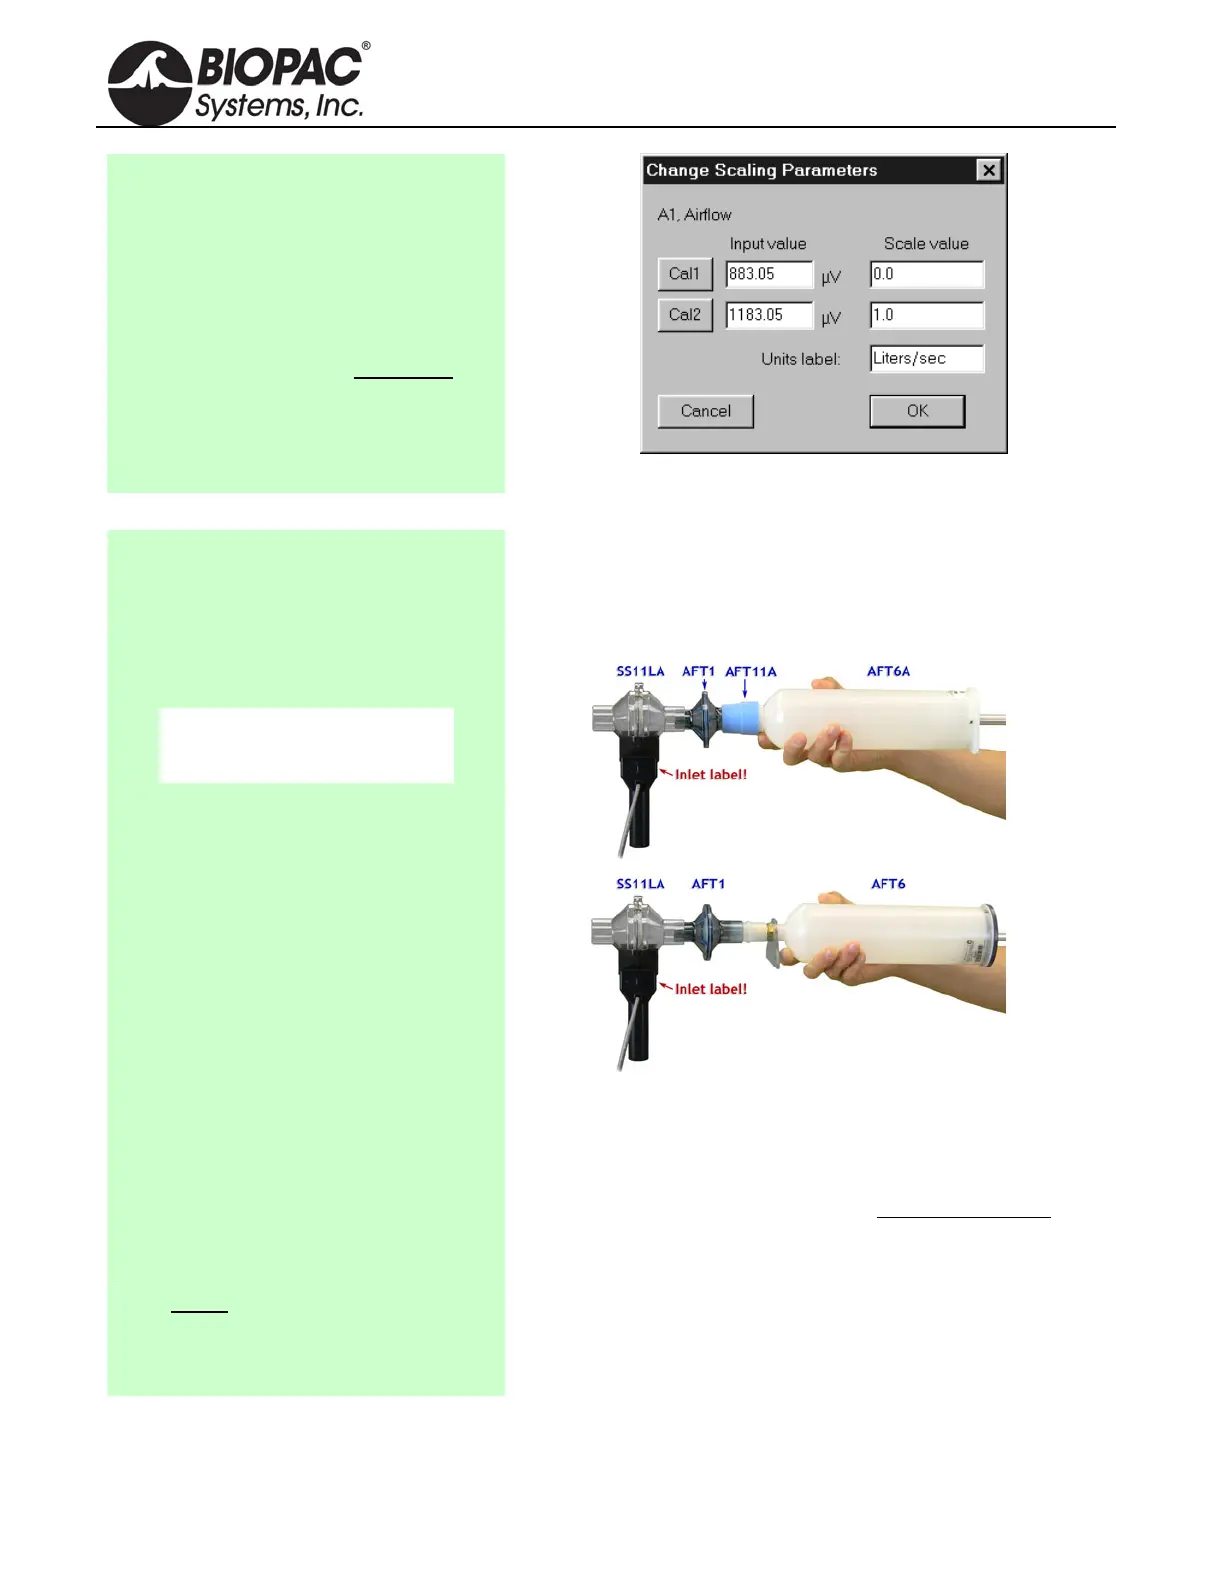
Using the Calibration Syringe
1. Place a filter onto the end of the
calibration syringe.
The filter is necessary for calibration because it forces the air
to move smoothly through the transducer. This assembly can
be left connected for future use. The filter only needs to be
replaced if the paper inside the filter tears.
2. Insert the Calibration Syringe/Filter
Assembly into the airflow transducer.
IMPORTANT!
Always insert on the
side labeled “Inlet.”
Calibration Syringe into airflow transducer
Insert syringe assembly so that the transducer cable exits on
the left, as shown above.
If using an older SS11L transducer with non-removable
head, insert syringe assembly into the larger diameter port
.
IMPORTANT: If the lab sterilizes the airflow heads after
each use, make sure a clean head is installed now.
Never hold onto the airflow
transducer handle when using the
Calibration Syringe or the syringe
tip may break.
The Airflow Transducer is sensitive to gravity so it needs to be
held upright throughout the calibration and recording.