info@biopac.com
support@biopac.com
www.biopac.com
BIOPAC Hardware | SS13L – RX104A | Page 1 - 3 Updated: 1.31.2013
SS13L PRESSURE TRANSDUCER
The SS13L pressure transducer is used to measure direct arterial or venous
blood pressure in animals or to record pressure changes within a closed
system such as an organ or tissue bath system. Connect to the tubing via the
standard rotating Luer-lok fittings. This assembly consists of a disposable
transducer with a 30cm cable that attaches to a reusable 3-meter cable that is
designed to interface with the MP3X. The transducer is supplied non-sterile
but can be cold sterilized.
Note: The SS13L Pressure transducer is not intended for use with humans.
Typical software settings for the blood pressure transducer are described in the table below:
Filter 1 Filter 2 Filter 3 Hardware filter Gain Coupling
Low pass
66.5 Hz
Q = 0.5
Low pass
38.5 Hz
Q = 1.0
Band Stop
60 Hz
Q = 5
1 KHz
100
(preset)
DC
These settings are automatically applied when the Pressure preset is selected, but settings can be adjusted if
necessary.
PRESSURE TRANSDUCER CALIBRATION
Calibrating a blood pressure transducer is a two step process. The first step involves finding the optimal gain
setting for the transducer and the second step is the actual calibration.
1) To find the optimal gain setting:
a) Start with the software Presets (in this case, a gain of 100)
To set the Presets: MP3X menu > Setup channels > Analog Presets > select “Pressure”
b) Bring the transducer to the approximate maximum and minimum expected pressures.
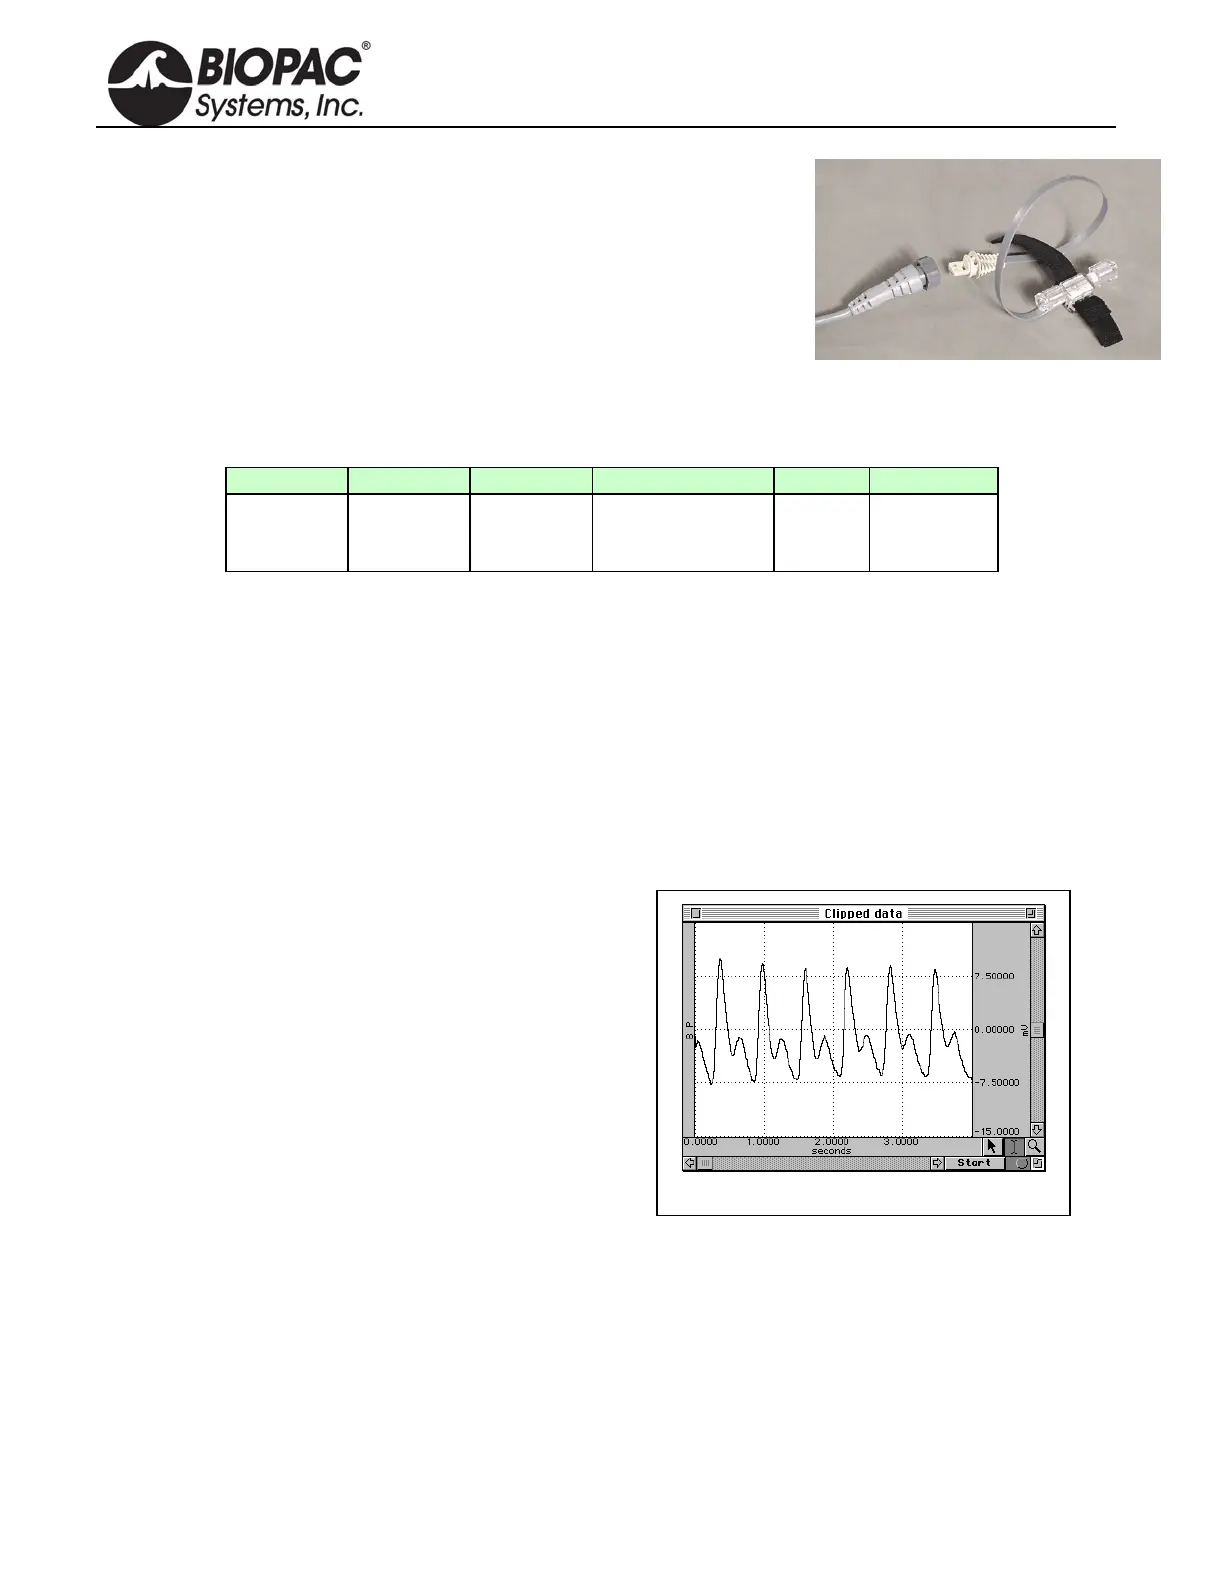
Gain set too high — Clipped BP data
c) Collect data f
or a few seconds at these settings.
d) Inspect the sample data; look for data that is
“railed” or “clipped.” This occurs when the input
signal (times the gain setting) is too large relative to
the maximum input range. An example of clipped
data is shown at right.
e) If the signal is clipped, decrease the gain setting by
one step (e.g., from x5000 to x2500) and collect
new data at the lower gain setting.
To access the Gain setting: MP3X menu >
Setup channels > Pressure preset channel >
View/Change Parameters icon > Gain pull-
down menu
f) Repeat this procedure until the signal no longer appears “clipped.”
Once an optimal gain setting for the transducer has been established, this same gain setting can be used for
other similar transducers and similar measurements.
2) The next step is to actually calibrate the transducer, which means mapping the input signal to more
meaningful units (such as mmHg). To do this:
a) Access the Channel scaling dialog box (MP3X menu > Setup Channels > Pressure Preset channel >
View/Change Parameters icon > Scaling button).