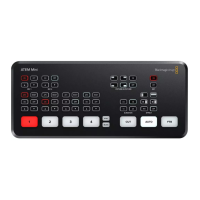
Using External ATEM Hardware Panels
AUTO and Transition Rate
The AUTO button will perform the selected transition at the rate specified in the transition
rate window.
The AUTO button illuminates red for the duration of the transition and the transition
rate display updates to indicate the number of frames remaining as the transition progresses. If
the software control panel is active, the virtual fader bar updates to provide visual feedback on
the progress of the transition.
The transition rate for each transition style is set in the system control, and is displayed in the
transition rate window of the transition control block when the corresponding transition style
button is selected.
Fader Bar and Fader Bar Indicator
The fader bar is used as an alternative to the AUTO button and allows the operator to manually
control the transition. The fader bar Indicator next to the fader bar provides visual feedback on
the progress of the transition.
The AUTO button illuminates red for the duration of the transition and the transition
rate display updates to indicate the number of frames remaining as the transition progresses. If
the software control panel is active, the virtual fader bar updates to provide visual feedback on
the progress of the transition.
Transition Style Buttons
The transition style buttons allow the operator to select one of five styles of transitions; mix,
wipe, dip, DVE, and stinger. Mix, wipe, stinger and DVE transition styles are selected by
pressing the appropriately labeled transition style button which will illuminate yellow.
The Dip transition style is selected by holding down the SHIFT button while pressing the DIP/
MIX transition style button, or by double-pressing the DIP/MIX button. The button will illuminate
green indicating a shifted transition style.
PREV TRANS
The PREV TRANS button enables the preview transition mode allowing the operator to verify a
dip, mix, wipe or DVE transition by performing it on the preview output using the fader bar.
Once you press this button on, you can preview your transition as many times as you like
allowing you to make changes and corrections as needed. You can even preview stinger
transitions! Once you are happy with the preview transition, press the button off and you are
now ready to send your transition on air.
Next Transition
The BKGD, KEY 1, KEY 2, KEY 3, KEY 4 buttons are used to select the elements which will
transition on air or off air with the next transition. Any combination of background and keys can
be selected by pressing multiple buttons simultaneously. Double-pressing the BKGD button
selects all of the next transition upstream keyers that are currently on air and copies them to the
Next Transition buttons.
Pressing any of the next transition buttons will clear selection of all others. When selecting the
elements of the next transition, the switcher operator should look at the preview output
because it provides an accurate representation of what the program output will look like after
the transition is completed. When only the BKGD button is selected, a transition from the
current source on the program bus to the source selected on the preview bus will occur.
ON AIR
The ON AIR indicator buttons indicate which of the upstream keys are currently on air and can
also be used to immediately cut a key on or off air.
190