121
Electrical and Ignition
Electric Starter Servicing
6
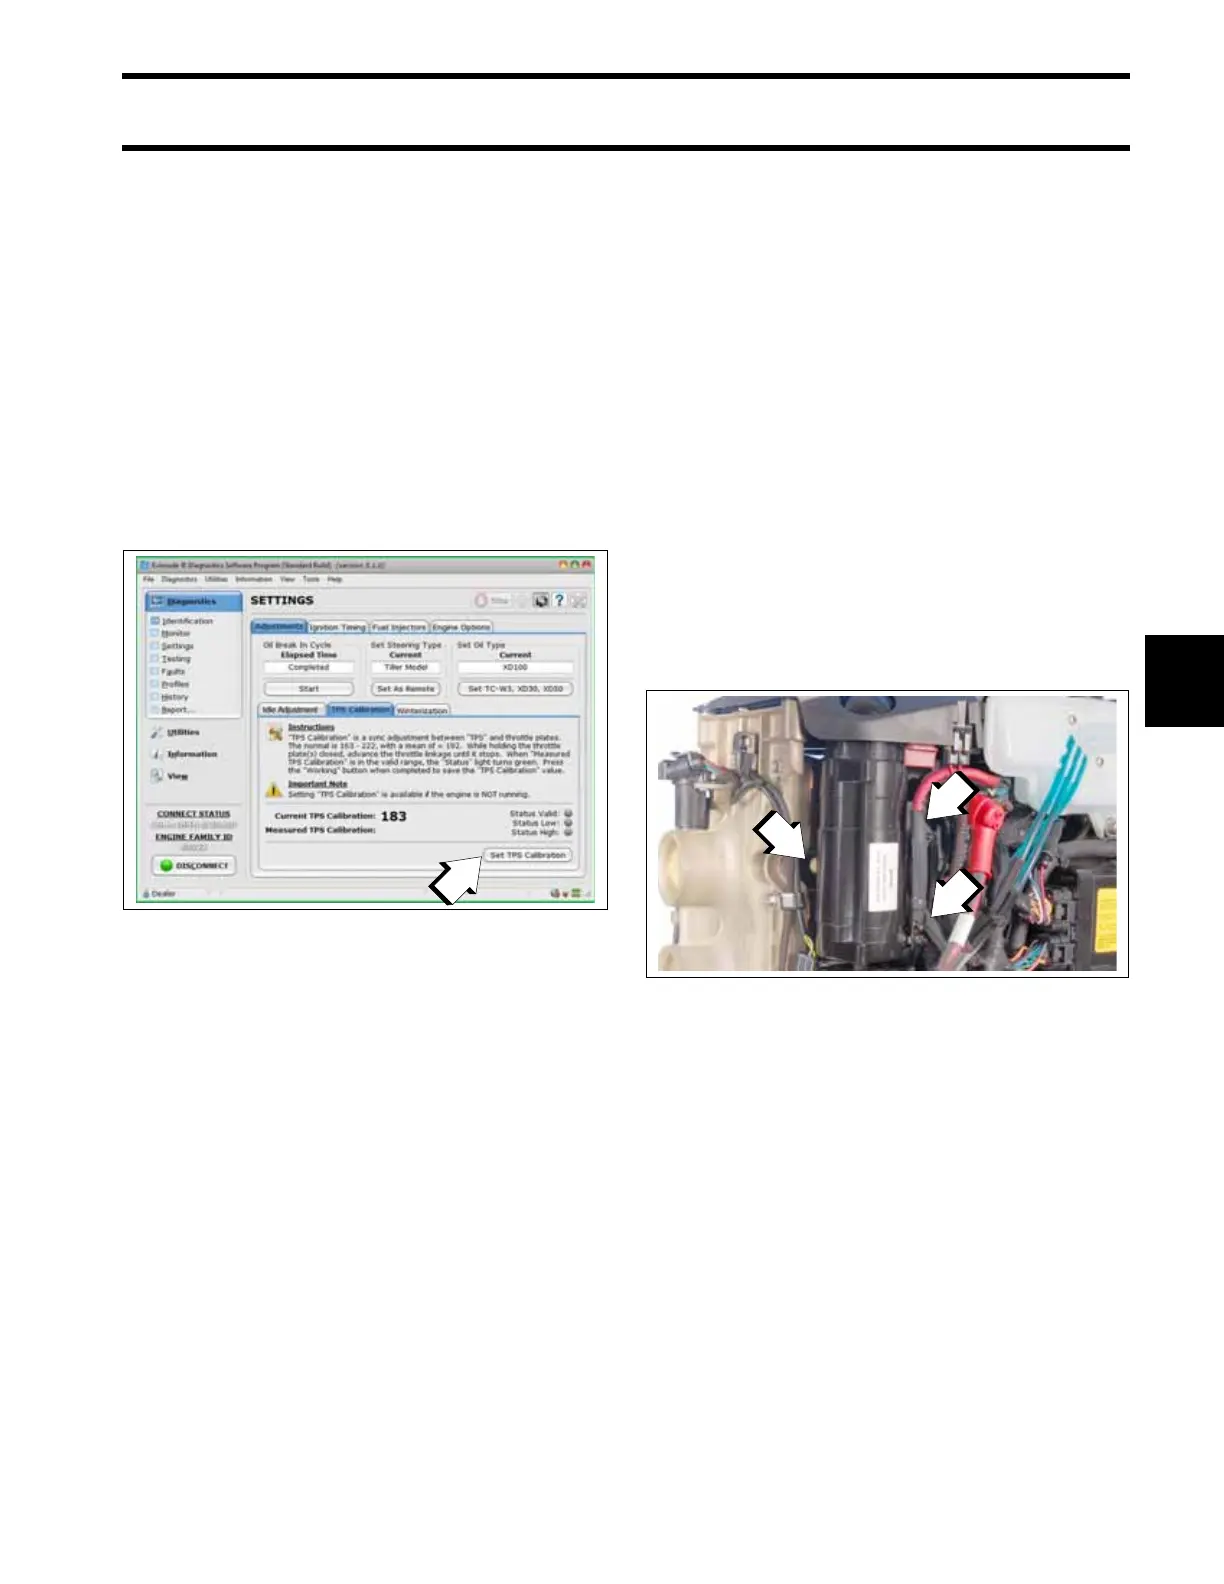
TPS Calibration
Use Evinrude Diagnostics software to tell the
EMM what throttle position sensor voltage is when
the throttle plates begin to open.
Set TPS Calibration after replacing or adjusting
any throttle body or throttle linkage parts.
Remove the lower engine covers and air silencer.
Do NOT start the outboard.
On the Settings/Adjustments screen of the diag-
nostics software, click the “Set TPS Calibration”
button.
While holding the throttle plates closed, advance
the throttle linkage until it stops. The Measured
TPS Calibration field on the screen will increase.
Click the Working button in the software to cali-
brate the TPS.
Install the air silencer and lower engine covers.
Electric Starter Servicing
Starter Removal
IMPORTANT: Do not clean the starter drive
while the starter motor and drive are installed on
the powerhead. The cleaning agent could drain
into the starter motor, washing dirt from the drive
into the starter bearings and commutator.
Disconnect the battery cables at the battery.
Remove lower motor covers and air silencer.
Refer to Lower Cover Removal on p. 56.
Remove the starter positive (+) cable from post on
starter. Remove the battery negative cable (–)
from the double-ended stud.
Remove two starter mounting screws and double-
ended stud. Remove the starter.
Starter Installation
Apply Triple-Guard grease to the threads of the
two starter screws, the double-ended stud, and
also to the washers.
Place starter in position and align the mounting
holes.
Assemble the washers and hand-start the double-
ended stud and the bolts.
Tighten the stud and bolts to an initial torque of 24
to 36 in. lbs. (2.7 to 4.0 N·m) using the sequence:
• Double-ended stud
• Lower
• Front
1. TPS Calibration button
008581
1. Screws
008189