47
Routine Service
Gearcase Removal and Installation
2
Remove the gearcase assembly from the exhaust
housing, being careful not to bend the shift rod.
3-Cylinder Models
Remove the 3/8-16 in. screw and washer, and
remove 7/16-14 x 3.5 in. screw and washer.
Remove the four 3/8-16 x 1.75 in. gearcase retain-
ing screws and washers.
Remove the gearcase assembly from the exhaust
housing, being careful not to bend the shift rod.
Gearcase Installation
Coat the driveshaft splines with Moly Lube. DO
NOT coat top surface of the driveshaft because
lubricant may prevent seating of the driveshaft in
the crankshaft.
2-Cylinder Models
Apply Adhesive 847 to the exhaust housing seal’s
outer surface. Place the seal in the gearcase
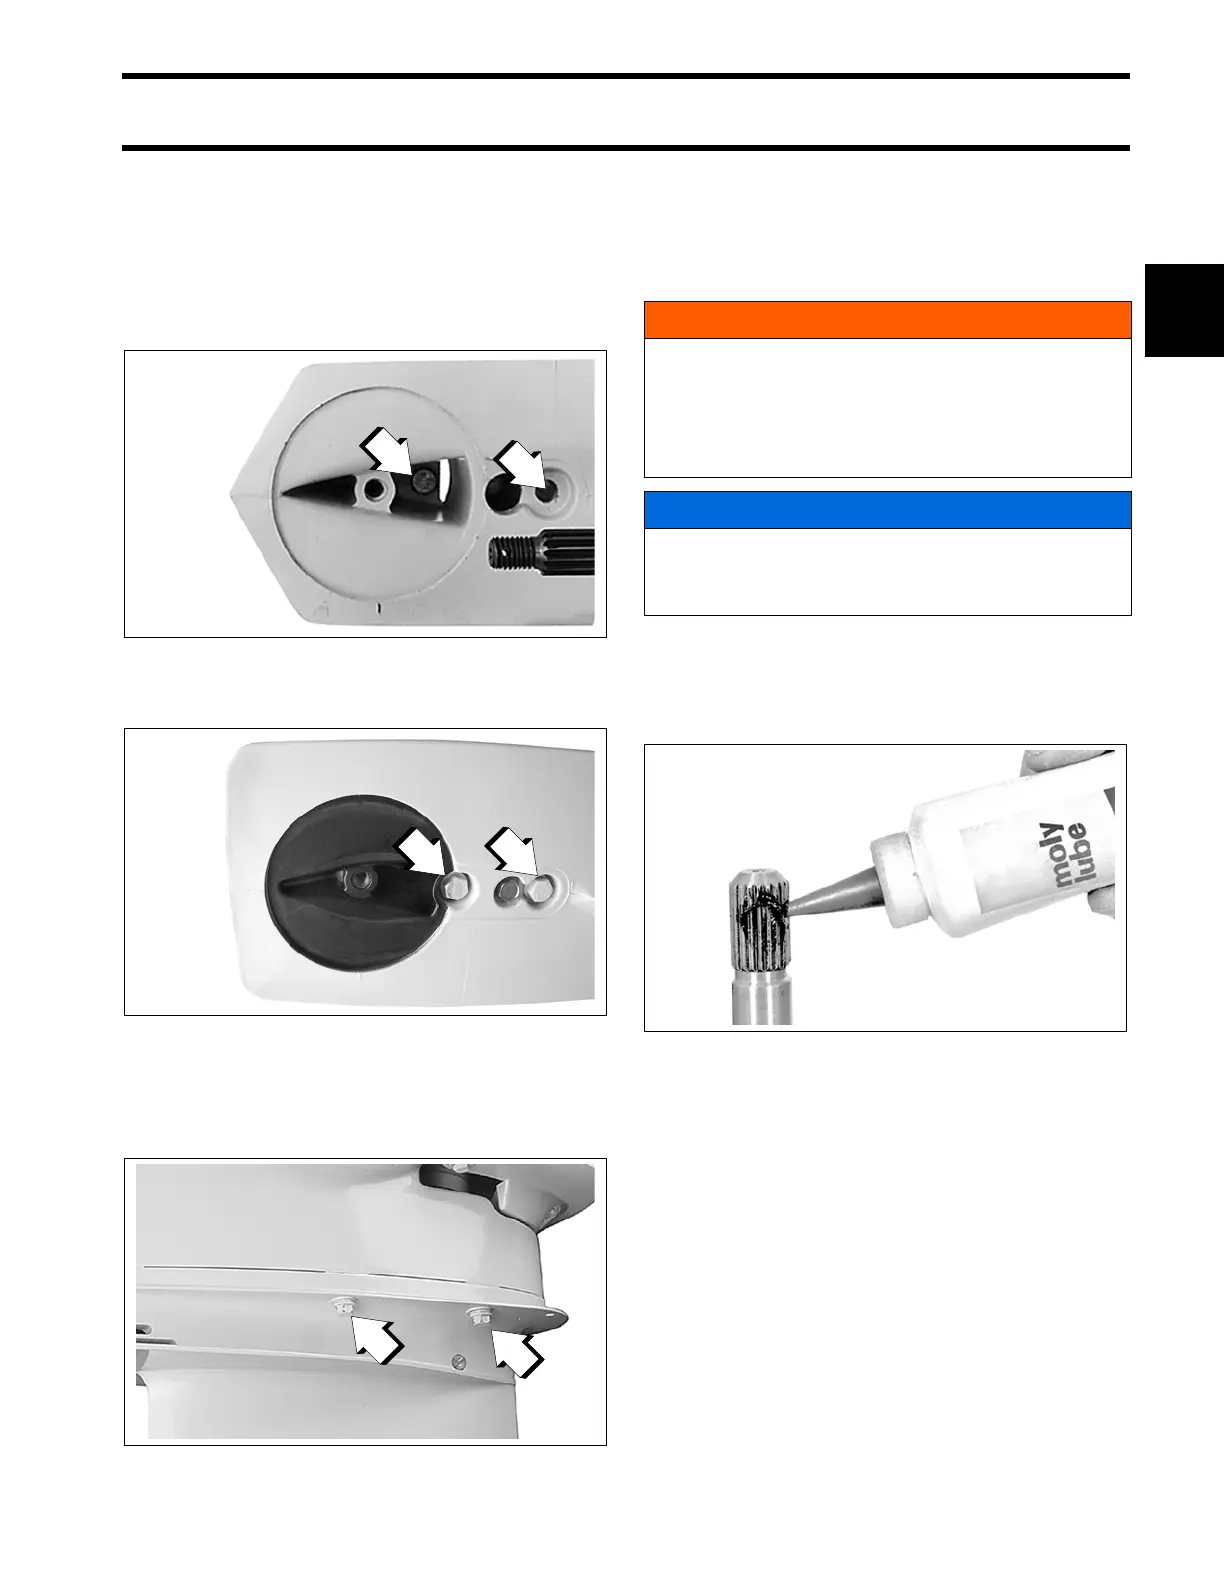
S Type Gearcases
1. 3/8-16 x 1.75 in. screw
2. 7/16-14 x 3.5 in. screw
COA3139
O Type Gearcases
1. 3/8-16 x 3.5 in. screw
2. 7/16-14 x 3.5 in. screw
006869
1. Gearcase retaining screws
001990
WARNING
During service, the outboard may drop unex-
pectedly. Avoid personal injury; always sup-
port the outboard’s weight with a suitable
hoist or the tilt support bracket during ser-
vice.
NOTICE
Before installing gearcase, shift rod adjust-
ment MUST be checked. Refer to Shift Rod
Adjustment on p. 300.
30385